

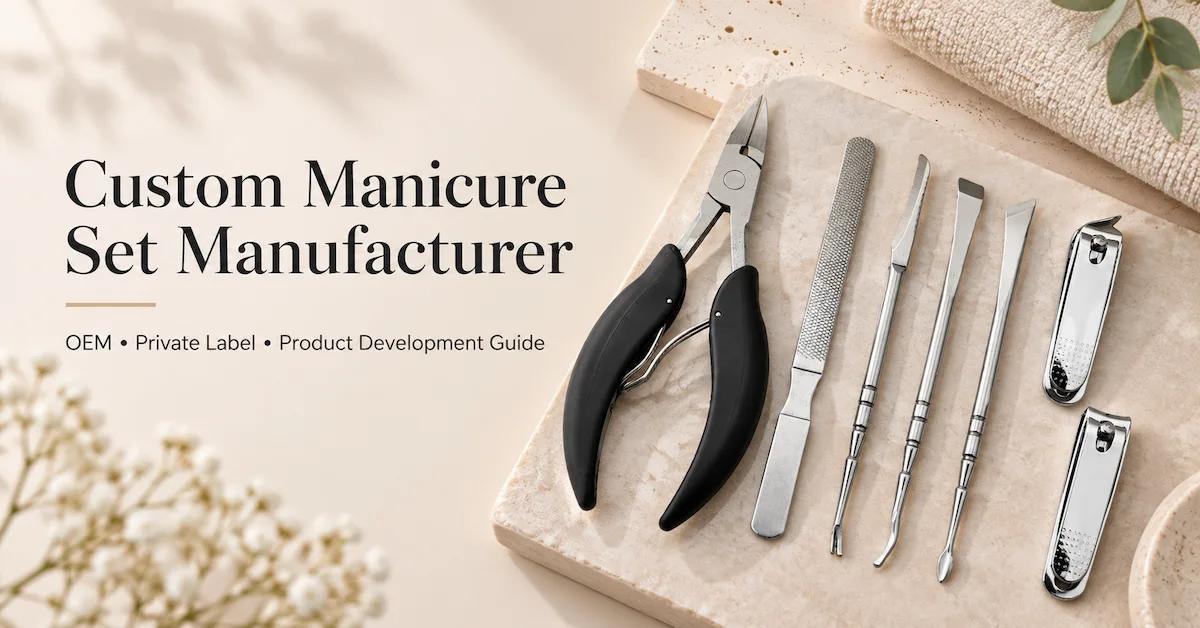
A custom manicure set manufacturer should help a brand convert a product idea into a complete, testable, repeatable SKU. That means deciding which tools belong in the kit, confirming how each one performs, engineering the case around their real dimensions, approving logos and retail packaging, and keeping all those decisions under version control when bulk production begins. If a supplier can only add a logo to a catalog photo, the project is not yet fully defined.
For a beauty-brand product manager, an importer, or a retail buying team, the central problem is often hidden between components. A nail clipper may work perfectly on its own but scrape against another tool inside the case. A premium-looking pouch may fail to close after the final insert is loaded. A beautifully printed sleeve may show eight tools while the approved kit contains seven. Each problem is small in isolation; together they affect launch timing, returns, product reviews, and the confidence to reorder.
This guide focuses on custom development decisions, not generic wholesale pricing or a broad factory introduction. It explains how to write a manufacturing brief, choose a realistic customization route, separate functional and cosmetic requirements, organize sample approvals, and make the finished kit verifiable. OLIMOR's manicure set collection provides existing product references, while the exact tool configuration, materials, decoration methods, MOQ, and schedule must be confirmed for each proposed project.
What Does a Custom Manicure Set Manufacturer Actually Customize?
Customization can take place at several levels. The first is assortment: which tools the buyer wants and which tasks they serve. The second is the individual tool: model, geometry, finish, grip, material, or decoration. The third is the kit architecture: case dimensions, insert, retention, tool layout, and closure. The fourth is the commercial presentation: brand identity, artwork, barcode, printed box, product story, and shipping protection.
Those layers have different consequences. Changing a sleeve design may require new artwork and printing approval without affecting the metal tools. Replacing a tweezer with a longer model may require a new elastic loop and a revised case layout. Altering a nail clipper's cutting head is a deeper engineering change that may affect tooling, cutting performance, and inspection.
A competent partner should therefore give each customization request one of three labels: existing option, feasible modification subject to sample approval, or new development requiring engineering review. Buyers should request these distinctions in writing. The label “custom” alone is not a specification and does not establish feasibility.
A basic logo-only manicure set may suit a fast private-label launch. A fully engineered kit may be the better route when the buyer has unique requirements for dimensions, tool functions, or case ergonomics. Neither is automatically superior: the right choice is the one that achieves enough differentiation without creating unnecessary approval risk.
Which Buyers Benefit Most—and When Is Custom Development Unnecessary?
Custom sets make the most commercial sense when an ordinary catalog product does not meet a defined buyer need. They are particularly relevant for the following groups:
| Buyer | Real product-development need | Most important validation |
|---|---|---|
| Beauty and personal-care brand | Recognizable design across a coordinated collection | Logo, finish, tool quality, master sample |
| DTC and marketplace seller | Differentiated visual story without fragile fulfillment | Packed-unit photography and parcel protection |
| Retail chain or store brand | Specific shelf format, price position, and assortment | Barcode, actual contents, repeatability |
| Importer or distributor | Consistent line extensions and defined reorder SKUs | BOM and change-control records |
| Nail-care or salon supplier | Accurate working ends and efficient tool access | Functional tests, grip, case retention |
| Hotel, travel, or gift buyer | Compact, presentable, easy-to-handle configuration | Case footprint, completeness, packaging |
Custom development may not be worth it when the first order is very small, the schedule is extremely short, the target product already exists, or the proposed changes are invisible to the customer. In those cases, an established set with controlled branding may deliver the commercial objective at lower risk.
An effective manufacturer will sometimes recommend less customization. That is valuable engineering advice, not a lack of capability. If the buyer can achieve differentiation through an approved logo, finish, and package, replacing proven cutting mechanisms may offer little advantage.
The One-Page Brand Brief That Prevents Expensive Sample Rounds
Before selecting tools, write a brief that a technical team and a marketing team can both understand. Keep it to one page for the initial discussion, with detailed drawings and artwork as attachments.
Specify the target user in concrete terms: an occasional traveler, a home nail-care buyer, a gift recipient, or a trained nail technician. Then describe the tasks that user needs to complete. A kit for travel should not be defined only as “compact and premium”; it might be specified as “cover routine trimming and filing in a secure case, with no unnecessary accessories.”
Next, describe the commercial setting: marketplace, beauty specialty store, pharmacy, salon distributor, hospitality, or gift channel. State the target retail price position as a planning input, not a promise of final manufacturing cost. Identify the sales markets so the supplier can flag labeling and documentation questions early.
Finally, classify every requirement as:
- Fixed: must be met, such as the approved logo, essential tool functions, maximum case footprint, or a particular packing format.
- Preferred: desired if feasible, such as a satin appearance, coordinated rose-gold accents, or a type of pouch lining.
- Open to proposal: a detail the manufacturer may recommend, such as the exact retention method or location of a small supporting label.
This classification is particularly helpful when a supplier proposes cost reductions. It prevents an apparently minor substitution from altering something the brand considers essential.
Build the Assortment From Tasks, Not a Piece-Count Claim
An eight-piece set can be more useful than a twelve-piece set if each tool has a clear job. Begin by listing the routine the customer is buying, then assign tools to it. The exercise also clarifies which products should be inspected most carefully.
Core tools
For many home-care concepts, core functions include shortening nails and smoothing edges. Depending on the intended routine, the assortment might feature one or more nail clippers and a nail file. For a professional-oriented program, the buyer may add a suitable nipper, pusher, or specialized tool with a clearly defined use.
Supporting tools
Tweezers and grooming scissors can make sense for a broader kit when their role is understandable. Avoid near-duplicate pieces that exist only to increase the advertised tool count. If a kit is called a manicure set but includes broader grooming accessories, the product description and customer-facing images should make that clear.
Optional components
Gift elements, pouch accessories, decorative details, or secondary grooming tools may support a particular channel. They also add a sourcing and assembly obligation. The buyer should have a reason to retain each optional item and an agreed method of removing it without changing the core product promise.
For first quotations, prepare an assortment hierarchy: essential tools, useful additions, and optional upgrades. Ask the supplier to price or evaluate variations against that hierarchy rather than offering unrelated catalog sets. Browse OLIMOR's nail clippers, nippers, and tweezers to identify candidate product families, while confirming that each exact model fits the intended kit.
Translate the Concept Into a Controlled BOM and Specification
A kit's bill of materials (BOM) is not just a costing worksheet. It is the connection between the brand's promise, the factory's assembly instructions, quality inspection, and the next purchase order. Every component needs an identity—even if it has no visible logo.
The following is an illustrative BOM structure, not a confirmed OLIMOR standard set or a claim that all these tools are available in one predefined model.
| BOM field | Example entry or decision | Why it matters |
|---|---|---|
| Finished SKU | BRAND-MANI-01 / revision A | Prevents mix-ups between retail versions |
| Core clipper | Selected model, dimensions and approved finish | Controls cutting performance and case fit |
| Nail file | Surface type, length, edge finish | Controls user function and insert position |
| Tweezers | Tip geometry, length, tension reference | Prevents substitution of unlike tools |
| Cuticle tool | Working-end description and use | Makes inspection criteria specific |
| Case shell | Dimensions, material, color, closure | Controls form factor and presentation |
| Interior retention | Pocket, elastic or molded insert reference | Holds the real tools during transport |
| Branding | Tool marking, case logo and artwork revision | Controls brand consistency |
| Retail box | Dieline, language, barcode, print version | Supports accurate sale and fulfillment |
| Export pack | Master carton quantity and identification | Reduces shipping and inventory errors |
Make the BOM version visible on the pre-production approval. When an item changes, record which other requirements may be affected. A longer clipper can require a larger pocket; a new finish can alter how the logo appears; changing the case material can affect retail photography and packing performance.
The BOM should also identify the intended tool count and the counting rule. For example, does one two-sided file count as one piece? Is an accessory case included in the headline number? A consistent rule avoids packaging claims that no longer match the final set.
Technical Specifications That Matter for Each Tool
A phrase such as “high-quality stainless steel accessories” cannot substitute for model-specific performance requirements. Each working end behaves differently and should have a relevant approval method.
Nail clippers: cutting contact and lever movement
Check upper and lower edge contact, the feel of the cut, lever travel, pivot stability, unintended burrs, and cosmetic finish. If a set contains more than one clipper size, test each separately. The buyer should specify the intended use and agree on a representative functional test; a showroom demonstration is not a production criterion.
Cuticle nippers: jaw geometry and spring response
Nippers require attention to jaw alignment, opening and closing, spring return, joint movement, handle comfort, and exposed edges. A visually similar nipper can behave differently if its cutting geometry or spring differs. Approve the actual component rather than relying on the category name.
Tweezers: tip contact and controlled grip
Define the intended tweezer type and use. Inspect tip alignment and contact, operating tension, edges, and surface finish. A narrow pointed tweezer and a slanted grooming tweezer should not be treated as interchangeable simply because both fit the pouch.
Scissors: blade and pivot performance
For scissors, evaluate how the blades meet, cutting performance on an agreed medium, joint feel, finger openings, and tip finish. Shorter tools are not automatically appropriate for every use. Storage also matters: the case should not force the blades against neighboring components.
Files and pushers: the working surface is the specification
A file must have a suitable and consistent filing surface; a pusher or cleaning tool must have the intended working-end shape and a comfortable, properly finished handle. “Metal file” alone tells the buyer little about its working performance. Confirm the selected material and construction for each SKU rather than generalizing one material claim across the entire kit.
These checks should become part of a function sheet for every critical component. OLIMOR's nail-care tools category can help buyers compare the range of available working ends before fixing the assortment.
Material Selection and Finishes: Coordinate Without Overpromising
Many beauty brands want all tools to share a visual language: polished silver, satin metal, black accents, or a rose-gold direction. That can be commercially useful, but it should be approved physically rather than based on one edited photograph.
A set may combine components made from stainless steel, other metals, polymers, textiles, PU-like case materials, elastics, printed surfaces, or abrasive materials. The phrase “stainless steel manicure set” should not be used to imply that every component and the case share the same material. Confirm each tool's material and any claimed grade with the actual specification and supporting evidence.
Finish can influence tool feel, appearance, logo visibility, case rubbing, and inspection requirements. Coated or colored surfaces may call for different handling checks from uncoated polished metal. Even two items described as “silver” can show different reflectivity when placed side by side inside a case.
Ask for a finish board or approved group sample containing the actual tools together. This is more useful than approving each item independently under different lighting. Document which surfaces may touch the insert or other tools and which cosmetic marks are unacceptable for the desired retail position.
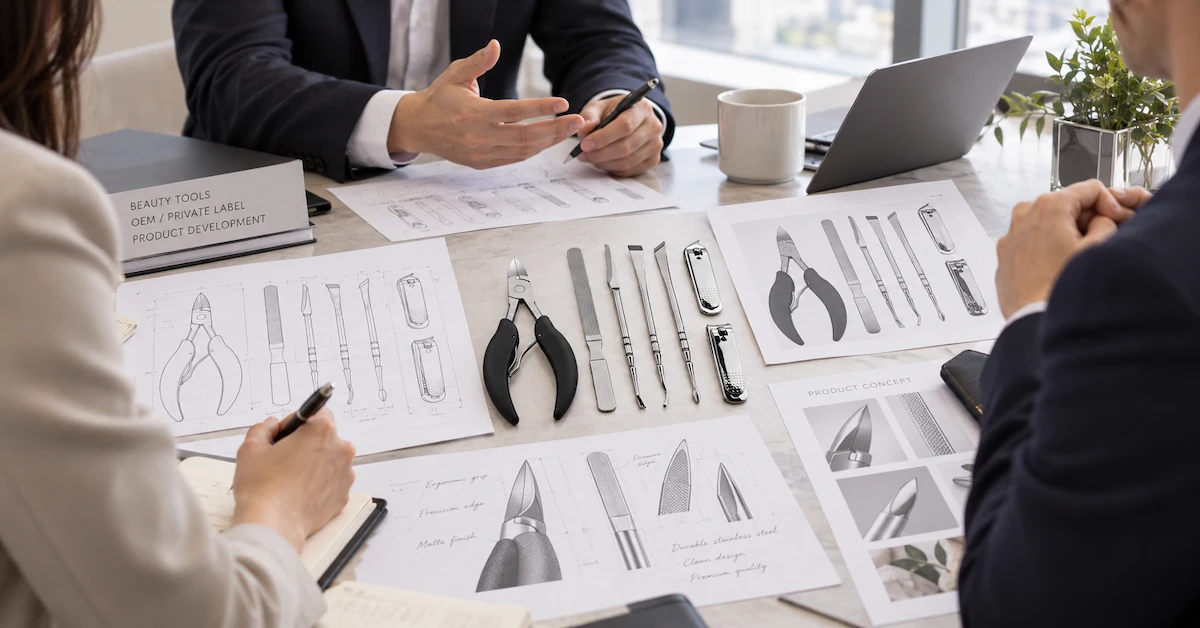
Design the Case Around Real Component Dimensions
The case is not a decorative afterthought. It determines retention, access, closure, pack size, photography, and transit protection. A small geometry change to one tool can invalidate a previously approved insert.
Begin with the finished dimensions of each approved component and then design the tool layout. The retention method might involve elastic loops, sewn pockets, shaped trays, or other features. Each method must be evaluated with the real tool rather than an approximate drawing.
At the open-case stage, ask whether shoppers can identify the contents and users can remove each tool without catching on a neighboring blade or tip. At the closed-case stage, check pressure, rubbing, bulging, closure function, and whether the items stay in place. At the packed retail stage, test the final box or sleeve around the filled case.
A common design mistake is to reduce the case thickness before confirming the stack height of the tools. A case that closes when empty may bow after the final nipper, clipper, and elastic are installed. Another is to place polished tools against one another because the open-case photo looks symmetrical; that layout can produce scratches during shipment.
The case must support real use after purchase as well. A customer should be able to put each tool back without fighting the insert. That usability detail can matter as much to reviews as the appearance of the gift box.
Custom Logo and Packaging: One Brand System, Multiple Substrates
Branding decisions should be made for the tool, case, and retail package together. Laser marking, engraving, printing, labels, and other methods may be suitable for different surfaces, but their availability and appearance depend on the selected SKU, geometry, material, and finish.
A small metal clipper may offer a narrow marking zone. A case may provide enough space for a wordmark, while the box can carry full product information, usage description, and barcode. Trying to fit the same complex logo at the same scale on all three surfaces usually creates unnecessary problems.
Approve these items separately: logo artwork revision, location, dimensions, contrast, acceptable cosmetic appearance, retail dieline, language, and physical packaging fit. Consider how case lining or inserts may rub against decorated metal areas. Printed colors on a box should not be assumed to match a metallic coating exactly.
For a deeper review of the presentation component, read OLIMOR's custom packaged manicure set guide. It complements the manufacturing decisions explained here. The practical rule is that branding has to survive normal handling while remaining consistent with the actual product and retail description.
Decide Which Development Route Fits the Brief
OEM, ODM, and private label are not interchangeable quotations. They describe different starting points, which determine how much engineering work and sample validation are needed.
| Route | What the buyer brings | What must be confirmed | Typical project trade-off |
|---|---|---|---|
| Private label | Existing tool and kit platform, brand artwork, packaging needs | Available finishes, logo process, package, model-specific MOQ | Faster starting point but narrower product differentiation |
| ODM adaptation | Target use, preferred configuration and requested changes | Which structures are adjustable, which need new samples or tooling | Balanced differentiation with change-control needs |
| OEM specification | Controlled drawings, sample, geometry or detailed requirements | Feasibility, tooling, performance, validation and ownership of deliverables | Stronger control but potentially more development effort |
A supplier should respond with a change-impact list. If the buyer asks to replace a component, change the clipper geometry, select a new finish, and create a printed rigid box, each item should be labeled for cost, tooling, sample work, and schedule. This keeps the quotation from hiding meaningful development differences.
Do not automatically request custom tooling merely because a competitor's product looks different. If a fit-for-purpose existing platform can deliver the same customer value, keeping its proven functional geometry may reduce time and risk.
A Seven-Gate Development Process From Idea to Production
The most useful way to manage a custom kit is to separate the decisions that must be approved before another activity begins. The seven gates below are a recommended buyer-management framework, not a claim that every OLIMOR project follows identical dates or production operations.
Gate 1 — Product definition
Approve the intended customer, sales channel, essential tasks, planned assortment, target packed dimensions, visual direction, and non-negotiable requirements. Do not proceed with a vague “premium eight-piece set” brief.
Gate 2 — Engineering and feasibility review
Review individual tool references, material requirements, potential new components, case design implications, decoration feasibility, and estimated project dependencies. Identify which requests are existing choices, modifications, or entirely new developments.
Gate 3 — Functional tool sampling
Approve the performance of each critical tool. Evaluate cutting contact, tension, pivot action, filing surfaces, exposed edges, and handling. Keep functional approval separate from surface color and packaging approval so a good-looking sample does not conceal a weak mechanism.
Gate 4 — Case and layout prototype
Fit the approved tools into the actual case. Review access, retention, interference, opening and closing, visible alignment, and protective contact points. Any tool substitution should trigger an insert review.
Gate 5 — Decoration and pack approval
Approve logos on actual substrates, case finish, outer box, insert card, barcode, and required market information. Check a fully packed sample, not just a PDF dieline.
Gate 6 — Production release and first-piece confirmation
Freeze the approved BOM, samples, artwork, inspection criteria, and relevant revisions. Confirm that early production units and the complete packed set match those references before the main run proceeds.
Gate 7 — Final inspection and reorder handover
Review component function, tool count, layout, case closure, finish, markings, carton identity, and agreed shipment documents. Record any approved change. Preserve the master reference so the next purchase order can reproduce the same SKU.
If a gate fails, document the reason and what must be retested. Not every revision requires starting the whole project again, but it must be clear which previous approvals are still valid.
What a Good Sample Approval Package Contains
A photo labeled “approved” is rarely enough for a new custom manicure kit. A stronger sample pack includes a document trail that another team member can understand months later.
The package should contain: a versioned BOM, sample IDs, drawings or product dimensions where relevant, photographs of the correct set layout, functional inspection criteria for each tool, the physical or agreed finish reference, logo placement sheets, retail-pack artwork, carton data, and an approval history.
For a sample review, divide the findings into functional, cosmetic, and packaging categories. A clipper that cuts poorly is a functional failure. An unacceptable scratch is cosmetic. A case that allows tools to move during transit is a packaging failure. Resolving one category does not automatically close the others.
Request more than one sample where consistency matters. One carefully prepared presentation set can demonstrate the concept, but a small group of samples can help reveal variation in tool feel, finishing, insert dimensions, and branding placement before larger production begins.
Do not approve packaging copy until the final component list is fixed. An attractive box showing the wrong assortment creates avoidable problems for retailers, customers, and importers.
From First-Piece Control to Final Kit QC
Quality assurance for a custom manicure set operates at two levels: each tool must pass its own criteria, and the assembled kit must contain and protect the correct tools. A finished case can be defective even when every tool inside it functions correctly.
Use the following checkpoints as a project template:
| Stage | Evidence or check | Failure to prevent |
|---|---|---|
| Incoming components | Correct model, material requirement and finish | Wrong tool or changed component arrives |
| First piece | Functional sample and appearance against approved reference | Production setup differs from approval |
| In-process | Critical geometry, moving parts, finish where applicable | Process drift continues through the lot |
| Kit loading | Slot-by-slot BOM match, orientation and tool count | Missing, duplicate or swapped tools |
| Case inspection | Closure, retention, contact, surface protection | Loose items, bulging or scratches |
| Retail pack | Correct printed version, barcode, description, label | Obsolete artwork or misleading set count |
| Shipment | Correct SKU, carton quantity and packing identity | Mixed variants or documentation mismatch |
For sampling inspection by attributes, the international ISO 2859-1:2026 standard provides a framework for AQL-indexed sampling schemes. It does not certify a manicure set, dictate an automatic acceptance level for every defect, or replace the buyer's model-specific criteria. Define the applicable sampling plan and defect classification with the supplier and inspector based on the product and contract.
Critical safety-related problems, major functional failures, and minor cosmetic deviations should not be treated identically. A buyer should agree on how each is classified and what triggers containment, reinspection, corrective action, or rejection. Avoid unsupported blanket statements such as “100% tested to international standards” unless the exact documented process really supports them.
Use a Risk Register Before the Pilot Run
A small failure-mode review can save expensive rework. The following is an illustrative risk register, not measured OLIMOR defect data. It shows how to turn a vague concern into a test and a responsible decision.
| Potential failure | Where it may originate | Early prevention or detection | Decision owner |
|---|---|---|---|
| Clipper cuts unevenly | Cutting-edge or assembly variation | Functional sample and first-piece test | Tool quality team |
| File scratches another tool | Case layout or retention | Loaded-case handling review | Case designer and QA |
| Logo looks different on two tools | Substrate or finishing differences | Grouped decorated physical sample | Brand and supplier |
| Case does not close cleanly | Stack height or revised tool geometry | Fit test with final components | Product engineering |
| One tool is missing | Packing or replenishment step | Slot-based loading check and final count | Assembly supervisor |
| Retail box claims the wrong count | Artwork and BOM mismatch | Content-to-BOM proof approval | Buyer and artwork owner |
| Reorder uses an outdated component | Uncontrolled substitution | Approved BOM revision and change notice | Purchasing and supplier |
Ask which risks would affect customer safety, which would make the set unsellable, and which can be addressed through a simple design improvement. Prioritize changes according to impact, not just visual prominence. A better insert may sometimes protect product value more effectively than a more expensive exterior case.
MOQ, Tooling, Cost and Lead Time: What Must Be Quoted Separately?
A custom manicure set can include independent cost and quantity drivers. The metal tools, case shell, molded insert, printing, surface finish, and logo processes may not share one minimum manufacturing quantity. Ask whether MOQ applies to the finished SKU, individual components, each color, or each artwork version.
A useful quote separates the base tools, case and retention, decoration and packaging, assembly/inspection, and any development or tooling charges. This makes comparisons fair and helps a buyer understand where simplification is possible. If a supplier offers a lower price by changing the case material or removing a quality check, the change should be visible in the quote.
Lead time should be expressed as milestones, not one unqualified number. Functional samples, case prototypes, artwork proof, bulk components, printing, final assembly, inspection, and shipping may follow different schedules. A late printed sleeve can hold up an otherwise complete order.
Avoid quoting OLIMOR-wide standard MOQs, universal lead times, or fixed production capacity without a current model-specific confirmation. These depend on the selected platform and requested changes. The website's displayed product prices also should not be treated as firm bulk quotations.
Cost reduction without weakening the product
Start by removing low-value optional tools, using an existing case format where suitable, reducing unnecessary colorways, and simplifying printing while preserving the parts that deliver the intended user experience. Do not cut cost by leaving blade contact unverified, reducing case protection, or omitting the final completeness check.
A practical measure of value is not just factory price per piece, but cost per accepted, sellable complete kit after packing and quality outcomes are known. A slightly lower quotation can become expensive if it produces damaged tools, missing parts, obsolete artwork, or avoidable repacking.
Compliance, Product Claims, and Ownership of Designs
The target sales market should be identified before final artwork approval. Required labeling, traceability, safety information, material claims, and importer obligations depend on the destination and actual product. For consumer non-food products placed on the EU market, Regulation (EU) 2023/988 is a relevant general product safety framework; buyers should assess their product-specific obligations rather than assume a manicure set is exempt or automatically compliant.
Do not describe ordinary grooming tools as sterile, medical-grade, therapeutic, or universally safe for children without appropriate product evidence and a valid basis in the target market. Similarly, a company-level management certificate is not automatically a certification of every finished tool or kit. Ask for documents that identify the holder, scope, current validity, and relevance to the selected SKU.
When the project includes customer drawings, unique tooling, or distinctive case artwork, clarify ownership, usage rights, confidentiality arrangements, sample retention, and what happens after the order ends. These are commercial and contractual matters that should be decided before significant development, not assumed from the words OEM or ODM. A written agreement and professional advice may be appropriate for material IP concerns.
For safe product claims, keep a traceable list of which statements come from verified material declarations, approved tests, actual product features, or market-specific review. Promotional language should never outrun the evidence in the project file.
Three Practical Customization Scenarios
The following examples are hypothetical project scenarios, not descriptions of completed OLIMOR customer cases or measured results.
Scenario A: A new e-commerce beauty brand
The buyer wants a compact kit that photographs clearly and arrives without cosmetic damage. An established clipper and file platform, a small selection of coordinating tools, a distinctive case color, and a printed sleeve might achieve the goal. The highest-value tests are actual tool function, logo consistency, packed-case photography, and parcel handling. New tooling may not be necessary.
Scenario B: A specialty retail chain
The retailer needs a recognizable everyday set in a shelf-ready pack with consistent barcode and product claims. Its development priorities are essential tool functions, easy-to-explain contents, package footprint, legal text, and reorder continuity. A printed package change must be tracked even when the underlying metal tools remain the same.
Scenario C: A premium gift collection
The brand wants a coordinated metallic finish and a case that feels considered when opened. Tool color harmony, decoration proofs, friction points, secure retention, and closure performance become especially important. The buyer should approve a complete physical presentation set rather than judging component photographs independently. A premium finish does not remove the need for functional testing.
These three briefs should produce different quotations and sampling plans. That is a sign of a responsive manufacturer, not inconsistency.
How to Evaluate a Manufacturing Partner for Custom Work
Do not choose a supplier solely because it has a long catalog or attractive case photography. Ask for evidence of its ability to manage a defined product from a controlled sample to the next production run.
A useful evaluation can cover eight questions:
- Can the team explain the difference between a standard platform, an adaptable design, and new engineering work?
- Will it document component-level specifications instead of promising one generic material across the set?
- Can it review tool function and case fit before decoration and mass production?
- Does it identify internally performed and externally sourced processes clearly?
- Can it keep a controlled BOM, drawings, logos, and packaging artwork revisions?
- What are the first-piece, in-process, kit-completeness, and final-pack checks?
- How are nonconforming pieces handled and substitutions approved?
- What records and samples ensure that a later reorder matches the first accepted version?
A factory visit or video tour can be useful, but a beautiful production floor does not prove that one specific set is under control. Request the sample, workflow, inspection plan, and ownership of each approval step.
OLIMOR's current About Us page describes beauty-tool manufacturing, OEM development, and checks against approved samples, material requirements, and export specifications. Those statements are appropriate company-level context; the production route, testing, material specification, and commercial terms should still be confirmed for the exact manicure set under discussion.
OLIMOR Product References for a Custom Manicure Set Brief
A buyer does not need to start from a blank sheet. Existing products can provide a sensible geometry, assortment, case, or merchandising benchmark. Treat them as design references, not as proof that every requested modification is already offered.
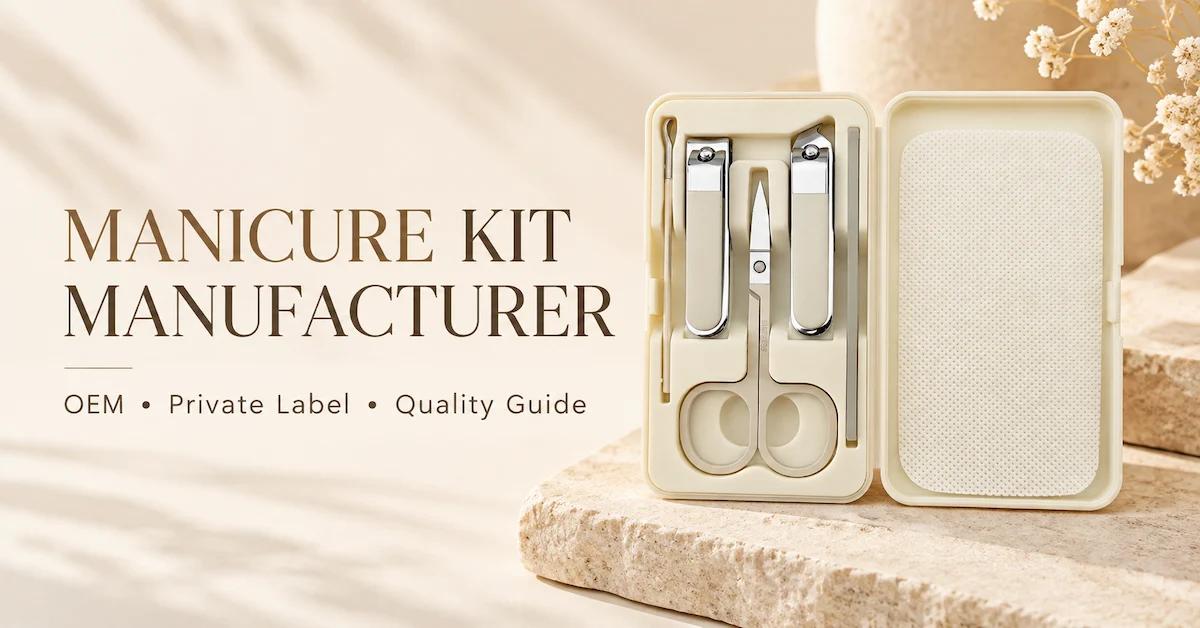
The MSB2061 Travel Manicure Kit represents a compact, ivory-case direction suitable for discussing travel-oriented layouts and essential tool selection. Before quoting, confirm the current tools, component materials, dimensions, and packing details for that exact product.
The Luxurious Nail Grooming Set offers a different merchandising direction for buyers considering a gift-oriented presentation and coordinated appearance. It can help start a case and finish discussion, but the current configuration and available custom options need project-specific confirmation.
The Sleek Grooming Kit can be useful when evaluating a broader grooming assortment in a portable format. Buyers should check whether all proposed accessories belong in a manicure-focused product and ensure that consumer-facing descriptions match the approved contents.
OLIMOR BEAUTY is presented on its website as a beauty and personal-care tools partner for international brands, retailers, and distributors. For a new kit, its manicure set category is the practical starting point; the contact page is where the brand can submit the brief, references, expected quantity, and packaging requirements for review.
A Manufacturer-Ready RFQ Template
A good request for quotation is specific enough to expose the real development scope without pretending the brand has already solved every engineering detail. Use the following as a working checklist:
| RFQ item | What to send |
|---|---|
| Buyer and channel | Brand, retail chain, distributor, e-commerce, salon or gift program |
| Market and end user | Destination country, target customer and intended use |
| Product reference | Website link, photograph, sample, drawing or mood board |
| Tool assortment | Core, supporting and optional tools, plus expected piece count |
| Must-have criteria | Functional performance, dimensions, handling, finish and packaging priorities |
| Case requirements | Approximate size, material direction, closure, insert and layout expectations |
| Branding | Logo file, preferred positions, color directions, artwork versions |
| Packaging | Retail box or sleeve, barcode, languages, protection and carton needs |
| Quantity and forecast | Estimated first order by SKU and possible replenishment |
| Required milestones | Sample review, launch deadline, production and destination |
| Quality and claims | Inspection priorities and any confirmed market-specific requirements |
| Change approvals | Contacts responsible for function, finish, artwork and full-kit approval |
A concise inquiry might say: “We are developing a private-label manicure set for beauty retail in [market]. Our concept includes nail trimming, filing, and selected cuticle-care functions in a compact fitted case. We want an existing tool platform where practical but need coordinated finish, branded case and sleeve, and a controlled packed sample. Please identify standard versus modified components, likely sample stages, model-specific MOQ, tooling or setup charges, inspection plan, and quotation assumptions. We can provide artwork and reference photos.”
That brief gives the supplier useful information and invites technical feedback. By contrast, “send your best price for custom manicure sets” leaves too many decisions undefined and tends to produce quotations that cannot be compared reliably.
Frequently Asked Questions
What does a custom manicure set manufacturer do?
A custom manicure set manufacturer helps define and coordinate the tool combination, component specifications, case structure, branding, samples, production and inspection required for a finished branded kit. The scope varies by project: some orders adapt existing products, while others require new engineering and tooling. The key deliverable is a controlled finished SKU, not merely a selection of tools placed into a pouch.
Can I customize only the logo and packaging?
Often that is the most efficient starting point when an existing product configuration already meets the market need. Available logo methods, case decoration, color options, retail boxes, artwork requirements and MOQ depend on the selected model. Approve actual decorated and packed samples before bulk release; a computer mockup alone cannot confirm finish or durability.
How is OEM different from ODM for manicure sets?
OEM usually begins with stronger buyer-defined drawings, samples or specifications. ODM typically starts from a supplier-side platform that the buyer wants adapted. Private label often focuses on branding and presentation of an established product. These routes can overlap, so ask the supplier to identify the specific development work, tooling, approval gates and commercial terms rather than relying on the label alone.
What should go into a custom nail care kit?
Choose tools for the intended routine. Common candidates include nail clippers, a nail file, a suitable cuticle tool, tweezers and grooming scissors. A travel essential, home grooming set and professional-oriented kit may need different combinations. More pieces do not necessarily mean more value: every included component should have a clear use and its own quality criteria.
Are all custom manicure sets made from stainless steel?
No single material statement should be assumed for every tool or case. Different components can use different metals, polymers, textiles, coatings, abrasives or linings. Confirm the specification of each selected tool and avoid describing an entire mixed-material kit as one stainless-steel grade. Product claims should reflect the actual BOM and available evidence.
How should samples be approved before production?
Separate approval into functional tools, case and retention, decoration, retail packaging and the final complete pre-production set. Keep a versioned BOM, relevant drawings, artwork, physical or documented master samples, and records of changes. A finished photograph is useful but does not replace function tests or a controlled sample reference.
What quality checks are most important for a manicure kit?
Inspect each tool for its intended function, then inspect the entire kit for correct component count, placement, case closure, finish, branding, product identification and packaging protection. Nail clippers, nippers, tweezers, scissors and files require different checks. Agree on sampling, defect definitions and corrective actions for the specific order.
What is the MOQ for a custom manicure set?
There is no universally valid MOQ. The minimum can depend on existing tools, new components, case color or material, printed packaging, logo setup, tooling and SKU variants. Ask whether minimums are calculated per finished SKU, per color or per artwork. Submit your actual specification and quantity forecast for a model-specific response.
How can I reduce the cost of a custom manicure set?
Begin by removing optional accessories that add little customer value, using an existing tool platform, limiting unnecessary finish variants and simplifying packaging without losing protection. Do not compromise core cutting performance or final kit completeness checks. Compare costs against the same approved specification and calculate the cost per accepted sellable kit.
How do I keep repeat orders consistent?
Keep the approved complete kit, BOM revision, individual tool references, finish standard, logo and packaging artwork, carton configuration, and inspection plan. Require review of material, component, tooling, finish or case substitutions before production. The second order should refer to the same controlled SKU definition as the first, unless changes have been approved.
Conclusion
A reliable custom manicure set manufacturer turns a brand brief into a kit that can be tested, approved, and reproduced—not merely decorated. Define the customer, choose tools with clear functions, engineer the case around real components, and approve the entire packaged SKU before mass production. Keep the BOM, artwork, inspection criteria and master sample together for reorders. To evaluate an OEM, ODM or private-label project, send your tool list, product references, logo and packaging requirements to OLIMOR for a model-specific review.
Tag:
Related articles
- OEM & Private Label
- Nail Care Tools Guide
anicure Pedicure Set Manufacturer: How to Source Complete Hand and Foot Care Kits for Retail and Salons
- OEM & Private Label
- Nail Care Tools Guide
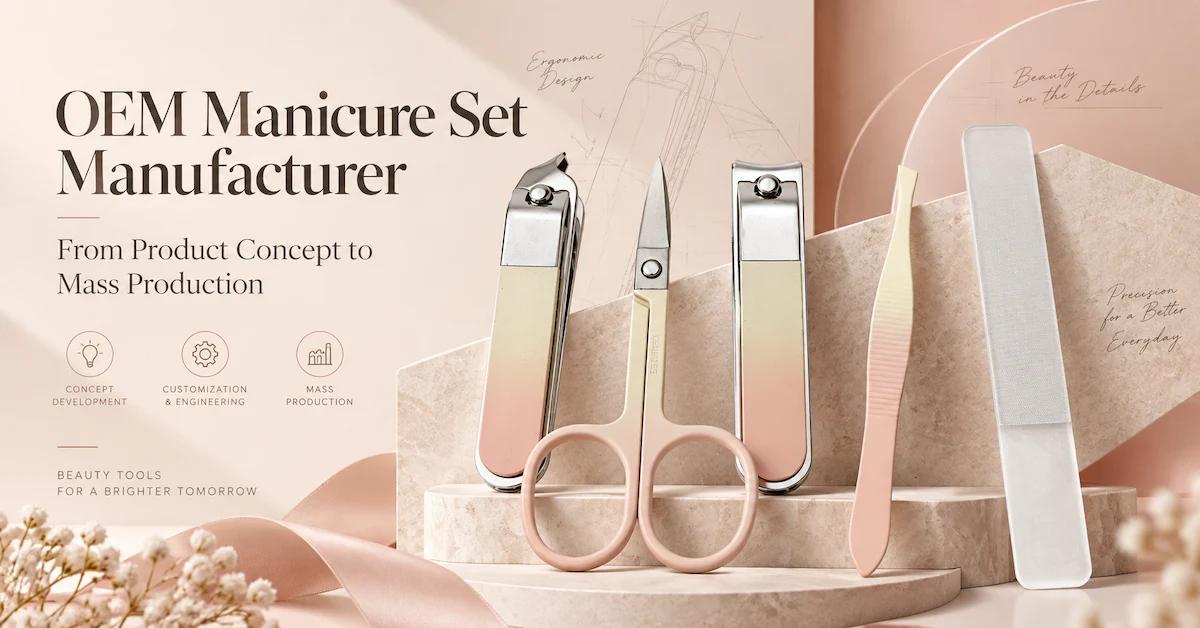
OEM Manicure Set Manufacturer: How Beauty Brands Move from Drawings to Approved Mass Production
- OEM & Private Label
- Nail Care Tools Guide