

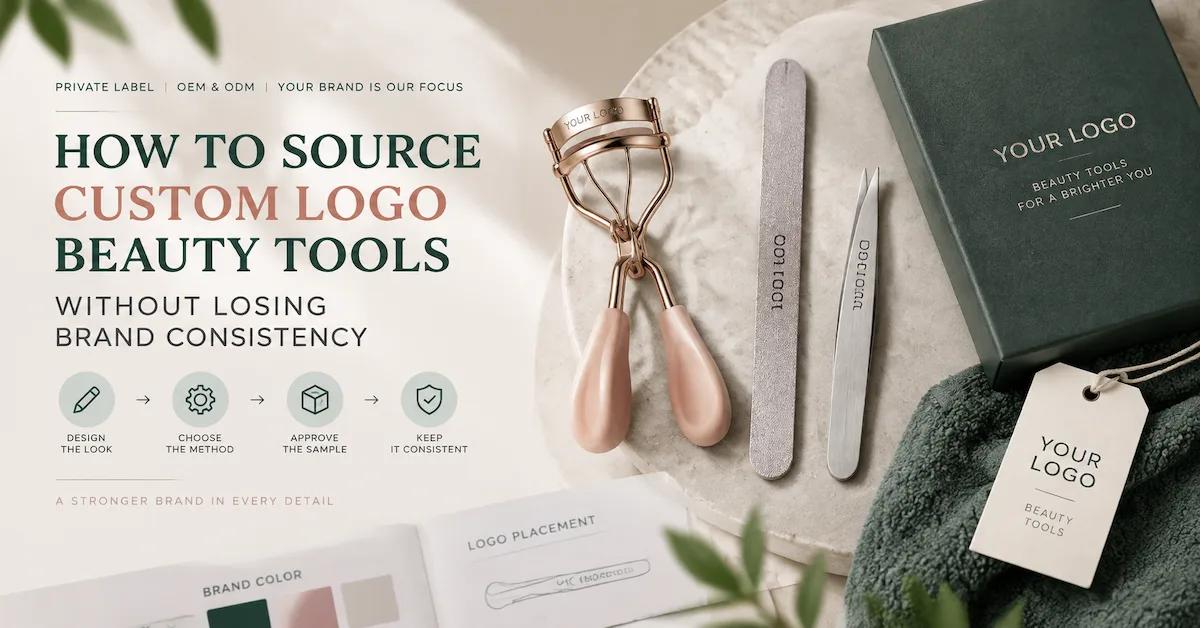
Quick Answer: The mark only stays useful when purchasing, decoration, inspection, and the next order refer to one record. Put the user, surface, process, logo zone, finish, pack, and deciding sample on that record. A metal curler, textured file, and manicure set will take different treatments; shared clear space, visual weight, artwork revision, and approval keep the family recognizable.
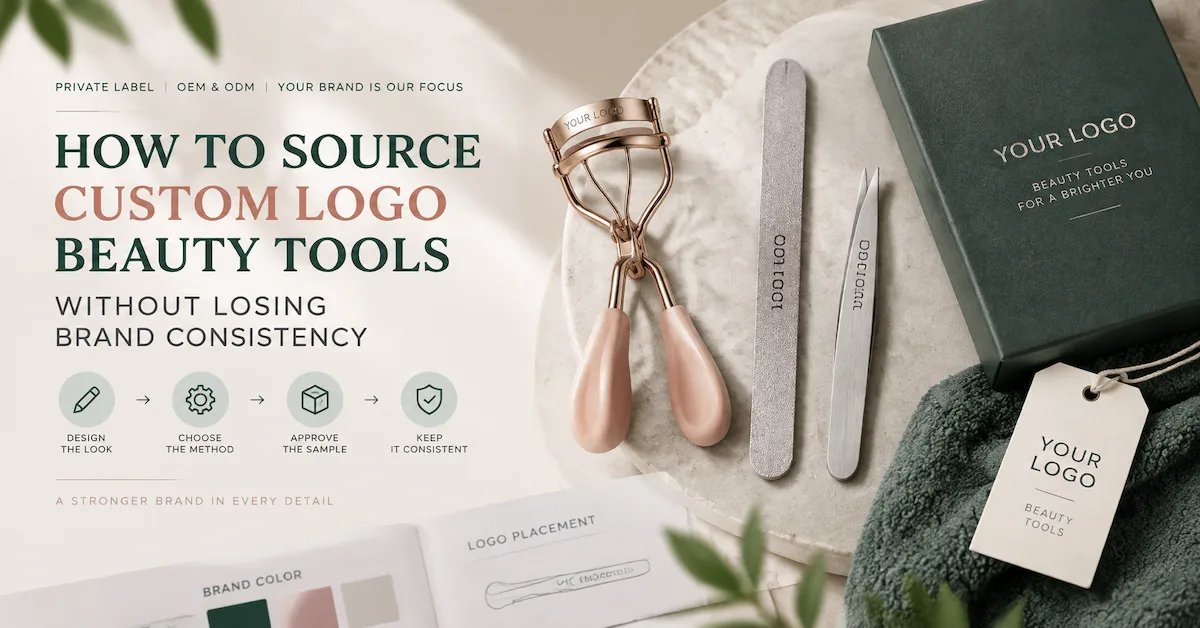
Introduction: A Logo Is Small, but the Decision Is Not
It is tempting to treat branding as an attachment: send the vector file and wait for the decorated sample. In practice, the mark lives inside a physical chain. Curvature, texture, coating, heat, handling, package contact, and viewing distance all affect what the customer sees. A line that is crisp on flat metal may lose contrast on a dark handle. A pouch may need a larger mark than a small curler. Paperboard may need its own color reference instead of borrowing the tool's finish.
That is why a private-label range can feel inconsistent even when every individual item passes a basic check. The mark is present, but its visual weight changes. One sits close to an edge, another turns the wrong way, and a third vanishes beneath an insert. The package then creates yet another version of the brand. Those small mismatches are visible to a buyer long before anyone opens a quality report.
Beauty brands, importers, retailers, distributors, salon suppliers, and ecommerce teams all meet the same awkward middle step: the logo is approved, but the repeatable product is not. This guide works through that step by looking at surfaces, true customization, marking routes, samples, packaging, inspection, and the next order.
In company-provided material, OLIMOR BEAUTY describes OEM and ODM work from drawings, physical samples, appearance ideas, and structural requirements. The same material lists stamping, heat treatment, injection, polishing, deburring, assembly, inspection, and packing. A selected SKU may use only some of those operations, so its quotation remains the place to settle route, materials, decoration, MOQ, samples, and schedule.
1. What Are Custom Logo Beauty Tools?
Custom logo beauty tools are grooming or personal-care products adapted for a buyer's brand through an approved marking, product appearance, set composition, or retail package. The base tool may already exist, or the project may include new product development. The logo is only one layer. A commercial product also needs a stable model identity, a defined unit of sale, accurate product information, a protective pack, an inspection plan, and a record that controls the next order.
For a small program, customization may mean a logo on an existing eyelash curler and a branded insert. For a wider collection, it may include different finishes, colors, grips, pouches, cartons, and product combinations. The more surfaces involved, the more important it becomes to define the brand system before approving individual products.
A useful brand system answers five questions for every SKU:
- Where is the logo allowed to appear?
- Which marking method is suitable for the actual surface?
- What minimum size, contrast, and clear space keep the mark legible?
- Which finish and color references control the visual family?
- Which approved sample and revision control future production?
Custom branding is not the same as custom geometry
A logo-only project may use an existing tool platform. A product-customization project changes a handle, working head, hinge, edge, grip, case, or component. A packaging project changes the retail unit without changing the tool. Ask the supplier to label each requested change as standard, configurable, or new development. This simple classification prevents a logo request from hiding tooling, assembly, testing, or package-fit work.
A custom beauty tools manufacturer should explain which part of the request is branding and which part changes the product itself. That distinction lets the buyer compare a logo-only route with a broader development route before approving samples or tooling.
A custom logo beauty tools manufacturer should be able to explain the effect of the mark on the chosen substrate and the effect of other changes on the marking area. Buyers should not accept "logo available" as a complete answer. Request the method, artwork requirements, proof stage, acceptable variation, and the evidence that will be retained.
2. Start With a Brand Marking Brief
Before requesting a quote, create a short marking brief that a purchasing manager, designer, quality reviewer, and supplier can read in the same way. State the brand name, target customer, sales channel, destination market, selected product, unit of sale, logo file version, preferred application, and visual references. Add what the logo must not do: cover a working surface, sit on a sharp edge, interfere with a grip, disappear against a finish, or rub against an insert.
Define the commercial context as well. A professional salon tool may be viewed closely and repeatedly, while a drugstore item may be judged through a hanging pack. A gift set may need a logo hierarchy across the tools, case, sleeve, and carton. An ecommerce product may rely on photographs where small marks must remain visible at thumbnail scale. The same artwork can need different placement rules in each channel.
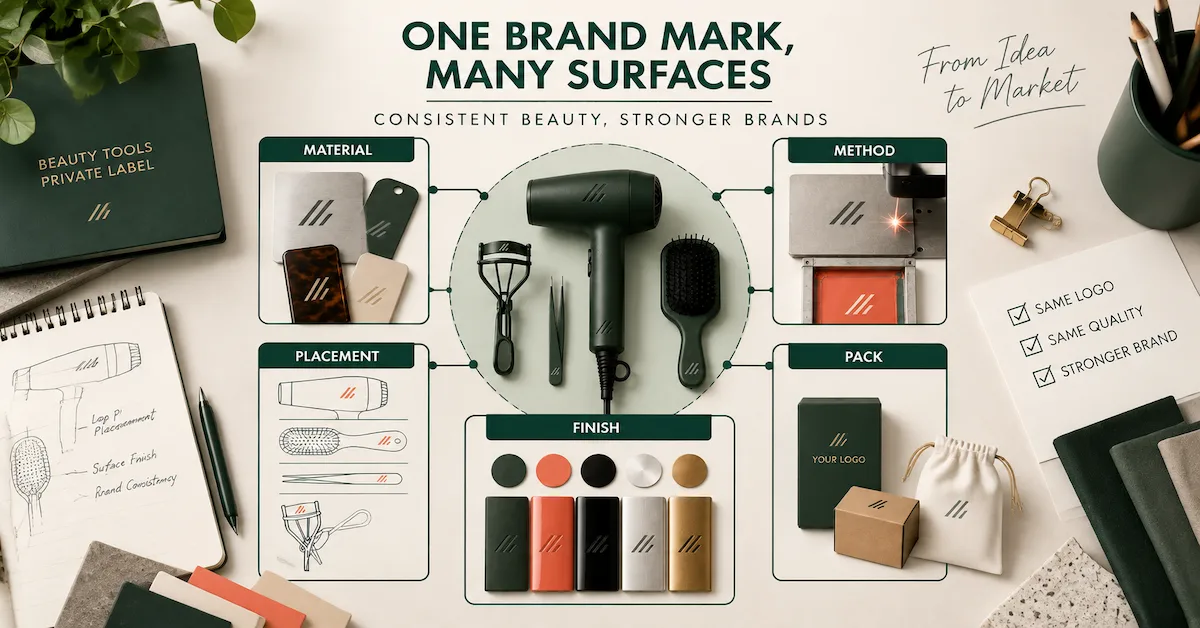
3. Map the Logo Across Material, Method, Placement, Finish, and Pack
One mark can appear on stainless steel, coated metal, plastic, fabric, paperboard, and glass-like surfaces. Recognition should carry across the range, but the physical application will change. A simple surface map made before sampling gives the manufacturer room to recommend a workable route and gives the buyer something concrete to compare when proofs arrive.
| Brand block | Buyer decision | Supplier question | Approval evidence |
|---|---|---|---|
| Material | Metal, plastic, coated part, fabric, paperboard, or mixed assembly | What surface preparation and marking limits apply? | Decorated sample on the intended substrate |
| Method | Laser, printing, transfer, embossing, engraving, label, or another route | Which method delivers the requested contrast and durability for this model? | Method proof and physical sample |
| Placement | Logo zone, orientation, edge clearance, and user-facing direction | Does the location affect grip, assembly, tooling, or package contact? | Annotated drawing and decorated product photo |
| Finish | Gloss, satin, brushed, coated, colored, or natural appearance | Will the finish change contrast, reflection, or color perception? | Side-by-side physical finish reference |
| Pack | Insert, pouch, carton, sleeve, barcode, and retail display | Can the logo remain visible and protected after packing and shipment? | Complete packed master sample |
The surface map stops a general capability list from deciding the method by itself. It also makes controlled variation easier to explain. The mark might be engraved on one metal tool, printed on a colored handle, and foil-stamped on a carton; the physical processes differ, while the clear space and visual weight remain related.
4. Compare Marking Methods by the Result You Need
Many sourcing conversations start with a process name. It is usually clearer to start with the desired result: contrast, tactile feel, permanence expectation, color, line detail, location, and quantity. Once those points are written down, the supplier can explain which process suits the model and its finish.
Laser or engraved marks
A laser or engraved mark can suit a brand that wants a controlled, low-ink appearance on compatible metal or coating. Surface condition, power, line weight, angle, and nearby finish all influence the result. A line that looks sharp on a flat coupon may soften on a curve or texture; make the proof life-size and put it on the intended location.
Printed marks
Printing suits projects that need color or stronger contrast on compatible plastic, metal, paper, or package surfaces. Check registration, coverage, edge sharpness, and rub behavior. Look at the print after finishing, handling, and the actual retail pack-out, not only while it is still on a clean sample table.
Embossed, debossed, or molded marks
Relief marks make the logo part of a surface, but they can require tooling or a component change. Depth, draft, edge radius, and clean release affect the result. Check that the relief does not create a pressure point, weaken a thin wall, collect residue, or turn fine detail into an unreadable shape.
Labels, sleeves, and package marks
Labels and sleeves can be useful when the tool should remain visually simple or when several versions share one base product. They also introduce adhesive, edge, moisture, rub, and package-removal questions. A label is not a substitute for a product specification. Record the label material, size, location, artwork revision, and how it is protected in the package.
The useful method is the one that survives the product's real conditions. Ask for limitations and exclusions along with the process name. If nobody can explain how the finished mark will be checked, the decoration route is still an open decision.
5. Product Example: Eyelash Curler Branding Needs Mechanical Awareness
The OLIMOR eyelash curler is a useful example because its brand area sits near a functional mechanism. A logo cannot interfere with the frame, finger loops, pad, moving parts, or the user's line of sight. The buyer should approve the mark on the assembled tool, not only on a flat artwork drawing.
For this type of tool, review the mark from the user's normal viewing direction and from the retail display direction. Check whether the chosen finish changes reflection around the logo. Confirm that the logo remains clear when the curler is closed and packed. The product description, package copy, and decoration proof should refer to the same model and current revision.
If a buyer requests a colored handle or a different pad, the logo decision may need to be revisited. A new color can change contrast. A new component can reduce the available flat area. A package insert can cover the original location. These are not reasons to reject customization; they are reasons to review the system after each meaningful change.
6. Product Example: A Metal Nail File Tests Contrast and Texture
The OLIMOR metal nail file illustrates a different branding problem. A file has a working abrasive surface, a handle or end zone, and a metallic appearance that can reflect light. The logo should not reduce the intended working area or create an edge that changes handling. The visible surface, product description, and package should make clear which part is decorated and which part performs the nail-care task.
Ask whether the chosen marking method can maintain clean edges beside the textured surface. If the logo sits on a smooth handle zone, define its distance from the abrasive area and from the end edge. If the tool is sold in a paper sleeve or kit, check that the mark is still visible when the product is stored in its intended orientation.
A stainless steel beauty tools supplier should be asked which component is stainless steel, which model-specific material description applies, and which documentation is available for the buyer's market. A silver appearance is not a material specification. Keep material, surface, cleaning information, and compliance review as separate fields in the technical package.
7. Product Example: A Manicure Set Needs a Brand Hierarchy
The OLIMOR professional manicure set shows why a logo program must include the complete set. A pouch, several tools, an insert, and an outer package create several possible brand zones. If every tool receives a large mark, the set can look busy. If only the pouch is marked, the individual tools may lose identity when removed from the case.
Set the brand hierarchy before requesting decoration. The pouch may carry the main mark, while the tools use a smaller secondary mark or none at all. The insert can name each component and carry care information; the carton can carry the brand promise and barcode. Choose the arrangement deliberately, then record it so the next set follows the same logic.
Review the packed set for movement and contact. Metal tools can rub against a decorated pouch or each other. A logo can be hidden when the tool is placed in its pocket. An insert can crease or cover copy. The complete unit should be shaken, opened, closed, and displayed using the same configuration that will be shipped.
8. Use a Brand Artwork Pack Instead of One Loose File
A loose logo file creates avoidable questions. A brand artwork pack gives the supplier the context needed to apply the mark correctly. Include the master vector file, a monochrome version, approved colors, minimum size, clear space, orientation, prohibited treatments, and examples of correct and incorrect use. Add a product-specific page for every SKU.
Give each product its own placement sheet. Record the model, logo zone, method, artwork revision, dimensions, edge clearance, viewing direction, substrate, finish, proof requirement, and package contact. The same logo may need different dimensions on two tools; keep the visual hierarchy while adapting the physical application.
| Artwork-pack file | Purpose | Owner | Change-control rule |
|---|---|---|---|
| Master logo | Source of approved vector artwork | Brand or design team | Version number and date required |
| Color reference | Defines approved brand colors and finish intent | Brand and supplier jointly | Physical proof takes priority over screen-only comparison |
| SKU placement sheet | Shows location, size, orientation, and clear space | Product development | One sheet per model or pack configuration |
| Method proof | Shows how the mark will appear on the actual surface | Supplier and quality reviewer | New substrate or finish requires reapproval |
| Packaging artwork | Controls box, pouch, insert, barcode, and required information | Brand and compliance reviewer | Copy and language changes create a new revision |
| Approval record | Connects the approved file to a sample and date | Buyer project owner | No production release without a traceable approval |
9. Review Color, Finish, and Logo Together
Color and finish change apparent logo strength. Black may disappear on a dark coated handle; brushing can interrupt a thin line; polish can throw glare around a small mark. Fabric and coated paper take ink differently as well. Put the mark and finish in the same physical review so the decision reflects the product customers will see.
Make the comparison physical. Put the decorated item, its unbranded counterpart, the color chip, finish reference, and package under ordinary viewing light. Record legibility at the intended distance, visual weight beside the other SKUs, and whether the item still belongs to the same range.
Acceptable variation should be defined carefully. Different substrates may not produce identical color or reflectivity. The goal is controlled brand recognition, not an impossible promise that metal, plastic, fabric, and paper will look physically identical. Record the acceptable visual range and the condition under which the comparison was made.
10. Build a Sample Approval Sequence
Sample approval should answer questions in an order that reduces rework. Start with the unbranded or standard product if geometry is still being evaluated. Review the decoration method on the actual material. Review the complete finished tool. Review the retail package. Finally, approve the packed master and the inspection reference.
Keep a gap log for each revision. Note where the issue appears, what the approved result was, what arrived, which evidence shows the difference, who acts, and how closure is recorded. A new preference is a requirement change; a supplier departure is a deviation. Calling a package simply "not premium enough" hides the useful detail, while precise wording gives both teams something they can correct.
11. Set Quality Checks for the Mark and the Tool
A logo inspection should not replace a product inspection. Check both. The product must still perform its intended task, and the mark must match the approved artwork and location. Packaging must protect the tool and communicate the correct information.
| Inspection area | Check | Evidence |
|---|---|---|
| Identity | SKU, model, revision, quantity, and unit of sale | Inspection sheet and carton record |
| Function | Working movement, surface, edge, closure, or included-tool condition as applicable | Model-specific functional check |
| Logo content | Correct artwork, spelling, orientation, and color | Approved artwork proof |
| Logo placement | Position, size, clear space, edge distance, and visibility | Annotated reference photo or drawing |
| Surface | Finish, scratches, marks, contrast, adhesion or decoration condition as applicable | Physical standard and defect examples |
| Packaging | Fit, restraint, printed copy, barcode, protection, and pack count | Packed master and packing instruction |
| Traceability | Batch, sample, production revision, and approval record | Retained sample and signed release |
ISO quality-management guidance puts customer focus, process thinking, evidence, and improvement at the center of quality work. That is relevant to branding because the mark is one requirement inside a product process, not a separate graphic exercise. The buyer still defines the product, decoration, package, and evidence used to release it.
When sampling inspection is used, agree on the lot, method, defect classes, acceptance rule, and response after a failed result. A generic quality sentence cannot describe every model. A small mark on a curve may need a closer review than a large carton print, so the inspection plan should follow the risk.
12. Compare Suppliers by Brand-Control Capability
A useful supplier answer goes beyond "yes, we can add your logo." Ask how artwork arrives, how proofs are issued, how the surface is prepared, how changes are labeled, how package files are stored, and how a reorder is released. That conversation should expose a conflict between logo placement and product function before production begins.
When reviewing an OEM beauty tools manufacturer, ask who owns the drawing, artwork, tooling, and approval record. When reviewing an ODM beauty tools manufacturer, ask which design elements are supplier-supported and which are exclusive to the buyer's project. For a professional beauty tools supplier, ask for model-specific quality evidence rather than broad claims about professional use.
A beauty tools factory China may list many processes or categories, but the buyer should trace the selected SKU. Which operation makes the surface? Which operation applies the mark? Who checks the mark? How is the approved sample identified? How are obsolete files blocked? These questions reveal more than a long process list.
13. Make the Quotation Comparable
A custom logo quotation should identify more than a unit price. Ask for the product model, material and finish assumptions, logo method, artwork size, number of marking locations, packaging, sample stages, tooling or setup, MOQ driver, inspection evidence, delivery basis, and quotation validity.
| Quotation field | Buyer should request | Risk if omitted |
|---|---|---|
| Product | Exact model, components, and current revision | Supplier prices a similar but different item |
| Decoration | Method, location, size, colors, setup, proof, and included quantity | Logo work or proofs appear as later charges |
| Packaging | Retail pack, insert, barcode, print, pack count, and carton basis | Retail-ready cost is missing |
| MOQ | Driver by model, material, finish, decoration, or printed packaging | Headline MOQ does not match the requested configuration |
| Schedule | Dependencies for artwork, samples, approvals, production, and inspection | A date has no operational meaning |
| Evidence | Inspection records, retained sample, photos, and documents | Quality expectations remain informal |
A wholesale custom beauty tools supplier should be asked to state which quantity and package assumptions support the quote. MOQ and schedule are configuration-dependent. A lower tool price may not be the lower landed cost if it excludes a decorated sample, custom package, inspection, or required documentation.
14. Protect the Reorder With a Golden Sample
A golden sample, approved master, or retained reference is useful only when it is identified. Label it with buyer SKU, supplier model, artwork revision, finish reference, package revision, date, and approver. Store the physical sample and digital record together. If a production sample differs intentionally from the master, record the deviation and its approval.
At reorder, do not send only a previous purchase-order number. Ask the supplier to confirm the current artwork file, marking method, product finish, package, unit count, carton information, and proposed changes. Reconfirm commercial assumptions because a product can remain visually unchanged while material availability, packaging costs, or delivery conditions move.
Review a proposed change before it enters production. A substitute coating, component, ink, pouch fabric, or carton board can alter contrast and the customer's impression. A written notice gives the buyer a clear moment to decide whether another sample or inspection is needed.
15. A Practical RFQ Checklist
Send a short, labeled request rather than a folder of unexplained artwork. Include:
- Brand name, target customer, channel, destination, and buyer contact.
- Selected product page, model, drawing, reference sample, or concept.
- Exact logo file, revision, preferred method, locations, and colors.
- Finish and color references, with notes about acceptable variation.
- Packaging type, unit of sale, barcode responsibility, languages, and carton needs.
- Quantity scenarios and the target order configuration.
- Required sample stages and who approves artwork, function, and packaging.
- Requested inspection evidence, retained sample, and destination-market documents.
- Questions about MOQ drivers, setup, tooling, ownership, schedule, and exclusions.
Mark open decisions honestly. If the material grade, decoration method, or package board is not fixed, write "open for supplier recommendation" rather than presenting it as a final requirement. The supplier can then propose options and price the difference. This creates a more useful conversation than asking for a discount on an undefined scope.
Frequently Asked Questions
Can I put the same logo on every beauty tool?
One brand mark can serve a whole range, although the physical application may change in size, location, or process. Check each substrate, curve, texture, finish, and package contact. Hold the brand rules steady while adapting the mark to the model.
What is the best logo method for beauty tools?
No single method wins for every tool. The choice follows the material, finish, detail, color, location, handling, package contact, and quantity. A method proof on the actual product is more useful than a process name by itself.
Can a logo be added to an existing product?
Many private-label projects begin with an existing product platform. The supplier still needs to confirm the printable or markable zone, process, artwork limits, setup, sample requirement, and packaging effect. Existing geometry does not mean the decorated retail unit is automatically approved.
How do I keep a logo from rubbing off?
Define the surface, marking method, handling condition, package contact, and acceptance test with the supplier. Review the decorated product after ordinary handling and after packing. The actual durability requirement depends on the product, finish, use, and destination-market expectations.
How do I check a branded manicure set?
Check the tool count, component identity, logo hierarchy, pouch or case, insert, movement, contact points, printed copy, barcode, and complete packed unit. Approve the set as one sellable product, not as a group of loose tools.
What should I ask a private label beauty tools manufacturer?
Ask which models are standard, what can be customized, which marking methods suit each surface, how samples are labeled, what inspection evidence is available, which packaging options are supported, what drives MOQ and schedule, and how reorders are controlled.
How should I manage logo changes?
Use a versioned artwork file, placement sheet, proof, decorated sample, and approval record. A changed logo file or position should create a new revision. Do not allow production to rely on an old attachment or a message screenshot.
Conclusion: Build a Marking System, Not a One-Time Decoration
Custom logo beauty tools become easier to source when the brand mark is treated as part of the product system. Start with the user, channel, and destination. Map the mark across material, method, placement, finish, and pack. Approve the actual decorated product, not only the artwork. Check the complete retail unit. Compare quotations by assumptions. Keep the golden sample, inspection record, and reorder revision together.
A range does not need identical physical treatment to feel coherent. An eyelash curler, a metal nail file, and a manicure set have different surfaces and jobs. Coherence comes from recognizable intent, clear product identity, accurate information, and decisions that can be repeated for every SKU.
Tag: