

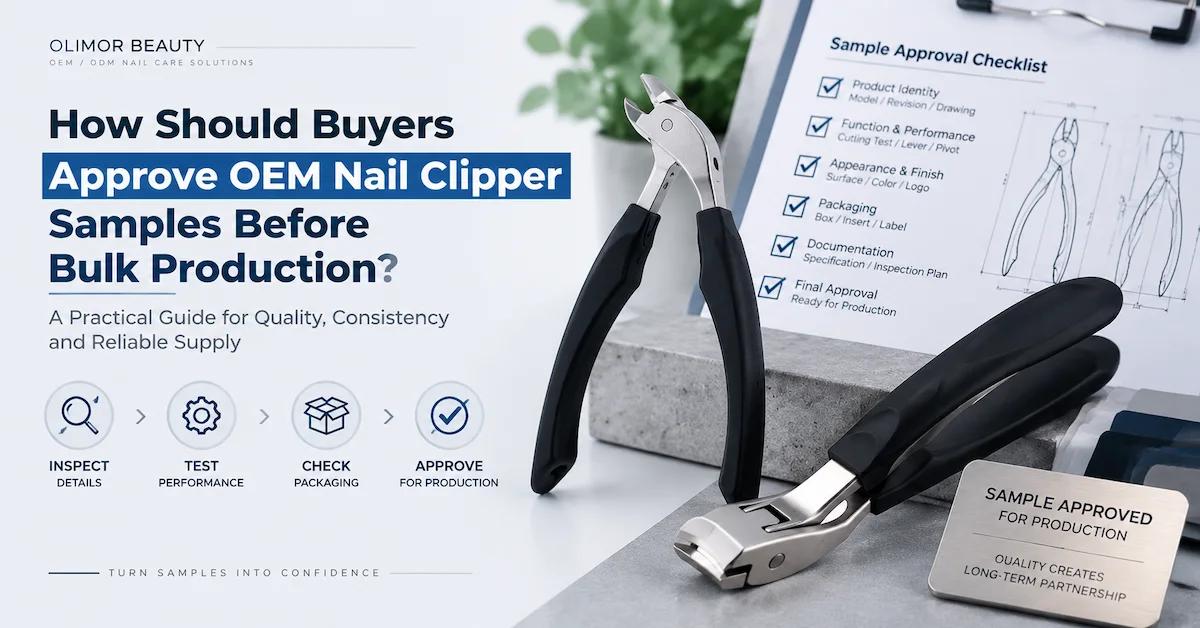
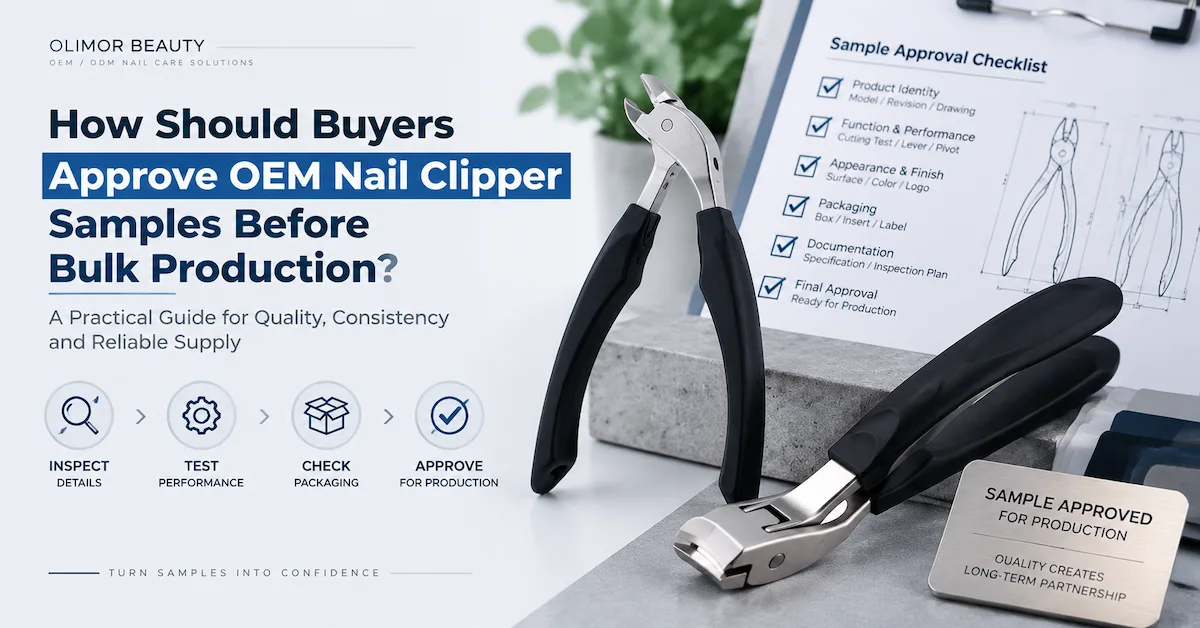
Search intent: commercial investigation, supplier comparison and RFQ intent. This guide serves brand owners, importers, distributors, retail quality teams and sourcing professionals who have received a nail clipper sample and need to decide whether it is ready for production. It focuses on what the sample proves, what it does not prove and how a buyer can make the approval useful during bulk manufacture and future reorders.
A sample meeting often becomes a visual review. The team opens a parcel, operates the clipper once, checks the logo and asks whether everyone likes the finish. That conversation is useful but incomplete. The sample also carries decisions about geometry, material, surface process, assembly, packaging and the way the factory will recognize the product later. When those decisions remain implicit, the production team may reproduce the general appearance while missing the buyer's critical expectation.
Approval should therefore be a controlled event, not a thumbs-up message. The buyer needs to identify the sample, record what was checked, mark unresolved items and connect the approved piece to the current drawing, specification, artwork and packaging. The supplier needs to explain which process controls will reproduce those features. Both sides need a clear rule for changes.
Model, revision, dimensions, components and material descriptions.
Cutting task, blade meeting, lever movement, pivot and model-specific checks.
Final logo, packaging, quantity basis, inspection scope and repeat-order controls.
What Does an Approved Nail Clipper Sample Actually Prove?
An approved sample proves that a specific physical item was accepted under stated conditions. It can show the chosen platform, dimensions, handling, finish, decoration, package and functional result at one point in time. It can help the factory interpret the buyer's requirements and help the buyer train colleagues and inspectors. It can also expose conflicts that drawings and photographs did not reveal.
The sample does not, by itself, prove material composition, durability, production capacity, process stability or lot consistency. A specially adjusted sample may perform well even when the production route is not controlled. A beautiful finish may be difficult to reproduce. A sample assembled by a development technician may not reflect normal line conditions. The buyer should ask how the factory will move from development handling to repeatable production.
The sample also does not settle every legal or market requirement. Packaging language, traceability, warnings, material documentation and destination-market obligations may need separate review. A claim should be supported by evidence applicable to the exact product and supplying entity. Do not infer certification from a logo, a general company certificate or a statement about a different SKU.
A professional OEM nail clipper manufacturer should welcome this distinction. The supplier can explain how the sample is coded, which parameters are recorded, where the production specification is stored and what checks are used when the order starts. The answer should name documents and owners, not only promise that production will be the same.
Identify the Sample Before Evaluating It
Start with identity. Give every sample a project code, model code, revision and date. Record the supplier, quantity received and the documents included. Photograph the sample from consistent angles, but do not let the photographs become the only record. A photo cannot show material, internal relationship, lever feel or the exact version of a finish.
Check the sample against the submission list. If several sizes, colours or packaging routes arrive together, label each one separately. Do not write "approved except the blue one" in a message that later becomes difficult to interpret. Use a table that states which item was approved, rejected, approved with conditions or retained only as a visual reference.
Confirm whether the sample was made with production-intent tooling, material and processes. A rapid mock-up can answer shape and handling questions without representing the final finish or manufacturing route. That is acceptable if clearly labelled. The problem begins when a concept sample is silently treated as a production sample.
List deviations. Perhaps the logo is temporary, the package is a white dummy or the chosen coating is unavailable for the first round. Record the missing feature, why it is missing and which later sample will close it. Conditional approval should have an owner and a due date.
| Sample status | Meaning | Allowed next step |
|---|---|---|
| Concept sample | Explores form, size, user fit or assortment direction | Confirm concept; do not release production |
| Engineering sample | Tests structure, mechanism, dimensions or manufacturability | Resolve technical issues and update documents |
| Appearance sample | Shows finish, colour, logo or package direction | Approve visual references separately from function |
| Pre-production sample | Uses intended material, tooling, process, decoration and pack | Complete release review and confirm controls |
| Golden sample | Identified approved physical reference tied to current documents | Use with written criteria for production and inspection |
Build a Nail Clipper Risk Map Before the Test
A sample checklist is stronger when it starts from risk. Ask how the customer uses the tool, what could prevent the intended result and which failure would affect safety, function, brand promise or packaging. Rank the concerns before testing so the team does not spend most of its time discussing colour while overlooking the cutting system.
The cutting edges are a central risk, but they are not the only one. Blade meeting, visible offset, burrs, chipping, deformation and the result of the agreed cutting task require attention. The lever and pivot influence force and control. Surface condition affects appearance and handling. A catcher, handle, file or decorative component introduces its own fit and use questions.
Packaging can create product risk. An insert may press the lever, expose the edge, scratch a coated surface or allow the tool to move. A hanging card may present the item well but offer less protection than the route requires. A travel case can protect the tool while adding closure, odour, material and pack-size questions.
Market and user context changes the risk map. A baby-oriented design, a salon-distribution item, a value retail clipper and a gift set should not use identical approval language. The buyer must define the intended user and avoid claims that turn an ordinary grooming tool into a medical promise without the relevant regulatory route.
| Risk area | Sample question | Production control to discuss |
|---|---|---|
| Cutting edges | Do the edges meet and perform the agreed task? | Geometry, setup, first piece and functional inspection |
| Lever and pivot | Is movement stable, controlled and consistent? | Component fit, assembly method and movement check |
| Burrs and surface | Are touch areas and visible surfaces acceptable? | Deburring, polishing, handling and appearance standards |
| Material and finish | Does the actual construction support the approved wording? | Material identity, applicable process and document control |
| Logo | Is the mark clear, correctly oriented and durable enough for handling? | Artwork revision, setup proof and inspection reference |
| Packaging | Does the packed product remain protected and correctly identified? | Insert, pack sequence, count, artwork and carton checks |
Perform a Functional Review That Mirrors the Intended Use
Begin with the task stated in the product brief. The sample should be operated as the intended customer will use it. Record the test medium, preparation and observations so the supplier can repeat the method. The purpose is not to create a dramatic demonstration. It is to decide whether the tool performs a defined grooming task with the agreed handling and result.
Observe the approach to the cutting area, lever travel, required control and the condition of the result. Repeat the operation enough times to reveal obvious inconsistency, but do not invent a durability claim from a short bench review. If lifecycle testing matters to the product promise, agree a separate method, quantity and acceptance requirement.
Review blade meeting when the clipper is closed in the normal way. Look at the relationship across the intended contact area and compare it with the approved reference. A visual check can identify offset or gaps, but the buyer should ask the technical team to define which characteristics are critical and how they will be measured or judged in production.
Check lever movement and pivot stability. Operate the clipper from different normal hand positions. Note binding, uneven motion, unexpected lateral movement or loss of control. If the design includes a handle, catcher, file or accessory, use it as intended and verify that it does not interfere with the core function.
Record failures precisely. "Does not feel premium" gives the factory little to act on. "Lever rubs the left side of the body near the middle of travel on samples 2 and 4" gives the team a location, condition and sample identity. Photographs, short videos and marked drawings can support the description.
Review Dimensions and Geometry Without Turning the Sample Into the Drawing
A physical sample shows shape, but production still needs controlled dimensions and tolerances. Identify dimensions that affect use, assembly, packaging and interchange. These may include overall length, width, height, jaw opening, lever position, pivot relationship, handle envelope and features that locate the tool in an insert.
Ask the supplier to propose realistic tolerances based on function and process. A tight tolerance should have a reason. Overly tight values can increase cost without improving the customer experience; overly loose values can hide variation that changes edge meeting, lever fit or package retention. The drawing should distinguish critical, important and reference dimensions where appropriate.
Do not measure one sample and declare every observed dimension mandatory. The piece may sit near one side of normal process variation. Use the sample to identify functional relationships, then let engineering and quality teams define the controlled range. If the buyer has a fixed interface, such as an insert or case, state that constraint clearly.
Keep the sample and drawing synchronized. When a dimension changes after testing, update the revision and decide whether a new physical sample is needed. Mark obsolete drawings and samples so they cannot return during a reorder. A common source of confusion is an approved sample that no longer matches the latest artwork or dimension sheet.
Verify Material and Process Claims at the SKU Level
Ask for material by component. The body, cutting area, lever, pin, file, spring, catcher, handle and decorative parts may not share one material. A general category statement should never replace the proposed construction of the sample. The quotation, specification, packaging and product listing should use compatible language.
When working with a stainless steel nail clipper supplier, clarify which components are stainless steel and what supporting evidence is available. Avoid turning that statement into universal corrosion, medical-grade or lifetime claims. If the target market or buyer policy requires a specific material test or restricted-substance document, define the scope and laboratory requirement before production.
Heat treatment can influence a cutting component, but the buyer should not prescribe or publish a number without product-specific engineering confirmation. Ask the supplier whether the selected construction uses heat treatment, where hardness is checked and how the result is connected to function. OLIMOR's supplied company information lists heat-treatment and hardness-testing equipment; the exact route still needs confirmation for each model.
Review the process map with the sample in front of you. OLIMOR's client-confirmed capability list includes metal stamping, heat treatment, injection moulding, polishing, water deburring, assembly and packaging. Ask which steps are in-house for the chosen clipper, which inputs come from partners and where incoming, in-process and final checks occur. Controlled outsourcing is not automatically a weakness; invisible handoffs are.
Inspect Burrs, Finish and Touch Surfaces
Run a careful visual and tactile review of normal touch areas. Look for burrs, rough edges, sharp unintended corners, polishing marks, scratches, pits, contamination, coating differences and assembly damage. Use safe inspection practices rather than sliding a bare finger along a cutting edge. Record locations on a marked image or drawing.
Define the finish with a physical reference and process description where possible. Words such as mirror, satin, matte or coloured are useful directions but may be interpreted differently. Check how the finish behaves near joints, recessed features, edges and decoration. A coating that looks uniform on a flat lever may show a different effect on the body or cutting head.
Appearance limits should reflect viewing distance, location and commercial importance. A small mark on a hidden internal surface is different from a scratch across the main branded face. Create defect examples or boundary samples for recurring points. Avoid writing a vague requirement such as "no scratches" if neither side can apply it consistently.
Handle the sample and pack it. Some marks appear only after the lever is rotated, the file is opened or the item rubs inside the insert. If a protective film or bag is required during production, include it in the packed sample and work instruction.
Approve the Logo as a Process Result
A custom logo nail clippers project should use controlled artwork and a physical decoration proof. Confirm the file revision, method, location, size, colour, orientation and any minimum line or gap requirement proposed by the supplier. Check the mark on the final finish and geometry.
Review readability and brand consistency, but also inspect the area around the mark. The decoration process should not create visible damage, distortion or an unintended texture. If the mark sits on a lever, confirm that handling and package contact do not degrade it during normal distribution and use.
Use separate approvals for tool decoration and printed packaging. Both may display the same logo, yet they use different files, colour systems and processes. The release package should identify every current artwork file and the physical reference it controls.
If the buyer requests a new finish and logo together, approve the combination. A mark that works on polished steel may have different contrast on a dark coating or textured handle. Do not assume a digital mock-up predicts the physical result.
Approve the Product Inside Its Final Packaging
A loose clipper and a packed clipper are different approval objects. The final packaging can move the lever, expose the edge, rub the surface, hide the logo or change how the customer holds the product during opening. Ask for a complete packed sample using production-intent product, insert, print and closure.
Check product orientation, retention, opening sequence, edge protection, lever pressure, movement, surface contact, visibility, barcode area, instructions, warnings and required legal information. If the package is designed for hanging, observe balance and presentation. If it is designed for ecommerce, discuss parcel movement and secondary protection.
Confirm the unit count, inner pack, master carton, carton marks and any market variation. A package that grows by a few millimetres can change the carton arrangement. A new insert can change weight, protection and assembly time. The quotation should reflect the same packed configuration that the buyer approves.
Inspect the product again after a packaging-handling trial appropriate to the project. Do not claim a transport standard was passed unless a defined test was performed. The practical goal is to reveal movement, scratching, crushing, opening or count problems before bulk packing.
Create a Golden Sample With Written Acceptance Criteria
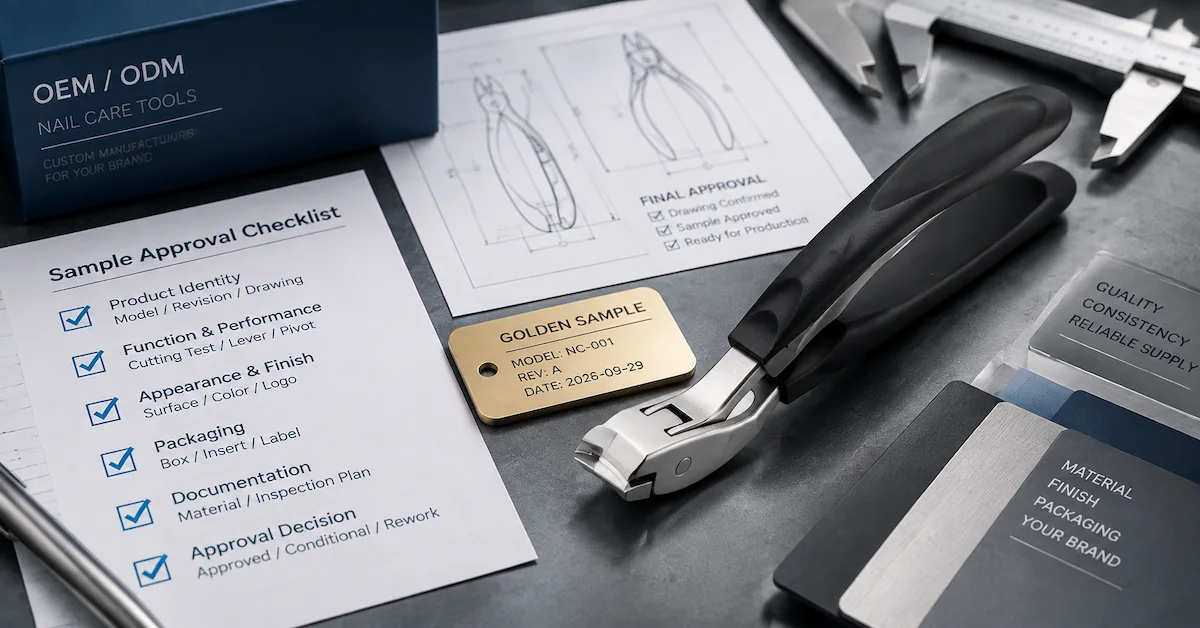
A golden sample is the identified physical reference accepted for production. Label it with the project, model, revision, approval date and signatures or digital approval record. Protect it in a sealed or controlled package, and retain equivalent buyer and supplier references where practical.
The golden sample should not stand alone. Pair it with a drawing, specification, material description, finish and colour reference, logo proof, packaging artwork, packed sample, inspection plan and approved deviations. Physical samples change with handling and age; documents explain what matters.
Photograph critical views under consistent conditions. Include the cutting head, lever, pivot, finish, logo, package orientation and carton label as applicable. Photographs help teams identify the product and inspect remote issues, but they do not replace tactile or functional checks.
Define what happens if the golden sample is lost or damaged. A controlled replacement should be compared with the documents and approved by the named parties. Never replace it silently with a later production piece.
Translate the Sample Into a Pre-Production Release
Before production, hold a release review that includes product development, purchasing, quality, packaging and the supplier. Confirm the current revision, approved samples, open conditions, quantity, materials, components, finish, logo, package, inspection plan, carton and shipment assumptions. Record who can approve a change.
Ask for first-piece verification after setup. The first completed pieces should be compared with the released reference for critical dimensions, blade meeting, function, lever movement, finish, logo and packaging.If a result is outside the agreed condition, correct the process and repeat the review before the full run continues.
A custom nail clipper manufacturer should identify which settings and process steps influence the approved result. Buyers do not need every proprietary manufacturing detail, but they need confidence that the supplier knows what must remain stable and how drift is detected.
The release should also address substitutes. If material, coating, handle, file, package board, insert or another component becomes unavailable, the factory should notify the buyer before use. The change request should state the reason, affected quantity, evidence, risk and proposed approval route.
Design In-Process Controls Around the Failure Modes
In-process inspection should occur where a problem can still be corrected. If stamping or forming influences geometry, check the relevant feature before later finishing adds cost. If assembly influences lever movement, inspect during setup and at an agreed frequency. If decoration can drift, compare placement and clarity against a reference during the run.
For each critical feature, write the method, tool or reference, frequency, record and reaction. "Check often" is not a plan. The frequency may depend on process stability, batch size, tooling, risk and prior history. The supplier's quality team should propose a practical route and the buyer should confirm that it protects the important requirements.
Use equipment only where it answers a defined question. A hardness tester, torque device or calliper has value when the product requirement, method and acceptance range are established. A photograph of equipment is not evidence that the sample or lot was tested. Ask for the applicable record and calibration status where relevant.
Nonconforming material should be identified and separated. The process should describe who can decide rework, concession or scrap and when the buyer must approve. Reworked pieces need re-inspection for the affected feature and for any new risk created by the rework.
Use Final Inspection to Verify the Released Product
Final inspection should confirm that the finished, packed goods match the released requirement. Build the checklist from the specification and risk map. Typical areas include product identity, dimensions, function, blade meeting, lever and pivot, burrs, finish, colour, logo, accessories, packaging, print, count and carton marks.
Define defect classes with product-specific examples. A severe unintended sharp edge, incorrect product, missing component or functional cutting failure may require different treatment from a minor visual variation. The buyer and supplier should agree classifications and acceptance rules before the shipment inspection, not after a dispute.
If an AQL-based plan is used, ISO 2859-1 supplies recognized sampling terminology and procedures. It does not choose the buyer's defect classes or acceptance values. The purchase agreement should name the lot definition, inspection level, sampling route and acceptance criteria. Critical safety or legal checks may need different handling from normal sampled appearance review.
Ask for a report that identifies the order, model, revision, lot, sample size, checks, results, defects, photographs and decision. The report should show failures, not only selected passing images. If third-party inspection is required, agree booking responsibility, inspection location, document access and the response to a failed result.
Audit a Factory by Following One Sample Through the Process
When evaluating a nail clipper factory China sourcing candidate, a factory tour becomes more useful when it follows the selected model. Start with the incoming material and components. Ask how they are identified, checked and connected to the work order. Follow forming, applicable heat treatment, grinding or edge work, polishing, deburring, assembly, decoration, inspection, packing and storage as relevant.
At each handoff, ask how the model and revision are identified. Look for work instructions, reference samples, inspection records, nonconforming-product control and change authorization. Do not judge capability only by equipment quantity or cleanliness. The important question is whether the process can reproduce and verify the approved result.
OLIMOR's supplied profile reports a 6,000-square-metre factory, approximately 200 employees and broad hardware and injection capacity. It also lists torque and hardness testing equipment plus in-process and finished-product inspection. A buyer should verify current evidence, scope and relevance to the quoted model during due diligence.
Ask about outsourced or purchased items. A case, package, file, handle material or special finish may involve another supplier. Review incoming control, sample ownership and change notification. A transparent, controlled supply chain is more useful than an unsupported claim that everything is made under one roof.
Handle Sample Failures With Corrective Action, Not Cosmetic Repair
When a sample fails, describe the issue and its conditions before asking for another piece. Identify the sample code, location, operation and expected result. Send photographs or video where helpful. Keep the failed sample if it may support root-cause work.
Ask what caused the failure and what will change in the product, tool, process, instruction or inspection. A polished replacement may hide the immediate defect without addressing recurrence. The corrective action should match the cause and include a verification step.
Decide whether the failure changes documents. A revised dimension, finish route, component, insert or instruction needs a new revision. Mark the earlier sample and document as obsolete. If the change affects cost, MOQ or schedule, update the quotation and plan before approval.
Use lessons from failed samples to improve production controls. If logo position varied because the fixture was unclear, add a controlled setup reference. If the lever rubbed because component fit was inconsistent, define the relationship and inspection. If the package scratched the finish, change the insert or protection and repeat packed-sample review.
Protect Repeat Orders With Change Control
Reorder consistency starts during first approval. Record the components, materials, finishes, tooling, artwork, packaging and inspection references that define the product. Require notice before the supplier changes any item that could affect function, appearance, claims, packaging or compliance.
Ask the supplier to compare each reorder with the current release. Tool wear, a new material lot, coating source, package supplier, barcode, language panel or carton plan may create a need for review. Not every change requires a complete development cycle, but every meaningful change should have a documented decision.
For a wholesale nail clipper supplier program, maintain model and market codes. A distributor may sell the same clipper in different packages, languages or quantities. The code should make the correct product-package combination visible on the purchase order, carton and inspection report.
Keep complaint and return information connected to the product revision and lot. A pattern in lever feel, surface marks or package movement should feed the next production review. Do not publish an unsupported defect-rate claim; use the internal data to improve specifications and controls.
How OLIMOR Supports Sample-to-Production Work
OLIMOR BEAUTY's client-confirmed information describes product development from drawings, physical samples, appearance concepts and structural requirements. The company supports OEM and ODM beauty-tool projects and lists metal stamping, heat treatment, injection moulding, polishing, water deburring, assembly, packaging, in-process inspection and finished-product inspection among its capabilities.
The product range includes nail clippers, manicure sets, cuticle nippers, tweezers, eyelash curlers, beauty scissors, eyebrow razors, nail files and related grooming tools. That range can help a buyer coordinate a collection, while each SKU still receives its own specification and approval logic.
For an OEM nail clipper manufacturer discussion, send the reference, user, destination, dimensions, material and finish preferences, logo, packaging, quantity range and launch needs. Ask which processes apply, what sample stage is proposed and which tests or records can support the selected model.
The company profile confirms ISO and BSCI availability but does not yet provide a public standard number, certificate holder, scope and validity in the materials used for this guide. Buyers should request current copies and match them to the legal entity, site and order. Certification should support due diligence, not replace product approval.
Buyer Sample-Approval Checklist
- Confirm project code, model, revision, sample stage and quantity received.
- Verify that drawings, specifications, artwork and packaging use the same revision.
- Record whether materials, tooling and processes are production-intent.
- Perform the intended cutting task using a documented method.
- Inspect blade meeting, edge condition and any visible offset.
- Review lever movement, pivot stability, opening and accessories.
- Measure the dimensions that affect function, assembly and packaging.
- Confirm material by relevant component and supporting documentation.
- Inspect burrs, touch surfaces, polish, coating, colour and assembly marks.
- Approve logo method, file, position, orientation, clarity and physical result.
- Review the fully packed product, insert, artwork, barcode, count and carton.
- List deviations and conditional approvals with owner and due date.
- Identify the golden sample and protect buyer and supplier references.
- Approve first-piece, in-process and final inspection requirements.
- Define change notification and repeat-order review.
Frequently Asked Questions
What is a golden sample for an OEM nail clipper?
It is an identified, approved physical reference connected to the current drawing, material, finish, logo, packaging and acceptance record. It helps production and inspection interpret the requirement, but it should not replace written specifications and methods.
How many sample rounds are needed?
The number depends on development scope and the quality of decisions. A simple private-label project may need fewer rounds than a new structural design. Plan rounds by purpose: concept, engineering, appearance, packaging and pre-production. Do not promise a universal number.
What should be tested on the clipper?
Review the intended cutting task, blade meeting, lever movement, pivot, dimensions, burrs, finish, decoration, package fit, identity and any model-specific material or performance requirement. Agree methods and acceptance criteria with the supplier.
Does a visually approved sample guarantee bulk quality?
No. It proves one sample met the visual review. The factory still needs a controlled release, first-piece check, in-process controls, final inspection and change management. The buyer should understand how the sample becomes production instructions.
How should I approve custom logo nail clippers?
Use controlled artwork and inspect the mark on the final product finish. Check method, size, position, orientation, clarity, contrast and handling. Then review the packed sample for rubbing or obstruction and keep the proof with the current product revision.
Can a sample prove the material?
Appearance alone cannot prove material. Ask for a component-level material statement and the evidence required by your buyer policy or destination market. Ensure quotation, packaging and listings use the same approved wording.
What if MOQ changes after sample approval?
Ask which component, finish, package or process creates the quantity threshold. If the approved route no longer fits the launch quantity, compare controlled alternatives and approve any change through a new revision. Do not silently substitute the product.
Should buyers use AQL for final inspection?
An AQL-based plan can be useful for lot sampling when defect classes, inspection level and acceptance values are defined. ISO 2859-1 provides recognized procedures, but the buyer and supplier must choose project-specific criteria and handle critical risks appropriately.
What is the difference between OEM, ODM and private label samples?
An OEM sample usually tests buyer-defined requirements, an ODM sample adapts a supplier-led platform or design direction, and a private-label sample often confirms an existing model with branding and packaging. Actual development scope should be written rather than inferred from the label.
Can a sample approval cover a whole product family?
Only when the relationship is explicitly defined and verified. Different sizes, edge forms, handles, finishes or packages can create different risks. Approve each model or document which characteristics are shared and which need separate checks.
Approve a System, Not a Showcase Piece
The most useful sample approval tells both organizations how to reproduce a result. It identifies the item, tests its intended function, confirms the product and package, records the open issues and links the physical reference to production and inspection documents. It asks how the factory will detect drift and how changes will be approved.
This approach protects buyers comparing an OEM nail clipper manufacturer, a custom nail clipper manufacturer, a private label nail clippers program or an ODM nail clipper manufacturer route. It also gives the selected supplier a fair, stable target.
OLIMOR can discuss existing nail clipper directions and custom development based on a drawing, sample or structured brief. Include your intended user, market, configuration, material and finish preferences, logo, packaging, quantity range, required evidence and launch schedule. The team can then propose a sample path and clarify what must be confirmed before bulk production.
Keep a Buyer-Side Retention and Review Record
The buyer should retain enough evidence to review the first order and later replenishment without relying on email memory. Store the approved sample in a clean, dry and protected location, label it with the current project and revision, and restrict casual handling. Keep its photographs, drawing, specification, material statement, logo proof, packaging artwork, inspection plan and approval record in the same project file.
When bulk goods arrive, select retention pieces according to the buyer's internal plan and record their order, lot and receipt date. Compare them with the released reference for the most important functional and appearance points. This receiving review is not a substitute for supplier quality control or shipment inspection. It gives the brand its own traceable evidence if a market complaint, package question or reorder discussion appears later.
Assign ownership. Product development may own the golden sample, quality may own inspection records, and packaging may own artwork. One project index should show where the current items are held and which revision is active. If the team replaces a file or sample, mark the earlier version obsolete without destroying evidence needed for traceability.
Before a reorder, bring purchasing, quality and product teams back to this record. Confirm whether the intended market, claim, package, barcode, component, material, finish or supplier process has changed. A short documented review prevents a familiar SKU from bypassing the controls used for the original launch. It also lets the buyer ask focused questions rather than requesting a completely new sample when nothing material has changed.
Tag: