

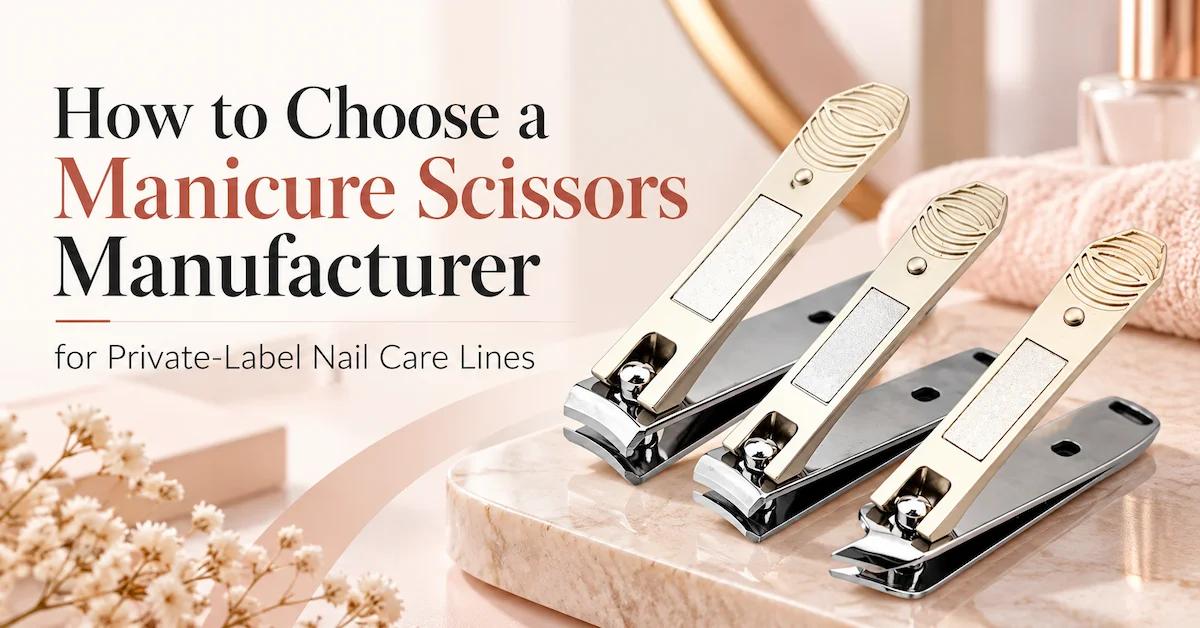
Introduction: a small cutting tool can create a large retail problem
A manicure scissor occupies little space in a beauty aisle, but its performance is exposed immediately. A customer opens the tool, places the blades around a nail edge or fine piece of cuticle, and expects a controlled cut. If the blades push material aside, the pivot catches, the tips obscure the working area, or the loops pinch the fingers, the brand name on the handle receives the complaint. The customer does not separate blade grinding, assembly, coating, packaging, and purchasing decisions. The customer sees one product.
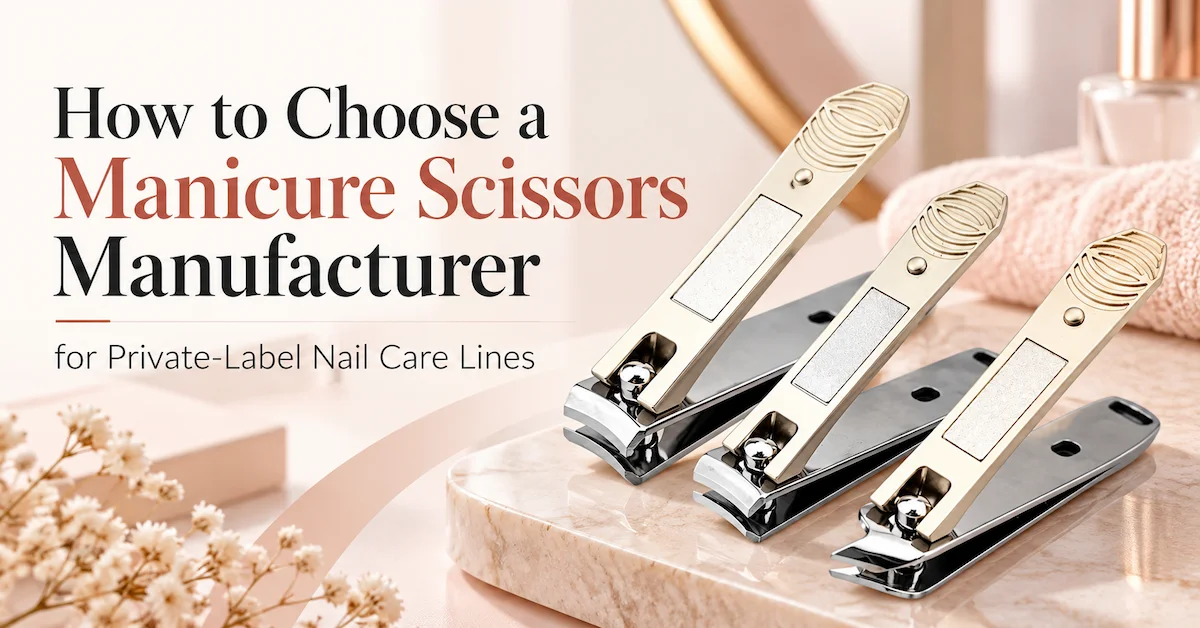
This creates a specific sourcing challenge for beauty brands, importers, distributors, subscription-box teams, pharmacy chains, and private-label nail-care programs. The supplier must do more than offer a familiar shape and a low unit price. It must translate the intended cutting task into a repeatable configuration, show how samples will be evaluated, protect the approved tool through decoration and packing, and control revisions when the order is repeated.
The phrase manicure scissors manufacturer can describe very different supply arrangements. One business may make selected metal components and assemble the tool. Another may coordinate specialist processes, branding, and packaging. A third may supply a standard platform with private-label decoration. The practical question is not whether a company uses the word manufacturer. It is whether the company can explain responsibility for the exact SKU being quoted and provide evidence at the points where product risk changes.
This guide is written for commercial investigation and RFQ intent. It covers what buyers should define before contacting a supplier, how to compare nail and cuticle scissor designs, what to check in a sample, which questions belong in the quotation, and how to prevent a successful first order from drifting on replenishment. OLIMOR BEAUTY supports nail-care and beauty-tool projects from Yangjiang, Guangdong, China, including development from drawings, physical samples, appearance concepts, and structural requirements. Its confirmed product range includes beauty scissors, manicure sets, and broader nail-care tools.
What is a manicure scissors manufacturer?
A manicure scissors manufacturer develops, produces, assembles, inspects, brands, or packs compact scissors intended for nail-care and related grooming tasks. The product normally depends on the interaction of two blades, a pivot, tips, handles, and finger loops. Depending on the selected design, additional components may include a screw, rivet, spring element, plastic insert, protective cap, pouch, tray, or retail package.
The manufacturing route varies by model. Metal forming, heat treatment, grinding, polishing, deburring, pivot assembly, adjustment, surface finishing, logo application, inspection, and packaging may be relevant. A responsible supplier should identify which processes apply to the quoted SKU and which are completed internally or managed through approved partners. Buyers should not assume that every capability listed on a factory profile applies to every scissor.
OLIMOR BEAUTY reports that its company was founded in 2011 and its factory in 2017. It operates in Yangjiang, Guangdong, China, with approximately 200 employees, and supports OEM and ODM beauty-tool projects. Confirmed available capabilities include metal stamping, heat treatment, injection moulding, polishing, water deburring, assembly, and packaging, together with in-process inspection and finished outgoing inspection. These facts describe company capabilities; they do not replace a model-specific process map, specification, or test plan.
1. Start with the cutting task, not the catalogue picture
A buying brief should name what the scissors will cut, where the cut occurs, who will use the tool, how often it will be used, and how it will be stored. “Manicure scissors” alone is too broad. Fingernail trimming, toenail edge correction, loose cuticle removal, hangnail trimming, eyebrow grooming, and general household cutting require different geometry and risk decisions. A supplier cannot make a meaningful recommendation when the task remains vague.
Write a one-sentence use statement before requesting samples. For example: “Compact curved nail scissors for an adult travel manicure set, intended for light fingernail edge trimming and stored in a fitted case.” Another brief might state: “Fine pointed cuticle scissors for trained salon users, packed as an individual professional retail SKU.” These statements guide blade thickness, curve, tip access, handle size, protective packaging, public claims, and sample evaluation.
Separate the primary task from secondary possibilities. A buyer may want one scissor that trims nail edges, cuticles, eyebrow hair, thread, and packaging. Combining unrelated jobs can produce a compromise that performs none of them well and creates confusing customer instructions. If the range needs two jobs, consider two clearly differentiated models. The extra SKU may be easier to communicate and control than a universal claim that is difficult to support.
The target market matters as well. Retail shelf presentation, professional salon use, a hotel amenity kit, an e-commerce manicure set, and a men's grooming line place different weight on appearance, handling, package size, instructions, and reorder quantities. State the market and channel in the RFQ so the manufacturer can discuss a suitable platform rather than simply sending the cheapest available sample.
| Intended application | Design questions | Sample evidence to request | Common purchasing risk |
|---|---|---|---|
| Fingernail edge trimming | Blade curve, usable cutting length, tip control, handle leverage | Cutting-task sample review using the same defined material and method | Selecting by appearance without verifying blade meeting |
| Cuticle or hangnail detail | Tip fineness, visibility, point protection, pivot control | Close-up inspection, controlled handling review, packed-tip check | Overly broad safety or professional-performance claims |
| Travel manicure set | Compact size, storage position, cap or case clearance | Complete set sample with final insert and case | Tool movement or blade contact inside the pack |
| Professional nail-care retail | Repeated hand movement, cleaning instructions, replacement consistency | Multiple coded samples and a repeatable acceptance record | Approving one unusually good sample instead of the production method |
2. Nail scissors and cuticle scissors are not interchangeable labels
Nail scissors generally use a blade profile and body that support controlled trimming at the nail edge. Cuticle scissors usually emphasize fine access around small areas of non-living cuticle or loose skin. Their narrower tips and delicate geometry may improve visibility for the intended task, but they also increase protection and handling requirements. The exact design should be assessed rather than inferred from the product name.
Ask the supplier to identify the proposed model's primary task, blade profile, tip type, and public product name. A visually similar scissor may be described as nail, cuticle, eyebrow, baby, or general beauty scissors across different catalogues. Inconsistent naming can cause the wrong item to be sampled, photographed, quoted, or packed. The released drawing and model code should therefore control the product identity.
For a mixed manicure kit, map every tool to one job. If both nail scissors and a cuticle nipper are present, explain why each tool belongs in the set. If scissors are the only cutting tool, avoid claiming that they replace every specialist item. A clear role makes packaging copy more accurate and helps buyers evaluate whether the kit composition supports its price and target customer.
| Comparison point | Nail scissors direction | Cuticle scissors direction | Buyer decision |
|---|---|---|---|
| Primary use | Controlled trimming at a nail edge | Fine detail around loose cuticle or hangnail areas | Approve one primary task and accurate public wording |
| Blade body | May require more support for the intended nail task | Often visually finer for access | Do not select thickness from a photograph alone |
| Tip style | Pointed or rounded options may be considered | Fine pointed tips are common for detail | Balance access, visibility, user group, and protection |
| Packaging | Protect blades and prevent opening in transit | Tip protection is especially important | Approve the final tool inside the final package |
3. Choose straight or curved blades by the working angle
A curved blade can follow an edge and may give the user a useful approach angle. A straight blade can provide a direct visual reference and a different cutting path. Neither is automatically better. The correct choice depends on the task, tool size, tip geometry, hand position, and user expectations.
Compare candidate samples in the orientation in which customers will hold them. Observe whether the user can see the cut line, whether the wrist must rotate awkwardly, and whether the curve helps or hides the working area. Product photographs laid flat on a white background do not reveal these details. Record the review position so another team can repeat it.
Blade length is also functional. A longer edge may offer more cutting area, while a shorter edge may feel easier to control in detail work. The useful cutting region is not necessarily the full visible blade. Ask where the manufacturer expects cutting contact to begin and how it should travel as the handles close. Then verify that expectation on more than one coded sample.
Any change to curvature, blade length, or tip profile should trigger a review of the protective cap, insert, box, and product images. A cap designed around a straight prototype can press on a curved production blade. An insert developed before the geometry is frozen can allow the tips to strike the package during transport.
4. Select pointed or rounded tips for the user and risk context
Pointed tips can improve access and visual precision in fine work, but the points demand controlled handling and suitable protection. Rounded tips change the approach and may be preferred for particular users or kit concepts. A rounded appearance does not by itself prove that a product is safe for children, babies, or any specific population. Such claims need product-specific design review, evidence, instructions, and market assessment.
Inspect the tips both open and closed. Check whether they remain in the intended plane, whether one tip extends beyond the other, whether the finish is continuous, and whether a burr or sharp unintended edge can be felt around the outside. Look at several samples under consistent lighting and magnification appropriate to the defect being evaluated.
Tip alignment should be defined visually or dimensionally for the model. A generic word such as “precision” cannot replace an acceptance method. If the supplier uses a fixture or reference sample, ask to see how the comparison is made. If your project needs a numerical tolerance, agree the measurement points, equipment, sample condition, and permitted variation before production.
5. Watch how the blades meet through the complete closing movement
Two blades can look aligned when fully closed and still cut inconsistently. Open the scissors, close them slowly, and observe where contact begins and how it moves. Note any gap, crossing, sudden resistance, gritty movement, or section where the test material folds rather than separates. Repeat the same method on several coded samples. One hand-adjusted presentation sample should not define the expected consistency of an order.
Use a test material relevant to the approved task. A paper demonstration may show that an edge can cut paper, but it does not automatically establish performance on nails or fine cuticle. Conversely, a nail-trimming check does not prove performance on fabric, wire, or packaging. The acceptance method should name the material, sample preparation, cutting region, tool position, and expected result.
When feedback is needed, avoid saying only “not sharp.” Record whether the material slipped, folded, cracked, tore, or required repeated pressure. State the model, sample code, blade region, pivot feel, and test condition. This separates possible edge, blade-meeting, pivot, geometry, and task-fit issues and gives the manufacturer useful information for correction.
Ask what changes after surface finishing and decoration. A coating, polishing step, cleaning operation, or logo process can affect contact surfaces or create residues if poorly controlled. The manufacturer should explain when final blade adjustment and cutting checks occur for the selected model. Buyers should verify that the tested sample represents the intended production route, not an unfinished tool that will later change.
6. Treat the pivot as a controlled functional setting
The pivot maintains the relationship between the blades. If it is too loose, the blades may separate, wobble, or lose controlled contact. If it is too tight, the handles may require excessive force, the movement may feel uneven, or users may twist the tool. The suitable setting depends on blade geometry, tool size, task, assembly design, and intended user.
Move each sample through its normal travel using the same grip. Note free play at the tips, initial resistance, smoothness, stick points, sound, and whether the setting changes after repeated openings. Subjective descriptions such as light, firm, smooth, or controlled are useful only when connected to an approved reference and consistent review method.
If a numerical torque or force is important, define how it will be measured. The instrument, fixture, point of force, opening angle, direction, speed, conditioning, and acceptance range all affect the result. Do not copy a torque value from a nail clipper, beauty scissor, or unrelated model. Confirm a model-specific method with the technical team.
Identify whether the pivot is screwed, riveted, pinned, or constructed another way. Ask whether it is intended to be user-adjustable and how it is secured. Do not promise adjustability or serviceability unless the design and instructions support it. For retail projects, examine whether the pivot creates catch points or contacts the package.
7. Review finger loops and handling with the target user in mind
Finger-loop dimensions, internal edges, spacing, surface finish, and handle angle influence control. A compact scissor may fit a travel case but feel cramped to some adult users. A decorative handle may photograph well yet hide the tips during use. A plastic insert may change comfort and colour presentation while introducing additional material, moulding, assembly, and durability questions.
Have several relevant reviewers handle coded samples. Ask them to perform the approved movement, not simply hold the tool. Record finger pressure, stability, visibility, reach, and whether the grip shifts. Keep subjective feedback separate from dimensions. A group preference can guide the range, but it does not justify a universal ergonomic claim.
Pay attention to the outer edges of loops and handles. Polishing and deburring should leave the intended touch surfaces free from unwanted sharpness. If a coating or decoration is added, review its effect on grip and edge feel. If the tool sits beside other metal items in a manicure case, check that the handles do not rub and mark neighbouring products.
8. Specify materials by component instead of using one broad label
“Stainless steel manicure scissors” is a useful category description, but it does not identify the exact alloy, hardness, heat-treatment condition, corrosion performance, or permitted cleaning method. Ask the supplier to state the material for the blades, pivot hardware, handle, plastic inserts, protective cap, and packaging components separately where relevant.
If an exact steel grade is commercially or legally important, request supporting documentation linked to the model or material batch. Do not assume that a grade mentioned for one product applies across a category. Similarly, hardness is meaningful only when the method, test location, conditioning, and acceptance range are defined. This article deliberately avoids publishing an unsupported grade or hardness figure.
Finish is a separate specification. Polished, satin, coloured, patterned, plated, coated, or decorated surfaces create different appearance, friction, logo, care, and packaging considerations. Approve the final finish under lighting that reflects the sales environment. Compare colour, gloss, texture, logo contrast, visible marks, residues, and contact with the insert.
Care instructions must match the actual material and finish. Do not copy claims such as sterilizable, medical grade, corrosion proof, or chemical resistant from another tool. If destination-market buyers request special performance, agree the test method and evidence required for the exact SKU before printing the claim.
9. Decide whether OEM, ODM, or private label fits the project
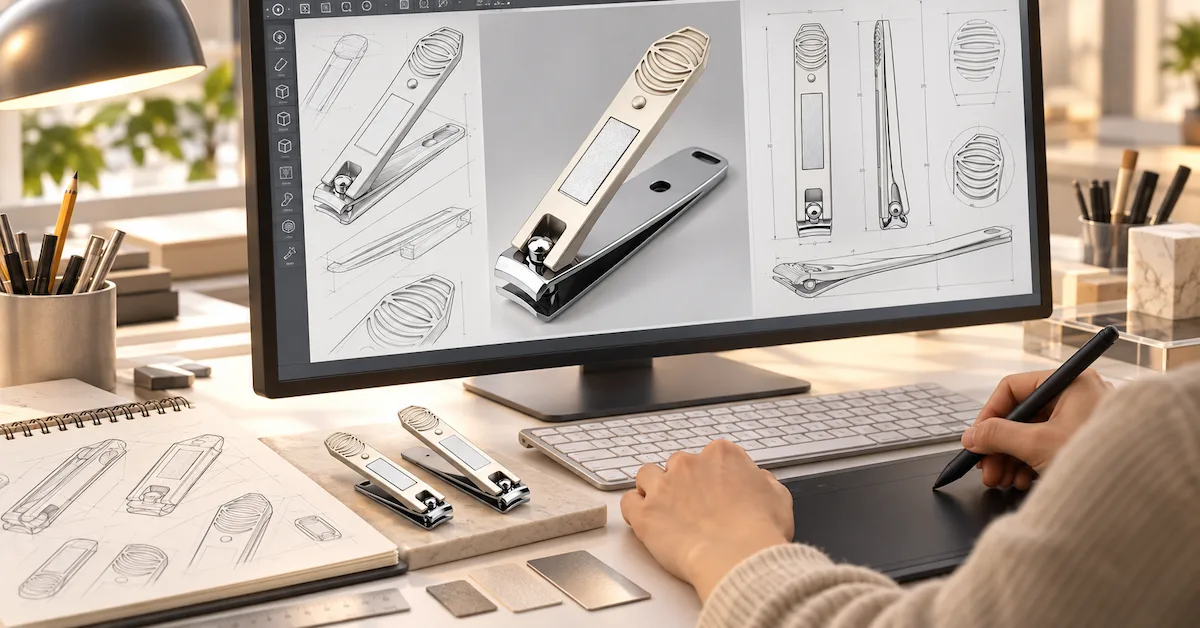
An OEM route usually begins with stronger buyer-controlled input: a drawing, physical reference, dimensional envelope, blade concept, handle requirement, target performance, or complete specification. The buyer should mark which features are fixed and which may be adjusted for manufacturability. Changes to blade geometry, pivot design, loop shape, or packaging may affect tooling, sampling, inspection, cost, and timing.
An ODM route begins with a supplier platform that is adapted to the project's user, finish, decoration, and pack. The buyer should still test function and identify the released model. Existing does not mean automatically suitable. A standard platform may reduce development work, but a new coating or insert can still change the finished product.
Private label focuses on converting an approved platform into a brand-ready SKU through logo, colour, surface treatment, protective component, pouch, card, tray, box, instructions, and carton marks. Approve the actual branded and packed sample. A plain metal sample does not approve a coloured finish; a digital artwork proof does not approve logo legibility on curved steel; and a product sample without the insert does not approve shipping protection.
| Development route | Typical starting input | Main buyer responsibility | Important approval gate |
|---|---|---|---|
| OEM manicure scissors | Drawing, sample, dimensions, structural or performance requirements | Identify fixed features, acceptable changes, and ownership of files | Functional prototype and released specification |
| ODM manicure scissors | Target user, task, market, price position, and supplier platform | Verify that the existing model fits the real application | Coded platform sample with model-specific review |
| Private label manicure scissors | Approved platform plus brand, finish, and packaging direction | Control artwork, claims, pack contents, and channel presentation | Final decorated and packed golden sample |
10. Use a sample ladder instead of expecting one sample to answer everything
A form sample can answer questions about overall size, blade curve, tip style, loops, and package envelope. A functional sample can answer blade meeting, cutting action, pivot movement, and hand position. A finish sample can answer colour, texture, gloss, and logo contrast. A packed sample can answer protection, identity, printed copy, item count, and retail presentation.
Label each sample with a model, revision, date, and purpose. Write what the sample approves and what remains provisional. For example, a functional sample may use a temporary finish, while a colour sample may use a non-functional display piece. Without that note, a buyer can accidentally approve a feature that was never evaluated.
Use coded samples when comparing suppliers or revisions. This helps reviewers focus on cutting and handling rather than a preferred logo or salesperson. Apply one method, collect observations independently where practical, and retain photographs or notes. A short decision record is more valuable than a message saying “sample OK.”
The final golden sample should represent the saleable configuration. Connect it to the current specification, model code, approved material wording, finish master, logo file, packaging artwork, inspection plan, and accepted deviations. Protect it from casual use or adjustment. If a significant component changes, issue a new revision rather than silently modifying the reference.
11. Ask the factory to map applicable production and quality controls
OLIMOR BEAUTY lists metal stamping, heat treatment, injection moulding, polishing, water deburring, assembly, and packaging among its available capabilities. The company also confirms in-process inspection and finished outgoing inspection. A buyer should ask which of these steps apply to the selected manicure scissor, which work is internal, which is partner-managed, and where product acceptance occurs.
Start quality planning with visible failure modes. Examples may include a blade gap, inconsistent cutting, uneven tip meeting, rough pivot movement, unintended sharp edges outside the cutting zone, surface scratches, colour variation, incorrect logo orientation, wrong protector, missing set component, or mixed model code. Define each defect with photographs, a reference, or a measurable method where possible.
Place checks where correction is still practical. Review formed or ground components before costly decoration. Confirm the first assembled piece before the run continues. Use in-process checks to detect drift. Inspect the final functional and visual tool after finishing. Then verify the complete packed unit so a correct scissor is not paired with the wrong cap, insert, label, or instruction.
Ask how nonconforming work is identified, segregated, reviewed, corrected, and rechecked. Sorting can protect one shipment but does not explain why the defect occurred. For repeat programs, corrective action and change control are more important than a promise that problems never happen.
| Control stage | Questions for the manicure scissors manufacturer | Suggested evidence |
|---|---|---|
| Material and components | Do the blade, pivot, handles, inserts, and protector match the released specification? | Supplier record, material statement, component identity, incoming check |
| First-piece assembly | Do blade meeting, tip position, pivot movement, loops, and finish match the reference? | First-piece approval linked to model and revision |
| In-process review | Are functional feel and appearance staying consistent through the run? | Patrol record with frequency and disposition |
| Final tool inspection | Does the completed scissor meet cutting, handling, identity, and visual requirements? | Finished-product inspection report |
| Packed-unit release | Are the model, protector, artwork, instructions, set components, and carton marks correct? | Pack approval and outgoing inspection record |
12. Packaging is part of cutting-tool quality
A scissor can pass final inspection and still reach the customer damaged if the package allows the tips to hit a carton wall, the blades to open, or the finish to rub against another tool. Packaging should be developed around the approved geometry, not selected from a generic size table before the blade and handle are frozen.
Test the actual tool in the actual protector, pouch, blister, tray, box, or manicure-set insert. Remove and replace it several times. Check tip clearance, blade restraint, pivot pressure, finish contact, logo visibility, opening direction, and whether the customer can return the tool to storage without force.
For a private-label manicure set, inspect the full component map. Each item should have a defined position and description. Scissors should not move into a nail clipper, file, nipper, or tweezer during transit. If the case is compact, confirm that closing it does not place load on the pivot or tips.
Printed content should match the released model. Confirm product name, intended use, material wording, finish, item count, warnings, care instructions, country information, barcode, languages, and importer details as required by the project. A copy error can create a market problem even when the physical tool is correct.
13. Compare suppliers using one shared specification and scorecard
Send each candidate the same brief. Include the user, task, target market, blade and tip direction, handle notes, material statement, finish, logo, pack, quantity range, required evidence, inspection expectations, destination, and desired launch window. Ask each supplier to mark assumptions and open items. This prevents one quotation from silently using a plain standard product while another includes a custom finish and retail box.
Score product fit, technical communication, sample discipline, process ownership, quality controls, packaging capability, document accuracy, change management, export execution, and total commercial scope. Weight the criteria according to your channel. A pharmacy retail program may prioritize traceability and copy control; a salon distributor may prioritize consistent pivot feel and repeat-order handling.
Do not use price as the first filter when the compared configurations are different. Normalize the quotation or request revisions. A low figure may exclude branding, protector, inner pack, inspection, development charges, or export assumptions. A complete quotation may initially appear higher while giving the buyer fewer later surprises.
| Scorecard area | Evidence to review | Buyer question |
|---|---|---|
| Application fit | Coded samples reviewed for the defined cutting task | Does the model solve the primary job without unsupported claims? |
| Manufacturing ownership | Process map and internal or partner responsibility | Who controls the features that affect blade, pivot, finish, and pack? |
| Quality system | First-piece, in-process, final, and packed-unit checks | How is the approved sample translated into order acceptance? |
| Development control | Revision log, drawings, artwork, golden sample | How are changes communicated and approved? |
| Commercial clarity | Configuration-specific quote and assumptions | Are MOQ, fees, packaging, timing, and trade terms tied to one SKU? |
14. Build an RFQ that produces comparable quotations
A strong RFQ begins with the project context and then defines the product. State the brand or buyer type, destination market, sales channel, intended user, primary task, and target launch. Add the preferred model or reference, blade profile, tip type, overall size envelope, handle direction, material request, finish, colour, branding, and packaging.
Attach controlled files. Use vector logo artwork, packaging dielines where available, reference photographs, drawings, and a revision list. Mark dimensions or features that are critical. If a physical sample is supplied, label what should be copied, what may change, and whether the sample is returned. Protect confidential work with the appropriate commercial agreement.
Request the supplier's proposed material statement, process route, sample stages, inspection approach, development charges, tooling ownership, packing configuration, carton information, MOQ, unit price bands, trade term, payment terms, schedule assumptions, document support, and quotation validity. Ask which buyer approval starts each timing stage.
MOQ, sampling time, and production schedule should be confirmed for the selected model, customization, packaging, and quantity. There is no responsible universal number for all manicure scissors. A standard unbranded platform, a coloured OEM version, and a new structural design can have different material, setup, tooling, decoration, and packaging conditions.
15. Understand the real drivers behind MOQ, price, and timing
MOQ can be influenced by the base model, material purchase, component batching, finish or coating batch, logo method, plastic colour, insert production, printed packaging, and the number of SKUs in an order. Ask whether the stated minimum applies per model, per finish, per colour, per logo, per package, or across a combined order.
Price should be attached to a written configuration. Blade geometry, tool size, pivot construction, handle components, finish, decoration, packaging, inspection scope, quantity, trade term, and destination assumptions can all affect the offer. Separate one-time development, artwork, tooling, plate, or sample charges from recurring unit cost. This helps the buyer understand reorder economics.
Timing should be shown as stages rather than one unsupported promise. Feasibility review, tooling where applicable, prototype, functional approval, finish proof, packaging proof, material preparation, production, inspection, packing, and dispatch may each require buyer decisions. Identify which stages can overlap and what happens if artwork or geometry changes after approval.
When comparing suppliers, use the same currency, quantity, configuration, pack, trade term, and destination assumptions. Record whether samples, testing, inspection reports, spare components, and export documents are included. Commercial clarity is part of quality because an unclear quote often produces uncontrolled substitutions later.
16. Control claims and destination-market information
Product copy should describe what has been confirmed for the released SKU. Use the correct model name, intended task, blade style, tip direction, material wording, finish, dimensions, weight, package contents, and care instructions. Do not generalize a specification from one beauty scissor to every manicure scissor in a range.
A company certification does not automatically certify each tool, material, claim, or destination. Where certificates or test reports matter, verify the legal holder, factory site, scope, validity, product identity, method, and result. Avoid publishing medical grade, FDA approved, CE certified, sterile, sterilizable, corrosion proof, or child safe without evidence and qualified market review for the exact product and wording.
The buyer remains responsible for determining applicable legal, labelling, safety, packaging, and importer obligations in the destination market with qualified advisers. The manufacturer's documents can support that review, but a general factory profile is not a substitute for product-specific compliance work.
17. Use a pilot order to test the whole saleable SKU
A pilot order should test more than blade performance. Give packed units to people in purchasing, quality, merchandising, warehouse, and customer service. Ask them to identify the model, finish, logo, barcode, pack contents, instructions, and carton reference without relying on factory messages. Any confusion may reveal an identity or copy problem.
Observe unpacking and storage. Do the tips remain protected? Does the finish rub against the insert? Can the scissor be removed without opening unexpectedly? Does it return to the case easily? Does the customer-facing description match the approved use? Does the outer carton keep inner packs stable?
Record pilot findings by revision. If the protector needs clearance, update the pack drawing. If the logo moves, update the artwork. If cutting feedback changes the pivot setting, update the functional reference and method. If public wording is too broad, correct it before launch. Close every approved change into the release package.
18. Protect repeat orders from silent substitutions and drift
A successful first shipment does not guarantee an identical second shipment. Retain the current drawing, specification, model code, golden sample, blade and pivot notes, material statement, finish reference, logo artwork, packaging files, inspection plan, accepted deviations, and change history. Ask the supplier to identify any proposed change before replenishment begins.
Changes can include material source, component thickness, forming tool, heat treatment, grinding method, pivot hardware, plastic insert, surface finish, decoration, cleaning, protective cap, packaging supplier, or carton arrangement. Not every change requires complete redevelopment, but each should receive an impact assessment.
Define which changes trigger a new functional sample, finish proof, packaging test, first-piece approval, or document review. Keep the public product page synchronized with the released SKU. Customers, purchasing teams, search engines, and AI answer systems should all encounter the same product identity.
19. A practical buyer checklist before supplier approval
- Write one primary cutting-task statement and identify the target user, channel, and market.
- Decide whether the project needs nail scissors, cuticle scissors, or two differentiated tools.
- Compare straight and curved blades in the actual working position.
- Select pointed or rounded tips based on access, visibility, user context, and protection.
- Review blade meeting and cutting action with a repeatable, task-relevant method.
- Check pivot movement, play, resistance, and consistency across several coded samples.
- Assess finger-loop comfort, outer edges, grip stability, and working-area visibility.
- Specify material and finish by component; request evidence where claims depend on them.
- Choose OEM, ODM, or private label and document ownership of drawings and artwork.
- Use sample stages and approve a final decorated, packed golden sample.
- Map applicable production steps and quality checks for the selected SKU.
- Test tip and blade protection in the final retail or set packaging.
- Compare suppliers using one shared brief and a weighted evidence-based scorecard.
- Tie MOQ, price, fees, schedule, and trade terms to the complete configuration.
- Retain a controlled release package and require approval before repeat-order changes.
Frequently Asked Questions
How do I choose a manicure scissors manufacturer?
Define the cutting task and user first. Then compare coded samples for blade profile, tip control, blade meeting, cutting action, pivot movement, loop comfort, materials, finish, logo, and packaging. Review process ownership, inspection records, quotation clarity, and repeat-order change control before approving a supplier.
What is the difference between nail scissors and cuticle scissors?
Nail scissors are generally configured for controlled trimming at the nail edge, while cuticle scissors emphasize fine access around small cuticle or hangnail areas. Product names vary, so buyers should verify the exact blade, tip, task, and approved public wording for each model.
Are curved manicure scissors better than straight scissors?
Not universally. A curved blade may follow an edge for some tasks, while a straight blade can provide another visual reference. Compare both in the intended hand position using the actual cutting task. Geometry, blade meeting, pivot control, and user preference all affect the result.
Should manicure scissors have pointed or rounded tips?
The choice depends on the user, task, access requirement, handling context, and packaging. Pointed tips can support fine access but need careful use and protection. Rounded tips change the approach but do not automatically prove suitability for children or another special population.
What should buyers inspect on a scissors sample?
Inspect blade meeting through the full closing movement, cutting behaviour on the approved material, tip position, pivot smoothness, free play, loop edges, grip, finish, logo, dimensions, product identity, and protection inside the final package. Review several coded pieces rather than one display sample.
What is the difference between OEM and ODM manicure scissors?
OEM usually starts with more buyer-controlled design or performance input. ODM usually starts with an existing supplier platform adapted to the project. Both routes need model-specific samples, a released specification, approved artwork, quality criteria, and a final packed reference.
Can a supplier add a custom logo and retail packaging?
Private-label projects may support logo, finish, colour, cap, pouch, insert, card, box, instructions, and carton marks, subject to the selected model and process. Buyers should approve physical decoration and the complete packed sample because digital artwork alone cannot confirm final appearance or protection.
What is the MOQ for custom manicure scissors?
MOQ depends on the base model, material, geometry, finish, logo process, plastic components, packaging, number of SKUs, and order configuration. Request a model-specific minimum and ask whether it applies per colour, finish, logo, package, or combined order.
How much do private-label manicure scissors cost?
Cost depends on blade and pivot design, material, finish, handle components, development work, branding, packaging, inspection, quantity, and trade terms. Compare the same written configuration and separate one-time development or tooling charges from recurring unit price.
How long does a custom manicure scissors project take?
Timing depends on feasibility review, tooling if required, sample rounds, buyer approvals, materials, finishing, branding, packaging, production, inspection, and shipment planning. Ask for a model-specific schedule with clear milestone start events rather than relying on a universal lead-time claim.
How should manicure scissors be protected during shipping?
Use a cap, sleeve, pouch, tray, insert, or case that fits the actual blade and tip geometry. Test opening restraint, tip clearance, finish contact, removal, replacement, inner-pack stability, and carton support with the final production-intent tool.
What information should an RFQ include?
Include target market, channel, user, cutting task, reference model or drawing, blade and tip preference, handle notes, material request, finish, logo, pack, quantity range, launch window, destination, required evidence, inspection expectations, and open decisions. Attach controlled files and revision codes.
How can buyers keep repeat orders consistent?
Retain the released specification, golden sample, material and finish references, cutting method, artwork, packaging files, inspection plan, deviations, and change history. Require the supplier to disclose proposed changes and define when re-sampling or first-piece approval is necessary.
Final decision: approve a controlled product, not a sales adjective
The most useful manufacturer comparison does not ask which supplier is the “best.” It asks which supplier can translate a defined nail-care task into a documented, sampled, inspected, packed, and repeatable SKU. That means choosing the right blade and tip, observing blade contact, controlling the pivot, confirming component materials, testing the handle, protecting the tool in its package, and tying the commercial offer to the exact approved configuration.
OLIMOR BEAUTY supports OEM and ODM beauty-tool development from drawings, samples, appearance concepts, and structural requirements. Buyers can review the company background on the About OLIMOR BEAUTY page, compare relevant nail-care tool categories, and submit a task-based RFQ through the contact page. For a useful first review, include the intended cut, reference product, target market, finish, logo, packaging direction, quantity range, and destination.
Tag:
Related articles
- Beauty Tools Manufacturing
- ODM Beauty Tools Solutions
How Can Buyers Move a Facial Tool from Brief to Repeatable Supply with an ODM Beauty Tools Manufacturer?
- Beauty Tools Manufacturing
- OEM & Private Label Solutions
How to Source Custom Logo Beauty Tools Without Losing Brand Consistency
- Beauty Tools Manufacturing
- OEM & Private Label Solutions