

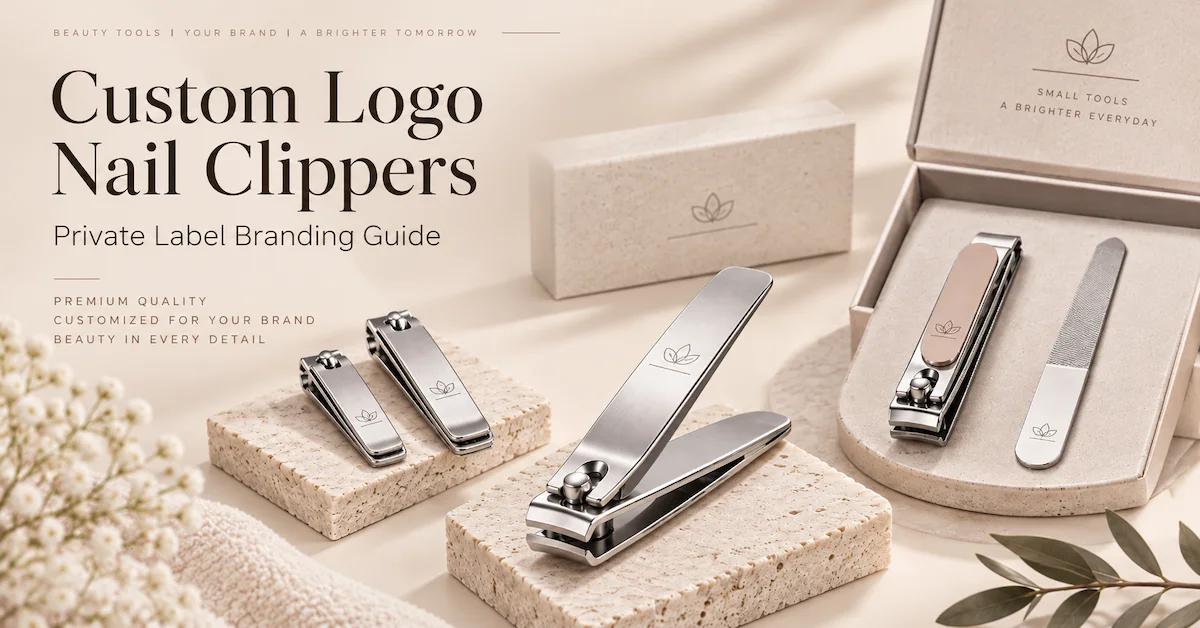
Custom logo nail clippers work best when the manufacturer treats branding as part of the product specification, not as artwork added just before shipment. For a dependable private-label program, a buyer needs to approve the clipper model, working mechanism, surface finish, logo method and position, retail package, and inspection reference as one coordinated product. Only then can a supplier quote, sample, manufacture, and repeat the same result with less ambiguity.
That distinction matters because a nail clipper offers very little branding space. Its most visible surface may be curved, reflective, textured, or moving under the user's thumb. A delicate logo can disappear into polished steel; a printed mark may be exposed to friction; a large design can interfere with the grip or look crowded in a small retail photograph. Even excellent decoration cannot compensate for a clipper whose cutting edges fail to meet accurately.
This guide is for product managers, private-label beauty brands, importers, retail buyers, e-commerce sellers, promotional-product teams, and distributors preparing actual purchase orders. It explains how to make the decisions that affect the finished product—not just how to place an image on metal. Buyers can start by reviewing OLIMOR's nail clipper range and identifying a model close to their target market before discussing customization.
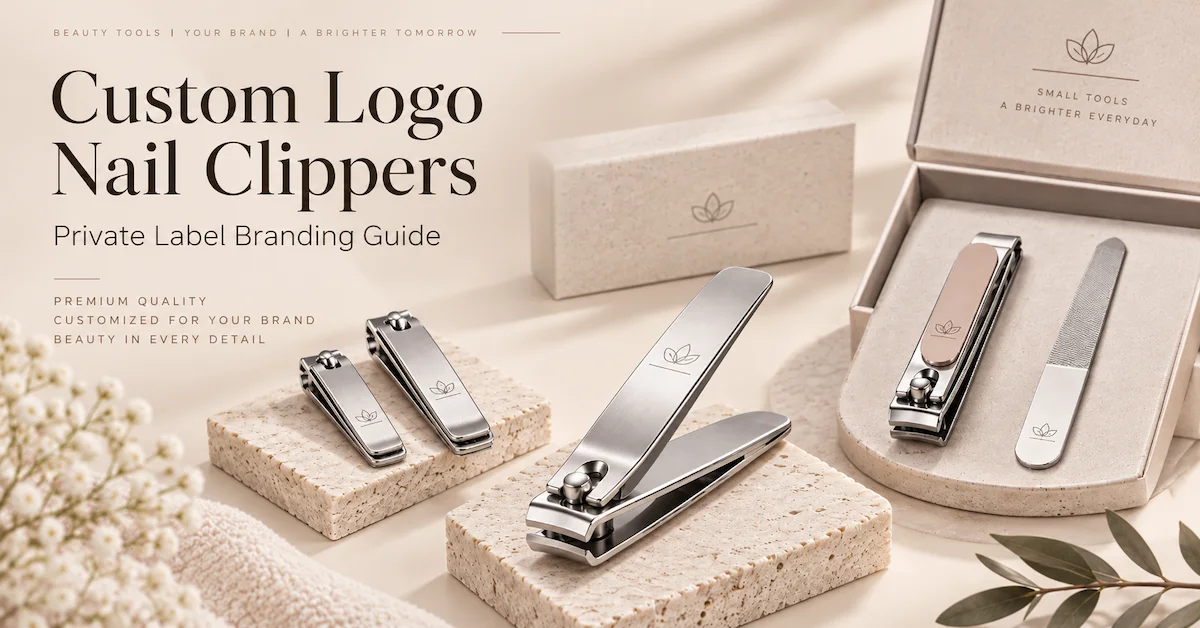
What Are Custom Logo Nail Clippers?
Custom logo nail clippers are nail-care tools supplied with a brand mark or related brand identity, usually through a model-specific marking method and a coordinated sales package. The core clipper may be an existing production design, or it may form part of a broader OEM or ODM development project.
The word custom does not necessarily mean a newly engineered clipper. A brand may select an established stainless steel model, approve a suitable logo on the lever, and develop a printed retail box. Another buyer may require a different finish, a two-piece set, a fitted travel case, or changes to product geometry. Those are different project scopes with different cost, sample, and production implications.
For a buyer, the practical difference is this:
-
Standard wholesale: a finished product is purchased with little or no branding change.
-
Logo-only private label: an existing model receives an approved mark, with standard or selected packaging.
-
Enhanced private label: the model, finish, logo, packaging, and perhaps set composition are selected together.
-
ODM: an existing product concept or platform is adapted more extensively.
-
OEM: the buyer supplies a drawing, sample, or more fully defined product specification for manufacturing evaluation.
A logo-only program can be an efficient entry point for a new brand. A deeper development program may create stronger differentiation, but it also requires clearer specifications and additional approvals. If the buyer only wants branded gift packaging, marking every clipper may not even be necessary.
Start With the Buyer and Sales Channel, Not the Logo File
Before choosing a marking process, identify who will buy the finished item and how it will be sold. The same clipper can occupy very different positions in a retail assortment.
A drugstore or supermarket buyer may prioritize a familiar shape, legible branding, reliable cutting, shelf-ready packaging, barcode placement, and stable replenishment. A large decorative logo may add little value if it makes a budget product more expensive.
A direct-to-consumer beauty brand is more likely to care about product photography, finish consistency, perceived quality, a recognizably branded unboxing experience, and complaints that could affect customer reviews. An understated mark on the lever, paired with a well-designed package, may be sufficient.
A salon or professional nail-care supplier should begin with cutting control, comfortable lever movement, and practical handling. Branding must not obstruct the surface the user presses, a moving joint, or the cutting area.
A hotel, travel, or promotional buyer may prefer compact products, a simple logo, a pouch, and consistent delivery of a large number of identically configured units. Brand presentation may come primarily from the case or sleeve.
Write the target user, sales channel, desired retail position, and approximate order quantity in the sourcing brief. Those four fields help determine whether the project should emphasize premium surface work, economical decoration, retail packaging, or a coordinated gift set.
Choose the Nail Clipper Before Designing Its Branding
A logo that fits one model may not fit another. Some clippers have wide, relatively smooth levers; others have narrow ends, punched holes, embossed grips, textured areas, or pronounced curves. A design that looks balanced on a full-size clipper can become illegible on a compact travel model.
Evaluate the base product in this order:
-
Cutting performance: do the cutting edges contact correctly and produce controlled cuts?
-
Lever movement: does the lever open and close smoothly without unusual force or looseness?
-
Construction: are the pivot, pin, body, and lever assembled consistently?
-
Handling: where do the user's thumb and fingers normally touch the tool?
-
Available logo zone: is there a suitable area that is visible, clear of functional parts, and compatible with the intended finish?
-
Packaging fit: how will the clipper sit in a card, box, pouch, insert, or set?
A visually striking sample is not enough. Use the actual clipper several times, inspect more than one sample if possible, and document the accepted functional result separately from the accepted branding.
A brand that wants to launch quickly will often be better served by a proven product format than by changing a lever shape solely to enlarge the logo area. Structural changes can affect ergonomics, tooling, cutting alignment, and production approval.
Which Logo Methods Work on Nail Clippers?
There is no single best method for all custom logo nail clippers. Selection depends on the substrate, finish, shape, desired color or contrast, line detail, expected handling, and budget. The supplier should confirm which processes are available and technically suitable for the selected model; the table below describes possible methods, not an assurance that every method can be used on every OLIMOR SKU.
| Branding route | Potential advantage | Main limitation to review | Best approval evidence |
|---|---|---|---|
| Laser marking | Precise, often suitable for restrained marks on compatible metal or coating | Contrast and line detail vary with material, surface and settings | Actual marked clipper in final finish |
| Mechanical engraving | A recessed or tactile mark where the design and thickness allow it | Depth, burrs, tool access and interference with thin areas | Physical sample with edge and surface checks |
| Logo printing | Can support color or stronger contrast on compatible surfaces | Adhesion, registration and rub resistance depend on the system | Decorated sample plus agreed handling checks |
| Mark on a separate sleeve or case | More space for prominent graphics without changing the clipper | The product itself may have limited visible brand identity | Packed sample and retail display proof |
| Packaging-only branding | Cost-efficient identity for some existing-model programs | Brand recognition may be lost when the tool is removed | Approved pack, label and product identity record |
Laser marking: a sensible option for many metal designs
Laser marking is frequently discussed for stainless steel grooming tools because it can create a controlled graphic without applying a conventional ink layer. However, appearance depends on the actual steel or coating, beam settings, surrounding polish, and the geometry of the marking zone.
Do not assume a black digital logo will become a black mark on every metal surface. A mark may appear gray, dark, light, or variable under different viewing angles. Extremely fine type can also lose clarity at actual product size.
Request a life-size physical proof. Inspect it under ordinary indoor lighting and at the distance a customer would use the product. Confirm that the surrounding finish remains acceptable.
Engraving: useful when relief is part of the design
Engraving may suit a project that wants a recessed or tactile mark. The buyer should ask how mark depth, surface smoothness, location, and any finishing after engraving will be controlled. A deeply recessed design is not automatically more premium: it may be unnecessary for a small tool or unsuitable for a thin component.
If the mark sits near a moving assembly or a stressed section, the manufacturer should evaluate its effect before approval. Do not request structural engraving as though it were simply a printing choice.
Printing: consider color, adhesion, and contact
Printing may be considered when the brand needs a specific color or high-contrast graphic on a compatible product surface. The supplier should confirm the print process, acceptable artwork detail, curing or finishing needs, and inspection method.
A print that looks convincing in a clean showroom may behave differently after repeated thumb contact, contact with packaging, or cleaning. The appropriate tests and acceptance criteria should be agreed for the product's intended use; buyers should not assume a universal durability figure.
Sometimes the best answer is a smaller product mark
A large logo is not always better. On a compact clipper, a small, readable symbol plus a distinctive package often communicates more effectively than crowded lettering on the lever. If the brand's full wordmark cannot be reproduced clearly at the available size, ask whether an approved symbol or simplified brand device is permitted.
OLIMOR's broader custom-logo beauty tools guide also explains why a brand mark should be considered together with the material, finish, packaging, and production reference rather than as an isolated artwork task.
Where Should the Logo Be Placed?
Many conventional clippers offer potential marking space on the top of the lever. That does not mean every lever is appropriate. Raised grip ridges, narrow zones, holes, curved ends, and moving connections can limit placement.
Assess at least four questions before approving the position:
-
Visibility: can the customer see the brand when the clipper is closed, displayed, or used?
-
Clearance: is the mark safely away from the cutting edges, joint, rubbing areas, and intended grip texture?
-
Orientation: which way should the logo face when the clipper is held naturally or placed in the retail pack?
-
Protection: will a card, elastic loop, foam insert, or case rub directly over the decoration?
Use an annotated photograph or dimensioned drawing rather than a vague instruction such as “logo on the handle.” State the intended zone, orientation, reference edges, maximum size, and required clearance.
For small products, even a modest placement error can be obvious. A logo tilted away from the lever centerline may not affect cutting performance but can make the product appear poorly finished. Buyers should agree on how position will be judged and what amount of deviation is acceptable before mass production.
Prepare an Artwork Pack a Manufacturer Can Actually Use
A low-resolution screenshot is not a production-ready brand specification. It can be used for a first discussion, but final approval should be based on controlled files and dimensions.
The ideal artwork pack contains:
-
Master logo: a vector file such as an appropriate AI, EPS, SVG, or PDF export, with editable source retained by the brand.
-
Approved alternatives: monochrome, symbol-only, or simplified versions if the brand permits them.
-
Color information: defined brand references where color reproduction is required, without assuming identical results across metal and paper.
-
Minimum size: the smallest approved physical reproduction rather than only a minimum pixel size.
-
Clear space: the area around the mark that must remain free of other graphics or product edges.
-
Placement proof: a full-size image or drawing showing orientation, position, and approximate dimensions.
-
File revision: a unique version identifier and approval date.
-
Prohibited treatments: stretching, outlining, reversing, or changing the logo without authorization.
For example, “LOGO_FINAL_NEW2” is a weak file name because a future production team may not know which version is actually approved. A dated version reference tied to the SKU, sample, and packaging artwork is much safer.
Ask the supplier to check the file for overly thin strokes, tiny counters in letters, excessive complexity, or details that will be lost at physical size. That engineering feedback should arrive before the decorated sample, not after a full production run.
Surface Finish and Logo Appearance Must Be Approved Together
The same design can look very different on a mirror-polished, satin, textured, or coated surface. Reflective steel may create glare around a fine mark. A brushed background can reduce apparent sharpness. A dark coating can change contrast, and a coating process may place separate limits on any subsequent marking.
Buyers should review finish samples and the decorated product side by side. Record what the finish should look like under normal lighting, not only in a highly edited catalog photograph.
A useful approval set has three physical references: an undecorated product showing the accepted base finish, a decorated sample showing the logo result, and a fully packaged sample showing how the customer will receive the item.
Do not infer that all “silver” nail clippers share the same material, finish, or marking response. Metal appearance is not proof of a particular steel grade or treatment. Material and available finish options need to be confirmed for the chosen SKU.
How to Approve Custom Logo Nail Clipper Samples
A supplier should not begin bulk decoration merely because a digital mockup looks attractive. Separate approval into stages so problems can be identified without confusing function, appearance, and packaging.
Stage 1: Approve the undecorated clipper
Check blade contact, cutting action, lever travel, joint stability, dimensional fit, exposed edges, and overall finish. If the base clipper is unacceptable, adding a logo does not make it production-ready.
Stage 2: Approve a real decoration proof
Inspect the logo at its actual size on the intended surface. Review line clarity, missing details, contrast, orientation, edge clearance, and any change to the surrounding finish. For a printed mark, agree on suitable contact or rub checks. For engraved features, inspect edges and mark quality.
Stage 3: Approve the complete decorated product
Confirm that the branded clipper still performs like the functional reference. Decoration, handling, or additional finishing should not result in loose assembly, scratches, or other new defects.
Stage 4: Approve the packed retail unit
Place the finished clipper into the actual packaging. Check product movement, contact with the marked surface, pack closure, barcode, printed artwork, product name, and quantity. Inspect the appearance after normal pack handling.
Stage 5: Release a controlled master sample
Record the SKU, product specification, finish, marking method, artwork version, package version, sample code, approved date, and approving person or team. Keep this reference available for production inspection and reorders.
This process is especially valuable when the brand, design agency, sourcing office, and manufacturing partner are in different locations. Everyone needs to approve the same version, not several similar-looking photographs.
Quality Control Must Cover Both the Tool and the Brand Mark
One of the largest mistakes in branded metal tools is checking decoration carefully while assuming the underlying product will work. Nail clippers need two overlapping sets of acceptance criteria.
| Inspection area | Functional or branding question | Possible evidence |
|---|---|---|
| Cutting-edge alignment | Do the upper and lower edges meet correctly? | Approved functional reference and defined cutting check |
| Cutting action | Does the tool clip smoothly without unusual force? | Repeatable trial on suitable test material |
| Lever and pivot | Is opening and closing stable? | Movement and assembly check |
| Surface finish | Are scratches, stains, burrs or polish defects acceptable? | Cosmetic standard and sample |
| Logo detail | Are edges, lettering and small features reproduced clearly? | Approved decorated sample |
| Logo placement | Is position and orientation within the agreed range? | Annotated placement sheet |
| Logo durability | Does the chosen process meet agreed handling expectations? | Method-specific verification, where applicable |
| Pack protection | Does the insert avoid rubbing or damaging the mark? | Fully packed sample and handling review |
| SKU identities | Does the tool match the box, label and purchase order? | Packing list and artwork revision |
The exact method and sampling plan should be agreed for the order. A factory's broad statement about inspection does not substitute for clear, model-specific acceptance criteria.
OLIMOR describes quality checks against approved samples, material requirements, and export specifications on its About Us page. For a custom-logo order, the buyer should make sure the approved decorated and packed samples are explicitly part of that reference set.
Packaging Makes a Branded Clipper Retail-Ready
The package often has more visual space than the nail clipper. It can carry the full brand name, instructions, product size, barcode, required market information, and a consistent design system across a collection. It also needs to protect the actual tool.
For physical retail, assess shelf visibility, hanging or stacking format, barcode location, product identification, and whether shoppers can understand the tool's function quickly. A crowded card with tiny print is not necessarily better than a clean box with a straightforward product image.
For e-commerce, inspect the packed item after ordinary handling and representative fulfillment conditions. The lever or body should not rub against a printed mark, and metal tools should not collide inside a multi-item box. Good packaging can reduce cosmetic complaints without requiring an entirely new clipper design.
For travel and gift programs, consider a pouch, fitted case, or coordinated set. The clipper should remain in its intended position, and the case should not create pressure on its mechanism or decorated surface.
For bulk distribution, standard packing may be appropriate where products will be repacked locally. Define the final unit of sale and who owns barcode, labeling, and pack compliance before confirming the quotation.
A useful comparison is to ask for two packing proposals: one that meets practical protection and retail requirements, and one that supports a more premium brand experience. Evaluate material, printing, insert, unit dimensions, shipping space, and assembly effort instead of judging the packaging only from a rendered image.
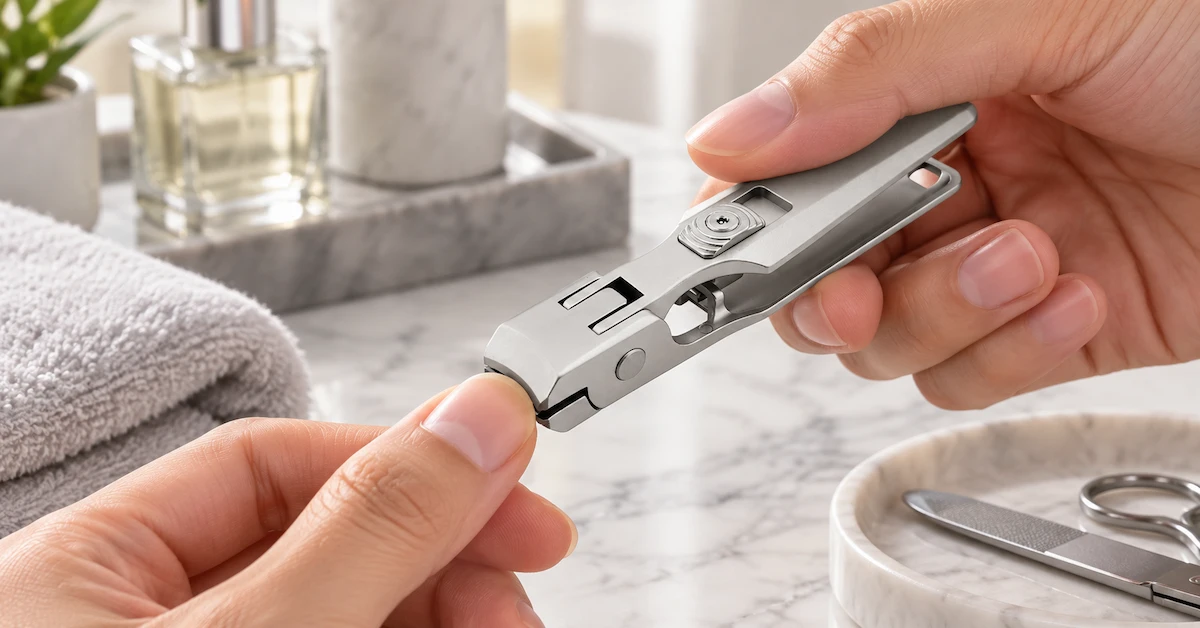
Three Branding Strategies for Different Commercial Goals
Not every brand needs the same level of customization. Choose the route based on how much differentiation is commercially useful.
| Buyer goal | Practical branding strategy | Where to spend approval effort |
|---|---|---|
| Launch a first private-label SKU | Existing clipper + simple mark + retail box | Product performance, logo clarity, packed sample |
| Build a premium personal-care item | Selected finish + restrained logo + fitted presentation | Finish consistency, decoration appearance, package protection |
| Create a coordinated nail-care range | Related clippers, files and tools + shared branding system | SKU-by-SKU marking, set fit, artwork versions, repeatability |
A hypothetical new online brand might launch one compact silver clipper with a small symbol and a carefully designed box. Once sales data justify expansion, it could add a nail file and tweezers using compatible visual rules. That is an illustration of a development strategy—not a claim about a specific OLIMOR customer result.
By contrast, a wholesale importer serving multiple retailers may want a neutral clipper and customized packaging variants for each customer. That arrangement introduces its own artwork-control and product-identification requirements, even if the metal product is identical.
Custom Logo Nail Clippers for Retail, E-Commerce, Salons, and Gifts
Beauty and private-label brands
These buyers should prioritize coherent visual identity, comfortable function, dependable sample approval, and consistent reorders. A logo that looks similar across separate batches is more valuable than a complex design that changes subtly every time it is manufactured.
E-commerce and marketplace sellers
Product photographs magnify details. Surface marks, poor alignment, inconsistent logo placement, and packaging scratches can become visible in reviews. Ask for a realistic decorated sample and photograph it under the same conditions used for product listings. Do not make product images promise a finish that mass production cannot repeat.
Retailers and store brands
Shelf presentation and clear product identification matter. A strong product mark may support the brand, but the retail box or card often does more of the selling. Coordinate the clipper logo with category naming, barcode, pack quantity, and display orientation.
Salon suppliers and professional buyers
Professional use puts priority on controlled cutting, handling comfort, and practical maintenance. Marking should not cover textured grip areas or interrupt functional surfaces. Treat the logo as a secondary requirement to mechanical performance.
Promotional, hospitality, and travel buyers
Compact format, reliable quantity control, sensible marking, and protective pack-out are common priorities. A pouch or gift sleeve may provide enough branding without asking the clipper itself to carry a large graphic.
If the project calls for a coordinated assortment rather than a single item, review OLIMOR's beauty and personal-care product categories to identify complementary tools before deciding how many different decoration methods the collection will require.
What Affects MOQ, Pricing, and Lead Time?
A custom logo does not automatically require a new mold, but branding is not cost-free. Its effect on MOQ and price depends on the chosen model, marking process, setup, finish, inspection, packaging, order quantity, and the way products are packed for shipment.
A quotation should separate costs where practical: base clipper, finish changes, decoration, special setup or tooling, branded packaging, sampling, inspection requirements, and freight terms. Otherwise two quotes may appear directly comparable when they cover different scopes.
Consider total landed and operating cost, not only the factory's unit figure. Poor logo reproduction can require sorting or rework. Packaging that scratches a finish can cause returns. An unclear artwork revision can delay a launch. These risks are real commercial costs even when they do not appear on the first quotation.
There is no universal MOQ or lead time for OLIMOR's entire clipper range. A standard model with a simple mark can have different requirements from a coated finish, printed gift box, multi-tool kit, or redesigned lever. The manufacturer needs the actual artwork, target quantity, package, and selected SKU to confirm feasibility and schedule.
Ask the supplier to distinguish sample time, artwork and package approval time, mass-production time after final approval, inspection time, and shipment transit. An advertised production period is not a substitute for a project calendar.
Common Failures—and How to Prevent Them
The logo is too detailed for the available space. A complex script wordmark may look excellent on a monitor but become unreadable on a small lever. Reduce detail using an approved alternate mark, or move the main wordmark to packaging.
The logo disappears on polished metal. Reflections and viewing angle can reduce contrast. Evaluate a physical mark under representative light and consider other approved placement or finish options.
The mark is close to a moving area. Decoration beside the pivot or grip may create avoidable wear, obscure handling features, or complicate inspection. Reposition it before sampling is released.
A printed logo looks good but wears quickly. Do not rely on a photograph immediately after printing. Agree on appropriate handling checks and inspect the printed surface after packing and normal contact.
Packaging rubs the decorated zone. Test the fully packed item; change insert contact, sleeve geometry, or product orientation where necessary.
The supplier uses the wrong artwork version. Record an unambiguous file name and revision in the sample approval and purchase order. Do not approve production from informal chat images alone.
The second order looks different. Preserve a decorated master sample, finish reference, artwork, placement sheet, and package revision. Any material or process change that affects the approved result should trigger review.
The logo passes inspection but the clipper does not cut well. Never combine brand approval and functional approval into one vague “sample OK.” Each needs its own criteria.
These problems are preventable when the sourcing team makes the approval criteria specific enough for production and quality staff to follow.
A Step-by-Step Development Workflow
A practical private-label project can follow this sequence:
-
Define the market. Specify customer, channel, price position, destination, and intended unit of sale.
-
Select the base model. Compare existing sizes, construction, cutting performance, and surface options.
-
Classify the customization. Separate logo-only work, finish or packaging changes, and any structural OEM/ODM request.
-
Build the marking brief. Provide artwork, version, method preference, desired appearance, placement, orientation, and clearance.
-
Confirm technical feasibility. Ask the supplier to check substrate compatibility, marking area, finish, cost assumptions, and limitations.
-
Approve functional samples. Confirm the product itself works as intended.
-
Approve decorated samples. Check mark clarity, contrast, location, and cosmetic effects on the real tool.
-
Approve retail packaging. Review artwork, barcode, pack fit, handling, and product protection.
-
Release the master reference. Tie the product, decoration, and package approvals to one controlled SKU record.
-
Inspect production and plan reorders. Compare the batch with the approved reference and preserve any accepted change.
The workflow is deliberately more detailed than “send logo, pay deposit, wait for goods.” For a branded product, clear approvals are what make a reliable repeat order possible.
The RFQ Checklist: What to Send a Manufacturer
Buyers who want an accurate response should provide a concise but complete request for quotation. Include the following information:
| RFQ field | Useful information to supply |
|---|---|
| Company and channel | Beauty brand, retailer, distributor, e-commerce or gift program |
| Target product | Reference link, model photo, dimensions or physical sample |
| Intended market | Destination country and sales channel |
| Material and finish | Confirmed requirements or options to be evaluated |
| Logo files | Vector artwork, version, approved alternatives |
| Marking target | Proposed position, physical size, orientation and visual goal |
| Packaging | Box, card, pouch, case, set, barcode and artwork needs |
| Quantity | Trial volume and realistic reorder forecast |
| Quality criteria | Cutting, lever movement, surface, logo and pack priorities |
| Timeline | Required sample approval, launch and shipping dates |
An effective inquiry might read: “We are developing a private-label compact nail clipper for an online personal-care brand. Please recommend an existing model with a suitable logo area. Our preference is a polished metal finish and an understated one-color mark. We can provide vector artwork and a package reference. Please confirm suitable marking routes, sample requirements, packaging options, model-specific MOQ, and the timeline after final approval.”
A supplier can answer that request far more usefully than “Please give your lowest custom nail clipper price.” It also reduces the risk of receiving quotes for mismatched products.
How to Evaluate a Long-Term Custom Logo Nail Clipper Partner
Look for the ability to manage product function, appearance, branding, packaging, and revision control together. A supplier should be able to explain what the chosen model can support, which requests require new development, how samples are approved, and what will be inspected in mass production.
The most revealing questions often concern repeat orders: Which master sample is retained? Who holds the approved artwork? How will the same finish and logo location be reproduced? What happens when packaging artwork changes? How is the customer told about a proposed material or process change?
OLIMOR BEAUTY develops and supplies beauty and personal-care tools for international brands, retailers, distributors, and private-label customers. Its stated product-development and quality approach includes sampling, customization, inspection against approved references, and packaging support. These are useful topics for a sourcing discussion; the exact material, marking route, MOQ, capacity, and schedule still require confirmation for the selected model.
Browse the nail clipper product category to identify a starting design, or review OLIMOR's nail clipper manufacturing guide for additional context on product structure and sourcing. For a project-specific assessment, the next step is to send the logo file and product requirements through Contact OLIMOR.
Frequently Asked Questions About Custom Logo Nail Clippers
1. Can a stainless steel nail clipper have a custom logo?
Often yes, provided the selected model has a suitable marking zone and the proposed method is compatible with its actual material and finish. Laser marking, engraving, or printing may be considered where technically appropriate. Ask for a decorated physical sample before approving bulk production; a steel-like appearance does not establish the exact material specification.
2. Is laser marking better than logo printing?
Neither process is universally better. Laser marking may suit a restrained metal appearance; printing may be preferable where a particular color or contrast is required. The decision depends on substrate, coating, logo detail, handling conditions, durability expectations, and cost. Compare real proofs on the intended surface instead of choosing only from process names.
3. What artwork format should I send for branded nail clippers?
Provide a clean vector master file and, when available, approved monochrome or symbol-only alternatives. Include physical logo size, orientation, preferred zone, clear space, color or visual references, and version information. A PNG mockup can communicate the idea but should not be the only production reference.
4. Where can a logo be placed on a nail clipper?
The lever is a possible location on many conventional models, but available space varies. Textures, curves, holes, working parts, and packaging contact can limit the mark. Approve placement on a real sample and document its size and position using a marked photograph or drawing.
5. Will the logo wear off after repeated use?
Durability depends on the marking process, underlying material or finish, and real contact conditions. No universal wear-life claim should be assumed. Tell the manufacturer how the tool will be handled and cleaned, agree on appropriate verification, and inspect the marked item after packaging and normal-use simulations where relevant.
6. What is the minimum order quantity for custom logo nail clippers?
There is no single MOQ across all models and customization routes. The requirement can depend on the existing clipper, finish, marking setup, colored components, printed packaging, and order quantity. Submit the target SKU, artwork, package, and quantity for a model-specific quotation rather than relying on a generic published minimum.
7. Can I customize the box or pouch without changing the clipper?
Yes, packaging-only branding may be practical for some existing-model programs. It can offer a larger brand presentation area while preserving an established clipper design. The supplier still needs to confirm the packaging structure, artwork, fit, barcode, protective insert, MOQ, and pack-out arrangement.
8. How long does a private-label nail clipper project take?
Timing depends on product selection, artwork preparation, decoration proofs, sample revisions, packaging development, order volume, and factory scheduling. Ask for separate timing for samples, final approval, production, inspection, and shipping. The timeline should start from clearly defined approvals, not from an unspecified initial inquiry date.
9. How do I keep logo placement consistent on repeat orders?
Retain an approved decorated master sample and a placement sheet with dimensions, reference edges, orientation, artwork version, finish, and inspection criteria. The purchase order should refer to those same records. Reapprove the mark if a changed lever, coating, or marking method affects the agreed result.
10. Can I create a matching private-label manicure set?
A coordinated collection can combine a nail clipper with nail files, tweezers, cuticle tools, nippers, or other grooming products where suitable. Match brand hierarchy and packaging, but approve each tool's function and marking area separately. OLIMOR's complete product range provides a starting point for discussing multi-SKU sets.
Conclusion
Successful custom logo nail clippers depend on more than a sharp-looking mark. Choose a dependable base clipper, confirm the marking method on its actual finish, approve product function and decorated appearance separately, and protect both in the final package. Preserve the artwork revision and master sample so later orders match the first approved run. If you are developing a branded clipper or nail-care collection, share your model reference, logo file, quantity, and packaging brief with OLIMOR for a project-specific customization review.
Tag: