Nail Clipper Mastery: Sharpening, Precision and Long-Term Care
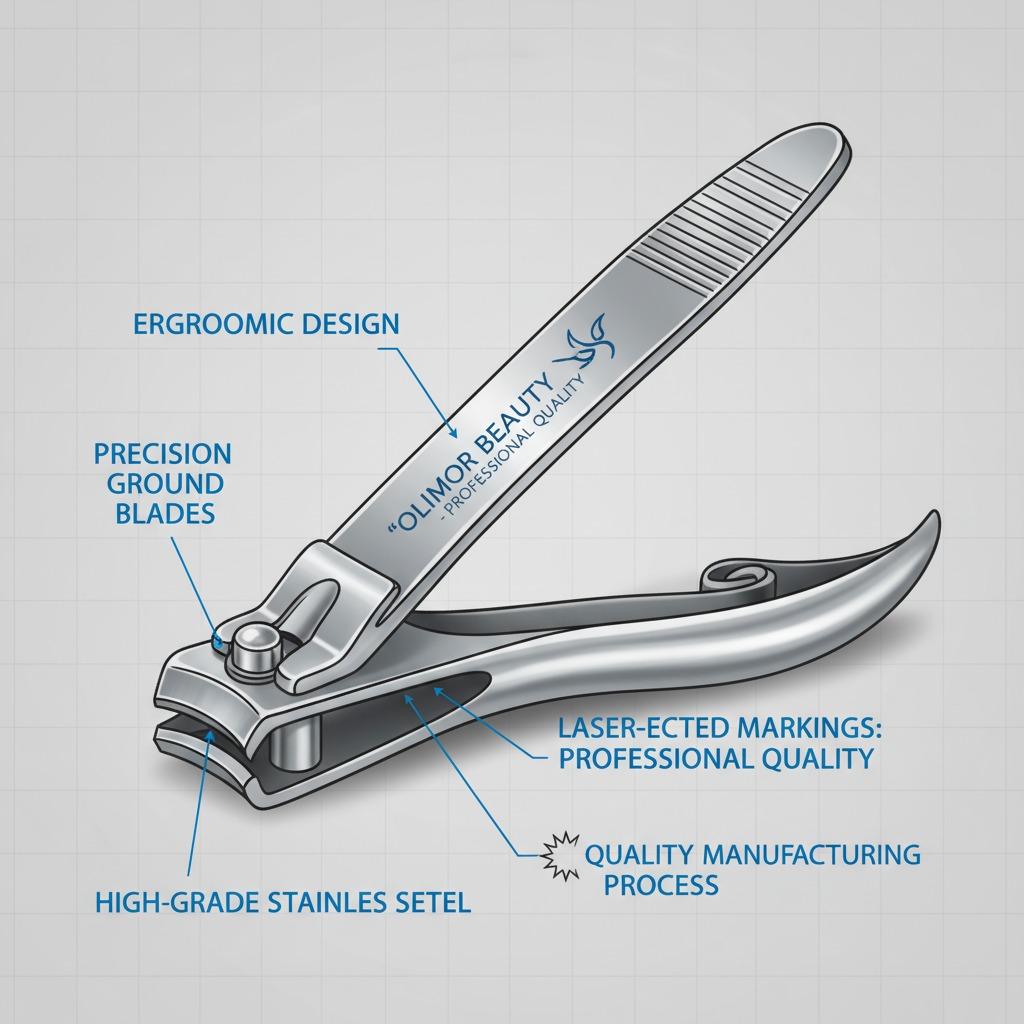
A nail clipper looks simple, but the difference between a clean trim and a ragged edge often comes down to blade alignment, edge sharpness, leverage and routine care. For personal grooming users, a precise nail clipper helps reduce splitting, tearing and repeated clipping over the same nail edge. For beauty tool buyers and retailers, the same details affect customer satisfaction, return rates and how confidently a product can be positioned in a nail care assortment.
Olimor Beauty nail clippers are designed for neat, controlled nail trimming and are associated with stainless steel construction, ergonomic handling and quality checks. This guide explains how to evaluate clipper performance, when sharpening is worth attempting, which maintenance habits help extend tool life, and what sourcing teams should look for when comparing nail clippers for retail, salon, travel or personal care kits. To explore related grooming items, visit Olimor beauty tool products or view broader product collections.
What Precision Means in a Nail Clipper
Precision is not only about having a sharp edge. A good nail clipper should close evenly across the cutting jaws, remove the nail in a single controlled cut, and leave an edge that needs only light filing. When blades are misaligned or dull, the clipper may crush the nail before cutting it. That pressure can create jagged edges, especially on dry, brittle or thicker nails.
Several practical details influence how a clipper performs. The cutting edges should meet cleanly from one side to the other. The lever should provide enough force without feeling loose or unstable. The body should feel firm in the hand so the user can position the jaws accurately before pressing down. Ergonomic design also matters: if the lever is awkward, users may twist the tool during the cut, which can create uneven results even if the blade is sharp.
For daily grooming, precision means confidence. You should be able to trim small sections of the nail without overcutting. For product buyers, precision is a sign that manufacturing consistency and final inspection are doing their job. A clipper that looks attractive in packaging but clips poorly will not build repeat demand.
How to Tell When Nail Clippers Are Dull
Sharpening should not be your first response to every imperfect trim. Sometimes the problem is nail condition, dirty blades, poor angle or a loose lever. Before sharpening a nail clipper, inspect how it behaves during normal use.
- Crushing instead of cutting: If the nail bends or whitens before separating, the cutting edge may be dull or misaligned.
- Multiple attempts needed: A healthy, moderately thick nail should not require repeated clipping in the same spot.
- Ragged nail edge: Small tears or flaky edges can indicate dull blades, especially when the nails are not unusually dry.
- Uneven contact: Hold the clipper closed and look at the jaws. Visible gaps may mean alignment is the issue rather than sharpness alone.
- Sticky or gritty movement: Built-up nail dust, moisture or residue can interfere with a clean cut.
If the jaws are badly bent, the lever is loose, or the pivot is damaged, sharpening may not restore proper performance. In those cases, replacement is usually more practical. If the tool is structurally sound and the cutting edge is simply tired, careful maintenance can help.
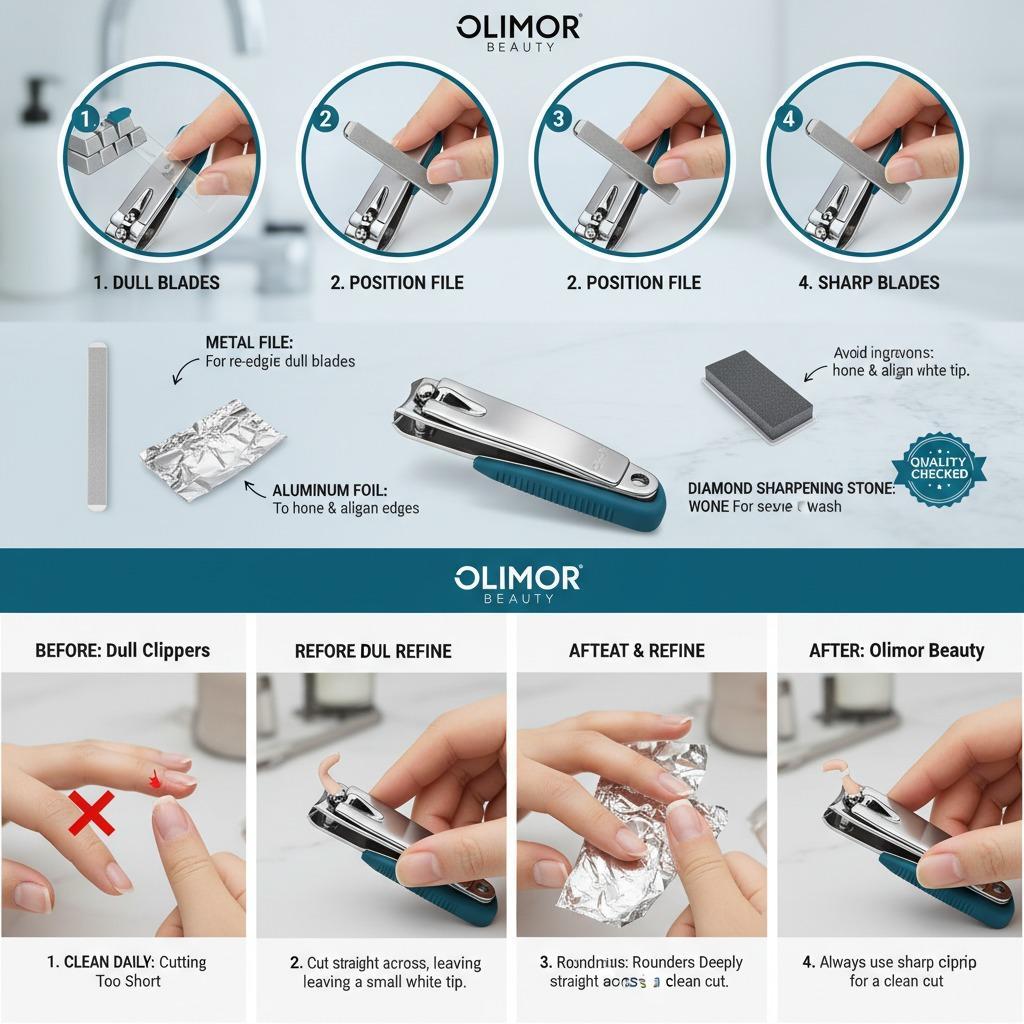
Safe Basic Sharpening Method for Dull Nail Clippers
Sharpening nail clippers requires a light touch. The goal is to refresh the existing cutting bevel, not reshape the tool. Removing too much metal can change the blade geometry and make the jaws meet incorrectly. Work slowly, keep the original angle, and avoid grinding the flat inner faces of the jaws.
- Clean the clipper first. Remove nail dust with a dry brush or cloth. If needed, wipe the tool and dry it fully before sharpening.
- Open the jaws as much as possible. Some users remove the lever pin on compatible designs, but do not force disassembly if the construction does not allow it.
- Use a fine metal file or small sharpening tool. Choose a fine abrasive rather than a coarse file. Coarse tools can leave rough edges.
- Follow the existing bevel. Stroke along the angled cutting surface with light pressure. Keep the same angle on both sides.
- Remove burrs carefully. After a few passes, close and open the clipper. Wipe away filings. Do not scrape aggressively across the inside cutting faces.
- Test on a small nail section or safe test material. The cut should feel cleaner and require less pressure. If performance does not improve after modest sharpening, stop rather than overworking the edge.
The aluminum foil method is sometimes used as a quick honing technique: fold foil several times and clip through it repeatedly. This can help remove minor burrs, but it is not a substitute for proper edge maintenance when a clipper is genuinely dull. A fine diamond sharpening tool can provide more controlled results for experienced users, but it should still be used gently.
Cleaning, Drying and Storage Habits That Preserve Sharpness
A nail clipper does not become dull only from cutting nails. Poor storage, moisture, residue and impact can shorten its useful life. Stainless steel helps resist rust, but it still benefits from simple care. A clipper kept dry and clean will usually feel smoother and stay more dependable than one left in a damp bathroom drawer.
After trimming, brush away nail fragments from the jaws and pivot area. If the clipper is shared in a household or used in a professional setting, follow appropriate hygiene practices and allow the tool to dry completely before storage. Avoid dropping the clipper onto hard surfaces because impact can disturb blade alignment. Store it in a pouch, case or dry compartment where the cutting edges will not rub against other metal tools.
A tiny amount of suitable lubricant at the pivot may help if the lever movement becomes stiff, but avoid over-oiling. Excess oil attracts dust and can make the tool feel dirty. For most home users, regular wiping and dry storage are enough. For salon or retail kit environments, build a simple care card into the user instructions so customers understand how to protect the edge.
Choosing a Nail Clipper for Home, Retail or Salon Use
Selection criteria should match the intended audience. A travel nail clipper may prioritize compact size and safe storage. A home grooming clipper should feel comfortable and dependable. A salon-oriented tool needs consistent cutting performance and easy cleaning. Instead of relying only on appearance, compare the functional details that affect the trimming experience.
| Selection Point | Why It Matters | What to Check |
|---|---|---|
| Blade alignment | Improves clean cutting and reduces nail tearing | Jaws should meet evenly when closed |
| Edge finish | Controls sharpness and smoothness of cut | Look for clean, even cutting bevels without rough burrs |
| Lever stability | Affects control and pressure | Lever should not wobble excessively during use |
| Grip and ergonomics | Helps users position the clipper accurately | Body and lever should feel secure in hand |
| Cleaning access | Supports hygiene and long-term care | Jaws and pivot area should be easy to wipe or brush |
| Packaging fit | Important for retail and kit presentation | Tool should be protected from scratches and impact |
When building a product line, consider whether you need one universal nail clipper or a range that covers fingernails, toenails, travel kits and gift sets. Buyers can compare available options through Olimor beauty tool products and use the send an inquiry page when preparing a sourcing brief.
Manufacturing and Quality Questions Buyers Should Consider
For retailers, distributors and private label buyers, the best nail clipper is not only sharp on the first sample. It must be consistent across production. Useful evaluation starts with questions that are specific enough to reveal how the tool is made and checked without assuming unverified specifications.
- How is blade alignment checked before packing?
- What visual defects are rejected on the cutting edge, lever and body?
- How is cutting performance evaluated during quality inspection?
- Is the stainless steel surface protected from scratches during packaging and transport?
- Can packaging be adapted for retail display, travel sets or grooming kits?
- What user instructions or care information can be included to reduce misuse?
Samples should be tested by more than one person and on different nail types if possible. Pay attention to how the clipper handles thin, flexible nails as well as thicker nails. A tool that feels sharp but uncomfortable may still disappoint users. Likewise, a sturdy-looking clipper with poor jaw contact will not deliver the clean finish customers expect.
When to Sharpen and When to Replace
Sharpening makes sense when the clipper is otherwise in good condition: the lever is firm, the jaws meet correctly, and the cutting edge has only moderate wear. Replacement is more sensible when the clipper is bent, corroded, cracked, loose at the pivot or still tears nails after careful cleaning and light honing.
For personal users, the decision is simple: if maintenance restores a smooth, confident cut, continue using the tool. If it takes more effort than it should, replace it with a better-aligned clipper. For business buyers, the bigger goal is to choose products that need less corrective attention after purchase. A well-made nail clipper should arrive ready to perform and be easy for the end user to maintain.
Olimor Beauty focuses on practical grooming tools that support clean nail care without unnecessary complexity. If you are comparing nail clippers for a retail assortment, salon kit or personal care line, review the functional criteria above and prepare a clear requirement list. For product questions or sourcing discussions, you can contact Olimor directly.
Tag: