

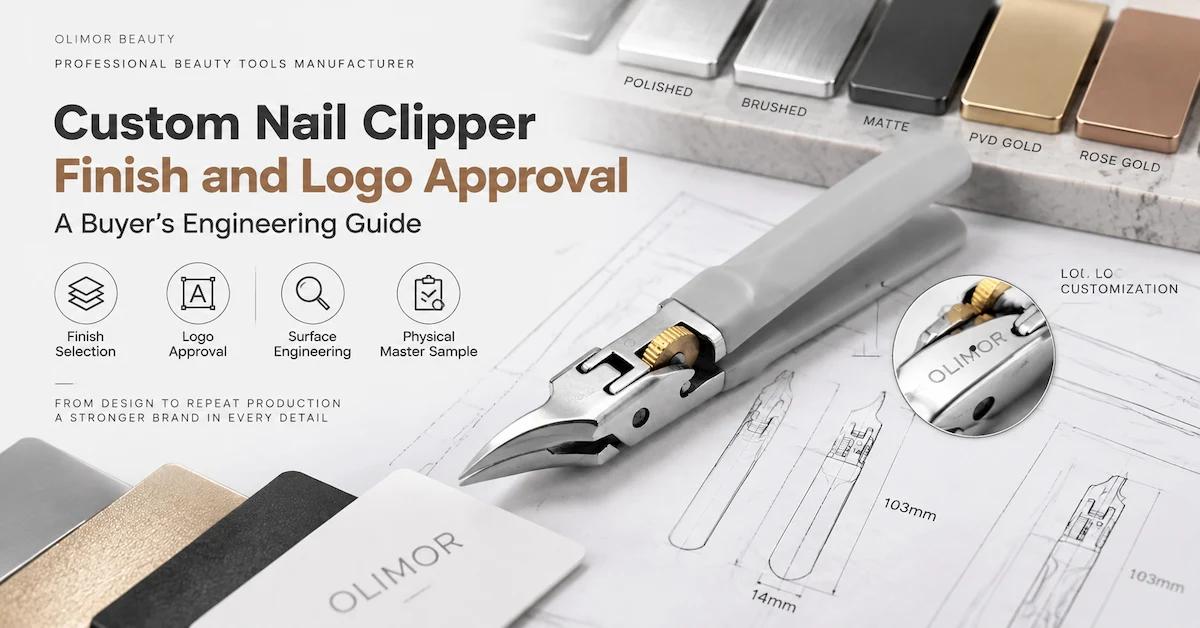
OLIMOR BEAUTY works with brands, importers, distributors and retail sourcing programs.
Beauty and personal-care tools, including nail clippers, with OEM and ODM support.
Office and manufacturing operations are reported in Yangjiang, Guangdong, China.
Development may begin from drawings, samples, appearance concepts or structural requirements.
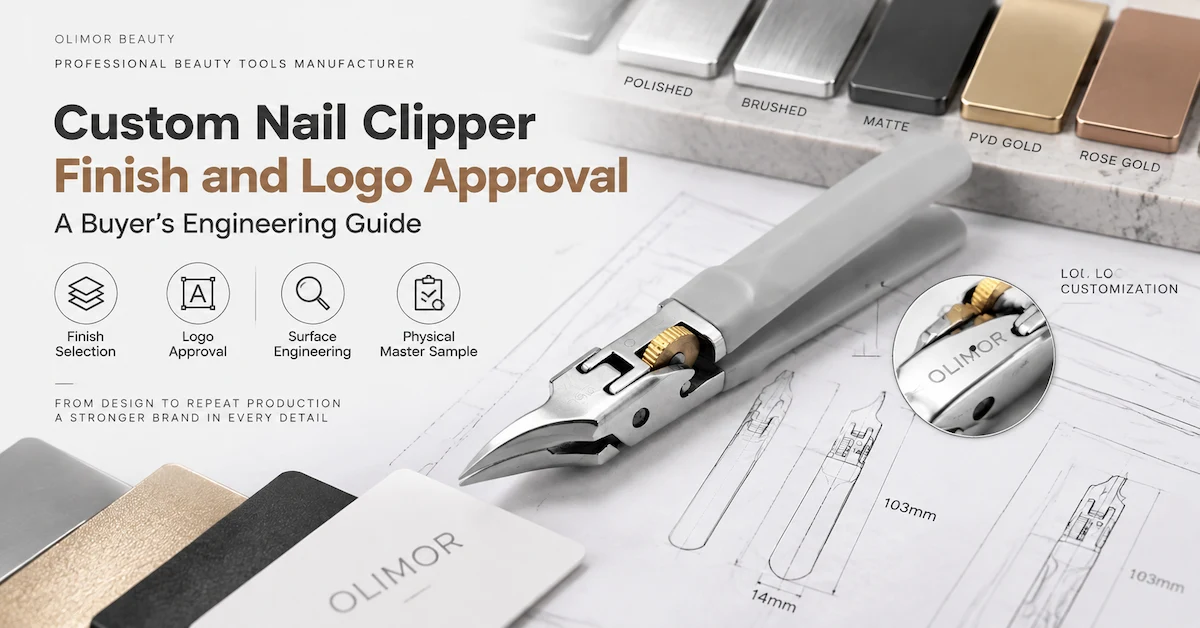
Why Finish Approval Is a Product Decision, Not a Colour Choice
Buyers often begin with a finish name: mirror polish, brushed metal, matte black, champagne, rose tone or another visual direction. That language is useful for mood boards, but it does not define a manufacturable surface. The final result depends on the base material, forming marks, preparation, polishing direction, coating process, thickness, masking, racking, handling, logo method and packaging contact. A finish should therefore be specified as a process and acceptance system, not as a colour adjective.
A nail clipper creates particular challenges because functional and cosmetic zones are close together. The cutting head, lever, pivot and body move against or near other parts. A coating that improves shelf appearance may affect movement or reveal wear where surfaces touch. A highly reflective polish can make small scratches visible. A textured handle can improve grip but distort a small mark. A package insert can protect the cutting edge while rubbing the branded surface.
Logo approval has the same interdependence. Artwork that looks balanced on a flat PDF may appear stretched on a curve, weak on a reflective background or misaligned when the lever is opened. A technically clean mark may still face the wrong direction in the retail pack. The correct question is not only, “Is the logo accurate?” It is, “Does this decoration remain accurate, legible and appropriately placed on the approved product through assembly, packing and normal handling?”
This guide presents a nine-step approval method that connects brand intent to factory evidence. It deliberately avoids invented claims about universal coating life, colour tolerance, adhesion value or corrosion performance. Those values must be chosen for the actual material, process, market and product requirement, then confirmed by the parties responsible for engineering and compliance.
What Should a Manufacturer Define for a Custom Finish?
A manufacturer should identify the substrate, preparation, finish route, cosmetic surfaces, process-contact areas, masking, decoration method, expected visual variation and inspection approach. If an operation is external, the supplier should explain how the incoming finished parts are identified and checked. The answer should be tied to the quoted model, because a finish that is practical on one geometry may not be suitable on another.
The buyer should provide a target rather than asking the factory to infer one from a screen image. Useful inputs include a physical reference, colour standard, gloss or texture direction, acceptable and unacceptable examples, market position and expected package. The reference must be labelled. A competitor product can communicate intent, but it does not reveal its process or prove that the same result is compatible with the new design.
OLIMOR's client-confirmed capability list includes stamping, heat treatment, injection moulding, polishing, water deburring, assembly and packaging. It also reports in-process and finished outgoing inspection. These capabilities support a connected discussion of surface preparation, component fit, decoration and pack protection. They do not prove that every listed finish is available or validated for every nail clipper model; a model-specific proposal is still required.
The supplier should also identify what evidence can be retained. That may include approved product samples, finish panels, colour references, artwork proofs, inspection photographs and production records. Evidence should be practical for repeat orders. A reference that fades, oxidizes, becomes scratched or cannot be traced to a revision will not protect a long-running product line.
Step 1: Map the Substrate and Every Visible Zone
Begin with a part and surface map. List the body, lever, pin, file, catcher, plastic grip, inlay and accessory that apply to the product. For each part, record the proposed material, forming condition, visible areas, contact points and finish. Avoid the shortcut of assigning one finish description to the entire clipper when parts have different substrates or exposure.
Divide surfaces into cosmetic classes. A primary face may need the tightest appearance because it carries the logo and faces the customer. Secondary faces remain visible but may tolerate controlled process evidence. Hidden or assembly-contact zones may have different requirements. Functional surfaces, particularly near the cutting head and pivot, should be identified separately so decoration or coating does not compromise their purpose.
Mark process-contact locations. Racks, fixtures, clamps, polishing tools and assembly equipment must hold the part somewhere. If the specification expects every surface to look identical without acknowledging contact, the factory may move marks unpredictably or rely on costly rework. Agree where unavoidable process evidence can occur and define whether it remains hidden after assembly.
Map part-to-part contact through the full movement. Open and close the lever, operate the clipper, insert it into the case and remove it from the package. Identify where a coated or polished surface touches metal, plastic, paperboard, flocking, elastic or film. The contact map becomes the basis for targeted trials rather than vague requests for “scratch resistance.”
| Zone | Typical buyer concern | Factory question | Approval evidence |
|---|---|---|---|
| Primary logo face | Colour, gloss, cleanliness and mark legibility | How is the surface prepared, held and decorated? | Signed physical master under agreed lighting |
| Cutting head | Function, burrs, masking and unintended finish build | Which surfaces remain functional and how are they protected? | Functional sample plus close inspection |
| Lever contact | Rubbing, seating and visible wear | Where do surfaces move against each other? | Operated sample and contact map |
| Side and rear surfaces | Uniformity, scratches and fixture marks | Which areas are primary, secondary or process-contact zones? | Cosmetic zone drawing and boundary samples |
| Plastic or inlay part | Colour match, texture, fit and contamination | Is colour controlled by master, material batch or another method? | Colour master and assembled sample |
| Package-contact surface | Scuffing, transfer, imprint and movement | What touches the product through packing and transport? | Final packed sample after handling trial |
Step 2: Convert the Brand Mood Board Into a Finish Brief
A finish brief explains the desired visual effect and the business reason for it. State whether the product must coordinate with a manicure set, reflect a premium identity, reduce visible fingerprints, support high-contrast photography or differentiate sizes. These priorities help the supplier choose between technically possible routes rather than simply matching the nearest colour chip.
Provide references in a hierarchy. The physical master should lead when it is available. A recognized colour reference can support the direction. Calibrated photographs can document placement and appearance, while digital values can guide artwork. Screens and office printers vary, so neither should be the final authority for a metallic, reflective or textured product.
Describe gloss and texture with observable comparisons. “Matte” can range from a soft satin reflection to a very low-gloss surface. “Brushed” requires direction, density and treatment around edges. “Mirror” requires a definition of which faces receive the highest polish and what visible process marks are acceptable. The supplier should return its proposed terminology and reference sample so both parties use the same language.
Include cleanliness and handling expectations. Highly polished surfaces can show fingerprints during assembly and photography. Dark coatings can make dust visible. Pale metallic surfaces can reveal colour differences between components. Decide whether protective film, gloves, trays or cleaning operations are needed and whether those steps belong in the quotation.
Keep claims separate from appearance. A silver-coloured finish is not evidence that every component is stainless steel. A gold tone is not a statement about precious-metal content. A coating marketed as durable still needs a defined requirement and appropriate verification. Packaging and ecommerce copy should use material and process language supported by the approved specification.
Step 3: Compare Finish Routes by Risk, Not by Name Alone
Ask the manufacturer to provide a finish-route comparison for the selected geometry. The comparison should state substrate preparation, visible character, colour range, masking, edge behaviour, logo compatibility, process-contact locations, known wear points, lot-to-lot control and cost structure. This helps the buyer compare the complete route instead of choosing a finish from a catalogue swatch.
Polished and brushed metal directions depend heavily on preparation. Forming lines, deburring, grinding and polishing affect what the customer sees. A reflective surface can amplify waviness or handling marks. A directional brushed surface can show inconsistency where geometry changes. Request samples made from the proposed part route, not only flat generic panels.
Coloured coatings introduce other questions. Ask whether the colour depends on part position, batch, surface preparation or process loading. Identify areas that cannot be coated uniformly or must be masked. Review the effect on movement and assembly. If components receive separate batches, ask how the supplier prevents an obvious mismatch on one finished unit.
Plastic handles or inlays require their own colour and texture controls. Resin colour, mould surface, part thickness and processing can affect appearance. A metal colour target and a plastic colour target may look different even when a digital value matches. Approve the assembled product under the lighting most relevant to retail and photography.
Use a weighted decision, not a beauty contest. Consider brand fit, manufacturability, defect visibility, logo contrast, package interaction, repair limitations, lot variation, lead-time exposure and total cost. A visually dramatic finish may still be appropriate, but the project should knowingly fund its controls.
| Finish question | What to request | Risk if omitted | Decision owner |
|---|---|---|---|
| Substrate preparation | Process sequence and production-intent sample | Colour is approved while underlying marks remain visible | Product engineering and quality |
| Colour and gloss | Physical target, viewing condition and boundary references | Teams argue from different screens or verbal descriptions | Brand and quality |
| Functional masking | Marked drawing and sample of protected zones | Finish interferes with cutting, movement or fit | Engineering |
| Part matching | Assembled samples across proposed components | Individual parts pass but the unit looks mismatched | Brand and supplier quality |
| Wear contact | Contact map and agreed handling or cycling trial | Early visible marks are discovered after packaging | Quality and packaging |
| Repair policy | Permitted rework and post-repair inspection | Uncontrolled touch-up changes colour or function | Supplier quality and buyer approval |
Step 4: Choose a Logo Method That Fits the Real Surface
The logo method must suit the material, finish, curvature, available area, line weight, colour requirement and production volume. The supplier should propose a route and explain its limitations. The buyer should not force a method used on a flat package onto a reflective, curved or textured tool without a physical trial.
Start with the mark's job. Is it a subtle premium signature, a high-contrast retail identifier, a size code or a regulatory element? A subtle mark may intentionally change with viewing angle; a retail identifier must remain readable. A size code may need to stay visible inside a set. Each job leads to different placement, scale and contrast decisions.
Check artwork construction. Supply vector files, approved brand colours, minimum clear space and permitted variations. Very fine reversed lines, tiny counters and complex gradients may not reproduce on a small metal surface. Allow the manufacturer to produce a technical proof, but require brand approval before changing artwork. Keep the production artwork file distinct from presentation mockups.
Consider the mark together with the finish. A low-contrast engraving can disappear on a mirror surface. Printed colour can change over a metallic background. A deep mark may collect polishing compound or appear uneven across a curve. A mark applied before another process may be softened or covered. The process order should be recorded in the route.
Ask how decoration is inspected. A logo control can include file revision, position reference, orientation, size, edge quality, fill, contrast and surface damage. Use a clear drawing or approved photograph and a signed physical sample. If the logo position is measured, the datum must be unambiguous and practical for production inspection.
Step 5: Control Artwork, Orientation and Revision
Give every artwork file a clear name, revision and date. A purchasing attachment called “final logo new” is not reliable control.The artwork register should show which file applies to the product, pouch, card, insert, carton and online image where relevant. Archive superseded files so they cannot be selected accidentally.
Define product orientation from the customer's point of view. Photograph the clipper closed, opened and placed in the final package. Mark which side faces the shelf or camera and which end is top. This prevents the logo from being technically within a location box but visually upside down when the product is used or displayed.
Approve a digital proof for content and a physical proof for execution. The digital proof checks the correct mark, spelling, proportion and location. The physical proof checks line quality, contrast, distortion, surface damage and viewing angle. Both approvals should cite the artwork revision and product revision.
Control variable elements separately. Model numbers, colour names, barcodes, legal lines and language may differ by SKU or market. Create an artwork matrix and use automated barcode verification where appropriate. A common master layout with controlled variable fields reduces the risk of mixing correct product art with the wrong SKU data.
When the brand changes, treat the change as a project. Review existing decorated stock, blank components, packaging inventory, plates or fixtures, sample needs and transition timing. State whether old and new versions can coexist and how cartons will be identified. An unplanned logo update can create more obsolete packaging cost than product cost.
Step 6: Build a Physical Master and Boundary Sample System
A physical master is the signed sample that represents the intended appearance. It should be produced on the correct or clearly identified production-intent material and finish route. Label it with project, model, revision, finish, date and approvers. Photograph it, but do not assume the photograph replaces it.
One perfect master does not define acceptable production variation. Boundary samples show the least and greatest acceptable colour, gloss, texture, logo position or visual feature where a numeric limit is impractical. Create them from actual process output when possible. Label each boundary and explain what it controls.
Store references properly. Light, heat, moisture, handling and cleaning can change a sample. A polished master can become scratched; a colour chip can fade; a paper label can detach. Agree replacement or revalidation intervals appropriate to the program. When the reference is no longer trustworthy, stop using it as the release authority.
Use controlled viewing conditions for appearance decisions. Record light source or viewing area, background, distance and product orientation if those factors change the result. This does not mean every production check needs a laboratory. It means buyer and supplier should not compare one sample under warm office light and another under a bright inspection lamp without recognizing the difference.
Train inspectors with the same references. A boundary system only works when people understand which surface class and defect it applies to. Photograph common unacceptable conditions, but keep the written definition and physical reference aligned. When a new defect appears, decide whether it fits an existing category or requires a new rule.
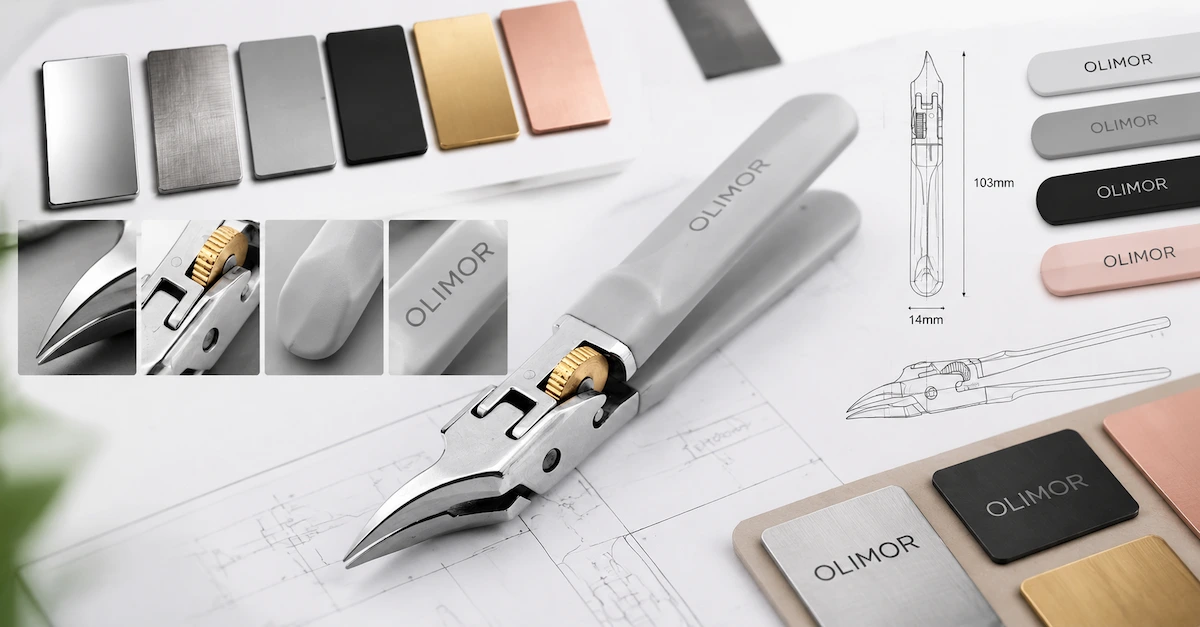
Step 7: Test Handling, Movement and Cleaning
A finish sample that remains untouched in a bag proves very little. Handle it using the motions expected in assembly, inspection, photography, retail setup and normal use. Open and close the lever. Remove and replace the clipper in its case. Clean it with the approved method. Observe contact marks, fingerprints, colour transfer and changes around the pivot or decoration.
Define the purpose of the trial before selecting a cycle count or chemical. The project team must choose conditions that represent the intended claim and market. This guide does not invent a universal abrasion, adhesion, corrosion or cleaning standard. Ask qualified engineering and compliance owners to approve the method, acceptance criteria and report.
Inspect functional effects separately from appearance. A coating may look unchanged but make movement rough. Polishing can improve appearance while altering an edge or fit if functional zones are not protected. Decoration can create a raised area that rubs the package. The report should record both cosmetic and operational observations.
Include contamination and transfer. Dark pigment, polishing compound, adhesive, protective film residue or package ink can move between surfaces. Check the product, user-contact areas and package after the trial. If cleaning is required before packing, define the material, method, responsible station and inspection.
Retain tested and untested comparison samples. Side-by-side evaluation is more informative than memory. Photograph the same zones before and after under consistent conditions. When a failure occurs, trace it to substrate, preparation, finish, decoration, package contact or handling rather than treating all appearance problems as one supplier fault.
Step 8: Approve the Product Inside Its Final Packaging
Packaging can protect the cutting head and still damage the visible body. Evaluate the clipper in the final insert, tray, pouch, card, film or carton configuration. Check movement, local pressure, contact at edges, closure force, product orientation and the path used to remove the item. A package that looks spacious may allow repeated movement; a tight pack may press on the lever or coating.
Use production-intent package materials where possible. Prototype foam, paper, flocking, elastic, film and ink can behave differently from final sources. Identify substitutes and repeat the relevant check when final materials arrive. Include printed surfaces because ink, varnish or rough board can change contact.
Review package cleanliness. Fibres, dust or paper debris may be highly visible on a dark or reflective tool. A polished clipper can show scuffs from an insert edge. A pouch may transfer colour or retain polishing residue. Packaging approval should include the product's appearance after packing, handling, opening and replacement, not only the empty layout.
Consider logistics orientation and pack count. Inner cartons and master cartons change pressure and movement. The supplier should propose carton configuration and protective method, while the buyer confirms any distribution test or market requirement. Do not publish a universal test result; retain the actual report for the approved configuration.
Protect the logo's retail view. The mark should face the intended direction, remain unobstructed and avoid a contact point likely to rub. If the pack includes a window, check glare and visibility under likely shelf lighting. If ecommerce photography uses the unpacked product, ensure the logo looks correct when the lever is in the photographed position.
Step 9: Translate the Approved Master Into Production Controls
Production control begins with the released documents: bill of materials, finish route, colour or appearance reference, artwork, decoration drawing, cosmetic zone map, package specification and inspection plan. The supplier should confirm that operators and inspectors use the current revision. Approval of one sample does not automatically establish a reproducible process.
Define setup and first-piece approval. Check finish, part matching, logo content and position, surface damage and assembly before a full run continues. If the process is batch-based, identify how batches are separated and compared. When a later adjustment occurs, document why and whether a new first-piece approval is required.
Establish in-process controls at points where correction remains possible. It is more efficient to detect preparation marks before coating, contamination before decoration or package rubbing during pack setup than after the entire lot is complete. A control plan should show who checks, what reference is used, how the result is recorded and what happens after failure.
Final inspection should compare the finished, cleaned and correctly packed SKU with the release package. Confirm correct finish, logo, orientation, artwork, barcode, pack count and carton identity. Visual defects should use the agreed surface classes and boundary samples. Functional checks remain necessary because an attractive surface does not prove correct movement or cutting performance.
Keep a change log for reorders. Changes to substrate source, preparation, coating supplier, colour formulation, polishing sequence, decoration equipment, artwork, insert or pouch can affect appearance. Require notification and appropriate validation before the new route enters normal production. The buyer should also inform the manufacturer when retail lighting, package or claim requirements change.
How to Diagnose Common Finish and Logo Failures
When colour varies, first separate visual perception from process variation. Compare samples under agreed conditions and against the correct master. Then review substrate, preparation, batch, part position, process settings and component matching. Do not immediately adjust a process to match a photograph taken under unknown lighting.
When a logo is weak or incomplete, inspect artwork line weight, surface cleanliness, curvature, focus or transfer, process settings and later handling. Determine whether the defect is systematic, position-specific or random. Changing the logo size may solve one issue but create a brand problem, so the corrective action requires both technical and brand approval.
When scratches appear, use the contact map. Examine trays, fixtures, assembly tools, bins, inspection tables, protective film, package inserts and carton movement. Scratch timing matters: a mark before decoration may be covered or amplified, while a mark after final inspection suggests handling or packing. Add containment where the defect is created rather than polishing every part repeatedly.
When parts look mismatched, confirm whether they were intended to share an exact finish. Different materials and geometries can respond differently. The solution may be a revised process, separate approved targets or a product design that uses deliberate contrast. Pretending two inherently different surfaces are identical creates recurring rejection without improving the customer experience.
When coating affects movement, stop treating the problem as cosmetic. Review masking, build, contact geometry, assembly order and cure. Rework around functional zones must be technically approved. A visually acceptable correction that changes cutting or lever performance is not an acceptable repair.
| Observed issue | First evidence to review | Potential source categories | Do not do |
|---|---|---|---|
| Colour mismatch | Master, viewing condition and batch identity | Substrate, preparation, loading, formulation or component batch | Approve from a phone photo alone |
| Faint or broken logo | Artwork revision and decorated first piece | Line weight, curvature, cleanliness, settings or handling | Change brand artwork without approval |
| Surface scratches | Before/after photos and contact map | Fixture, bin, assembly, inspection, package or transport | Assume polishing is always the correct repair |
| Finish wears at pivot | Movement path and masking drawing | Contact geometry, coating build or intended wear zone | Judge only the unused sample |
| Package transfer | Final material and packed handling sample | Ink, fabric, adhesive, residue, pressure or movement | Validate with unrelated prototype material |
How Buyers Should Compare Finish Proposals From Suppliers
Send every supplier the same substrate, appearance, zone, logo and package brief. Require a response that identifies the proposed route, limitations, sample sequence, control method and commercial assumptions. A supplier that quotes a colour name without identifying the underlying process has not answered the complete question.
Compare evidence quality. Does the supplier return production-intent samples or generic swatches? Does it identify substitutions? Can it explain where fixture marks may occur and how components are matched? Does the inspection plan use a physical reference? Strong answers expose boundaries instead of promising visually perfect output without a control method.
Compare the cost of control, not only the finish surcharge. Include additional preparation, masking, protection, lower process yield, cleaning, trays, inspection, packaging and reorder matching. Some controls may be unnecessary for the target market; others protect the main reason the customer buys the product. Use the commercial job to decide.
Compare change discipline. Ask how a new colour, revised logo or alternate package would be introduced. The supplier should assess remaining stock, tools or plates, samples, validation and transition identification. A professional response prevents mixed versions and makes the real cost of a change visible before approval.
Finally, compare communication ownership. Surface and logo questions often cross product engineering, factory production, external finishing, brand design and packaging. One responsible project owner should consolidate the answer and return a controlled revision. A long message chain with no current master is a warning sign even when individual samples look good.
A 90-Point Finish-and-Branding Content Scorecard
This page can support search and answer engines only if it remains useful and accurate. The following check applies the requested publication standard. It is a quality gate, not a guarantee of traffic, ranking or enquiries.
Does the page solve the buyer's finish and logo approval problem rather than merely list colour options?
Are physical references, product imagery, process capabilities and project-specific evidence boundaries clear?
Are manufacturer, location, product, materials, processes, application and market context identifiable?
Can the quick answer, steps, tables, diagnostics and FAQs be understood independently?
Do title, description, H1, slug, canonical, links, ALT text and breadcrumb agree?
Does structured data describe the visible article, organization, breadcrumb and FAQ without unsupported Product claims?
Are reviewer, date, sources, limitations and contact path present?
Confirm actual finish availability and evidence with the selected model before adding unverified performance claims.
Finish and Logo RFQ Checklist
Attach the product revision, part and surface map, target reference, finish direction, cosmetic classes, functional masking, logo artwork, position drawing, package concept, destination market and quantity scenarios. State which values are fixed and which invite a supplier proposal. Include photographs only as labelled references, not as unidentified instructions.
Ask the manufacturer to return a component-level finish proposal, process order, decoration method, sample ladder, evidence plan, boundary strategy, package-contact review, model-specific MOQ and schedule, and a separated commercial quotation. Ask what will be retained for repeat orders and which changes require new approval.
Approve content, appearance, function and packing as separate but connected decisions. Brand design approves the mark and intended look. Engineering approves compatibility with geometry and movement. Quality approves the control and evidence. Packaging approves contact and presentation. Purchasing approves the commercial route based on the same revision.
The result should be more than a beautiful sample. It should be a finish-and-branding system that a manufacturer can explain, a buyer can inspect and a future reorder can reproduce. That is the practical difference between choosing a colour and engineering a branded product.
Keyword-to-Decision Map for Buyers
Search terms are useful only when they lead to a verifiable buying question. The following map connects each requested phrase to the evidence a buyer should request. It also prevents a sourcing team from treating OEM, ODM, private-label, factory and wholesale routes as interchangeable when their control points are different.
| Sourcing phrase | What a buyer should verify | Project relevance |
|---|---|---|
| custom nail clipper manufacturer | Whether product development, sampling, production, inspection and packing are connected by one controlled specification. | Primary commercial investigation and RFQ intent. |
| professional custom nail clipper manufacturer | Documented capability, responsible technical review, traceable approvals and a clear response when evidence is incomplete. | Supplier qualification rather than a marketing label. |
| OEM custom nail clipper manufacturer | Ability to review buyer drawings, samples, structure, appearance and packaging without silently changing the requirement. | Buyer-led specification and brand programs. |
| ODM nail clipper manufacturer | Which proposed design elements already exist, which can be adapted and who controls the approved final revision. | Supplier-led platform or design direction. |
| private label nail clippers | What is standard, what can be decorated, what package options are compatible and how reorders are protected. | Faster brand launch from a validated platform. |
| custom logo nail clippers | Artwork revision, location, orientation, method, contrast, adhesion and interaction with the final finish and package. | Brand execution on the physical product. |
| stainless steel nail clipper supplier | Material by component, supporting evidence, applicable process route and alignment between specification and marketing claims. | Material-led sourcing and documentation. |
| custom nail clipper factory China | Actual in-house and managed processes, location, capacity context, inspection points and export coordination. | Factory evaluation and supply-chain due diligence. |
| wholesale custom nail clipper supplier | Assortment control, pack configuration, carton data, repeat-order coding and model-specific commercial terms. | Distributor and multi-SKU replenishment. |
Frequently Asked Questions
How should buyers approve a custom nail clipper finish?
Approve the substrate, preparation, finish route, cosmetic zones, physical master, acceptable boundaries, functional masking, handling result and final packed product. A rendering or screen colour should guide development but not act as the only release authority.
What is the best logo method for a nail clipper?
There is no universal best method. Selection depends on material, finish, curvature, artwork detail, contrast, wear contact and volume. Ask the manufacturer to propose and physically sample a compatible route.
Can a Pantone reference guarantee a metallic finish match?
A colour reference can define direction, but substrate, reflectivity, texture, gloss, geometry and lighting change perception. Approve a physical production-intent master and viewing conditions.
Why does a logo look different on a curved clipper?
Curvature changes viewing angle, focus, transfer and apparent proportion. Reflective finishes also alter contrast. Review the actual decorated part from its use and retail orientations.
How can buyers prevent scratches during packaging?
Map contact points, use final package materials, control insertion and movement, review trays and fixtures, inspect after handling and transport simulation, and approve the complete packed configuration.
Should cutting edges receive the same coating as the body?
The answer is model and process specific. Functional surfaces and masking must be reviewed by the manufacturer and technical owner so appearance processing does not compromise cutting, fit or movement.
What is a finish boundary sample?
It is a labelled physical example representing an acceptable visual limit, such as colour, gloss, texture or logo placement. It complements the ideal master by showing permitted production variation.
How should logo artwork be controlled?
Use vector production files with revision, scale, position, orientation and permitted colours. Approve a digital proof for content and a physical decorated sample for execution.
What should be checked on a decorated first piece?
Check the correct product and artwork revision, finish, logo content, scale, position, orientation, edge quality, contrast, surface damage, assembly movement and package fit before the run continues.
Can OLIMOR confirm every finish shown in a concept image?
Concept images communicate direction, not availability. OLIMOR should confirm the selected finish, logo method, sample route, MOQ and schedule for the exact model and package.
How should suppliers manage finish changes on repeat orders?
They should notify the buyer before changes to substrate, preparation, finish source, formulation, equipment, artwork or package, then complete the agreed validation and identify the transition.
What information belongs in a finish and logo RFQ?
Include part and surface map, substrate, target reference, cosmetic zones, functional masking, artwork, placement, package contact, destination, quantity scenario, required evidence and approval stages.
Tag: