

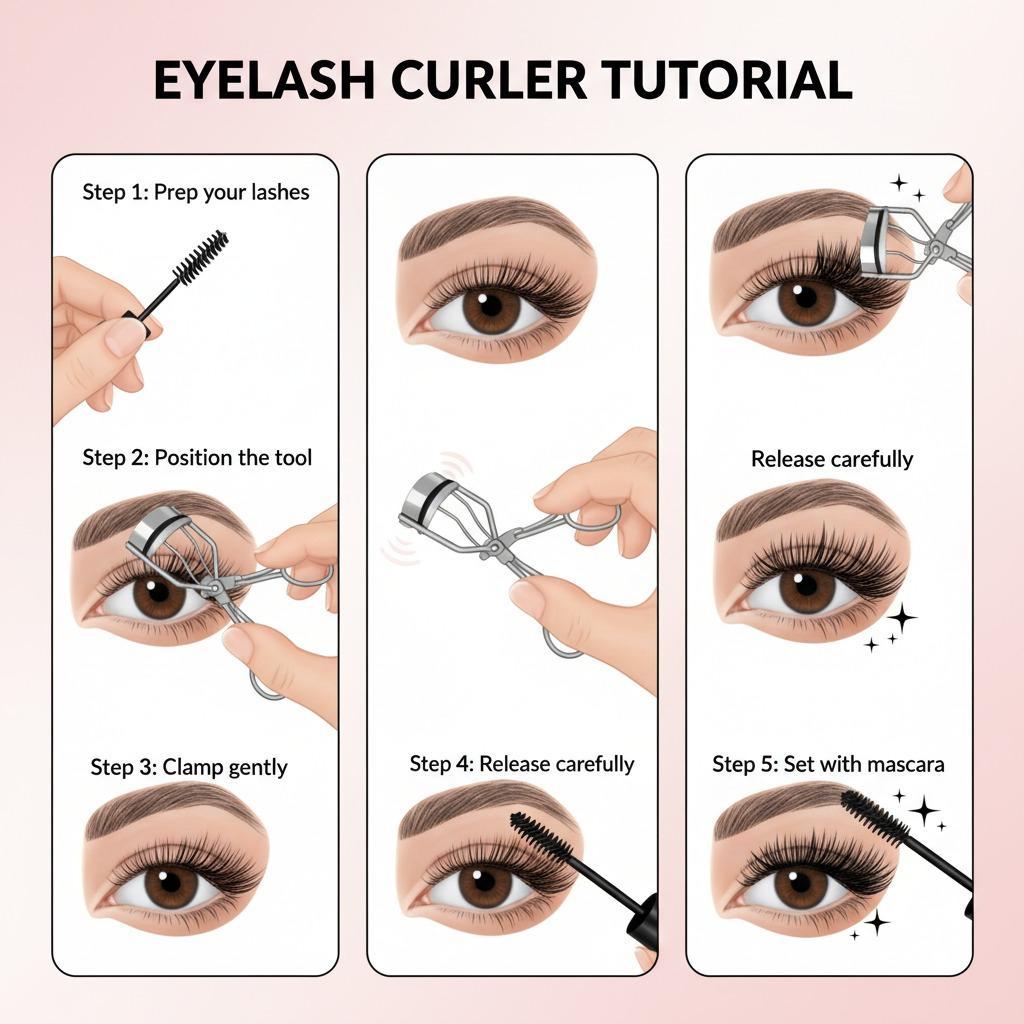
Eyelash Curler 101: A Beginner’s Guide to Safe, Natural-Looking Lift
An eyelash curler is a small beauty tool, but for beginners it can feel surprisingly intimidating. The hinge, clamp and curved frame sit very close to the eye, so it is worth learning the correct technique before you make it part of a daily routine. Used well, an eyelash curler can make straight or downward-facing lashes look more open before mascara is applied. Used carelessly, it can pinch skin, create a sharp crimp, or weaken lashes over time.
This guide explains how to choose an eyelash curler, how to position it, what mistakes to avoid and how to keep it hygienic. If you are comparing tools for personal use, salon retail, private label planning or wholesale sourcing, you can also browse Olimor Beauty beauty tool products for related product categories.
What an Eyelash Curler Does—and What It Does Not Do
An eyelash curler bends the upper lashes upward by applying brief, even pressure near the lash base and, if needed, through the mid-lengths. It does not permanently change lash growth direction, replace mascara, or create the same result as a professional lash lift service. Its main advantage is speed: a clean, dry curler can shape lashes in seconds, making the eyes appear more awake without requiring a full eye makeup look.
The goal is not to squeeze as hard as possible. A better curl comes from correct placement, controlled pressure and a curler shape that matches the eye area. Beginners often expect one strong clamp to create a dramatic result. In practice, two or three gentle presses along the lash line usually look softer and are less likely to create an obvious bend.
Choosing the Right Eyelash Curler for Your Eye Shape
The best eyelash curler is not only the one that looks polished in packaging. It should feel stable in the hand, open and close smoothly, and sit comfortably against the upper lash line. Eye shape matters: a curve that is too flat may miss lashes at the corners, while a curve that is too rounded may press uncomfortably into the eyelid.
| Selection point | Why it matters | What to check before buying |
|---|---|---|
| Frame curve | Affects how well the curler reaches the full lash line | Look for a curve that follows the contour of the eyelid without forcing the tool into the skin |
| Pad softness | Helps cushion lashes during pressure | The pad should be even, clean and free from deep grooves or cracks |
| Handle control | Improves stability for beginners | Open and close the handles to feel whether movement is smooth and predictable |
| Build consistency | Supports repeatable results | Check that the top bar meets the pad evenly from one side to the other |
| Replacement pad access | Extends useful tool life | Confirm whether suitable replacement pads are available for long-term maintenance |
Classic metal curlers are common for everyday makeup because they provide a defined lift and are durable when maintained properly. Heated electric curlers may help with very straight lashes, but they require more attention to temperature and battery or charging needs. Plastic or silicone-focused designs can feel lightweight and approachable, although they may give a softer effect depending on the user’s lashes.
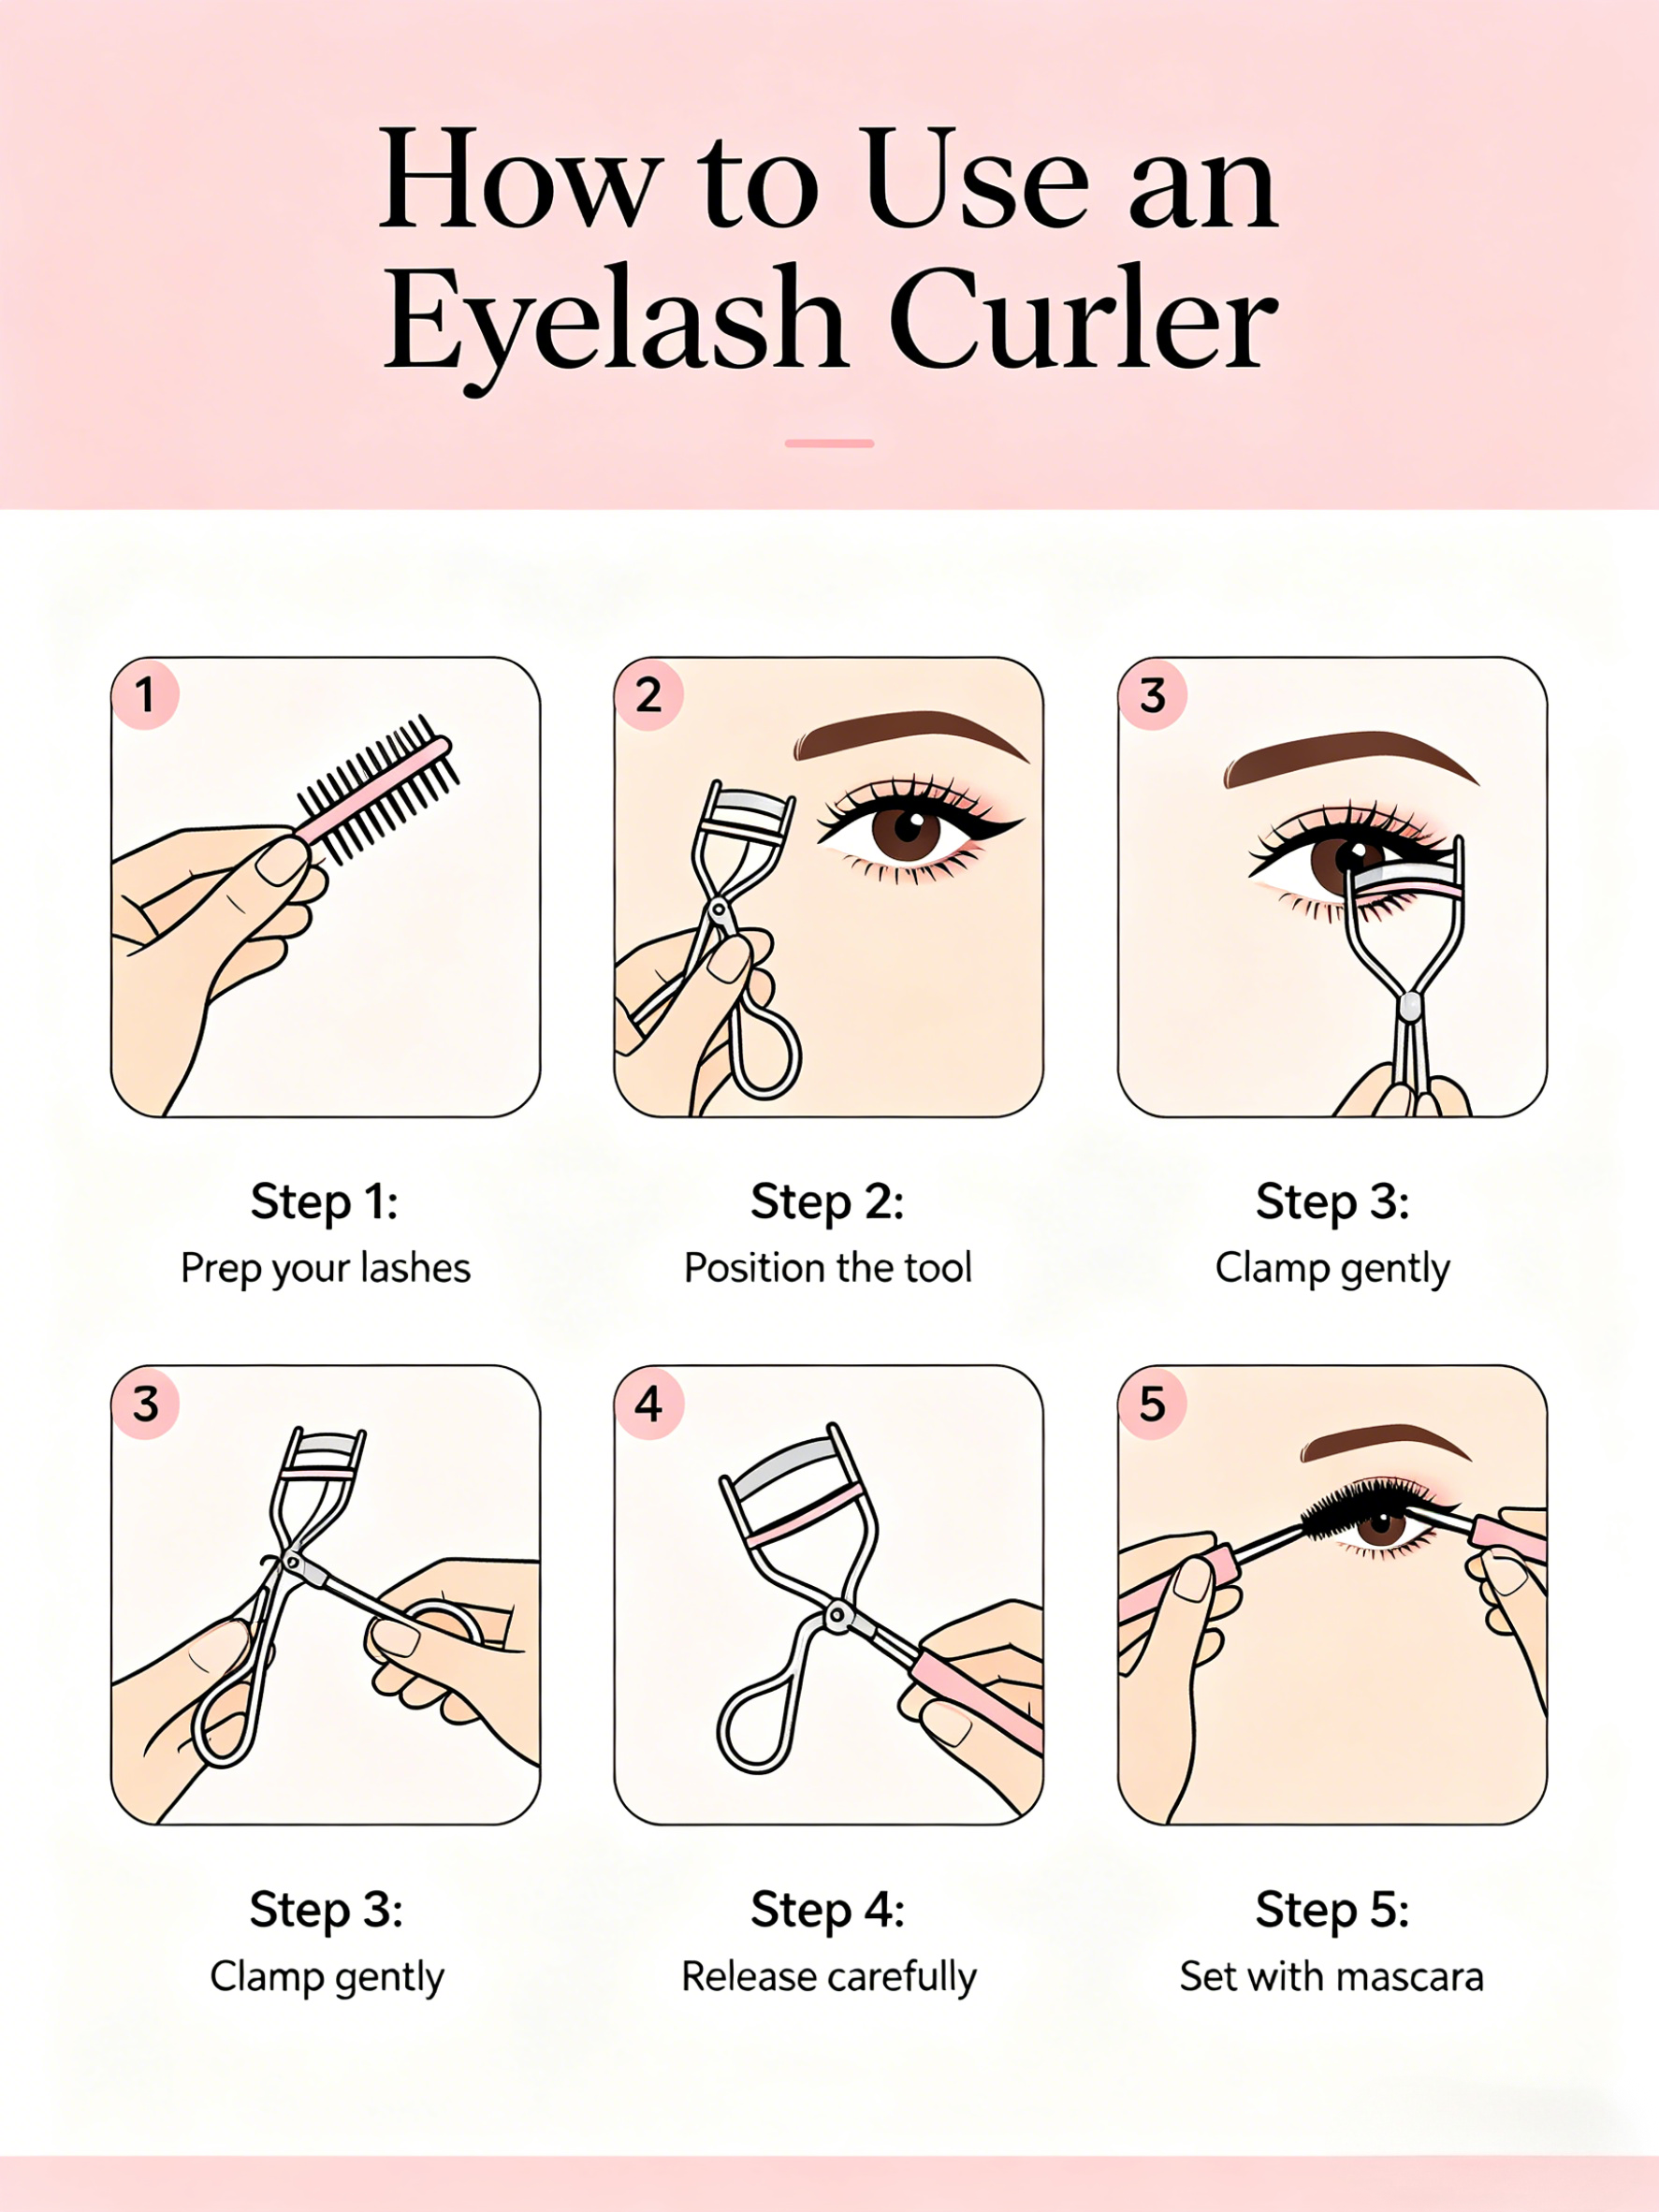
How to Use an Eyelash Curler Step by Step
Always curl before mascara. Mascara can make lashes stiffer and more likely to stick to the pad, especially if it is not fully dry. Starting with clean, dry lashes reduces pulling and helps the curler glide away cleanly after each press.
- Start with a clean tool. Make sure the pad is seated correctly and there is no old mascara, oil or powder on the contact area.
- Look slightly downward. A mirror placed a little below eye level can make it easier to see the lash base without lifting the chin too high.
- Open the curler fully. Bring it toward the upper lashes slowly, keeping the eye relaxed rather than tightly shut.
- Place it near the lash base. The curler should be close to the roots of the lashes but not grabbing eyelid skin. If you feel a pinch, release immediately and reposition.
- Press gently for a few seconds. Hold with light, even pressure for about 5 to 8 seconds. Avoid pumping aggressively, which can create uneven bends.
- Move outward slightly for a softer curve. For long lashes, release, move the curler to the middle of the lash length, and press again briefly.
- Apply mascara afterward if desired. Mascara can help hold the lifted shape, but it should not be applied before curling.
Beginner Mistakes That Cause Pinching, Crimping or Breakage
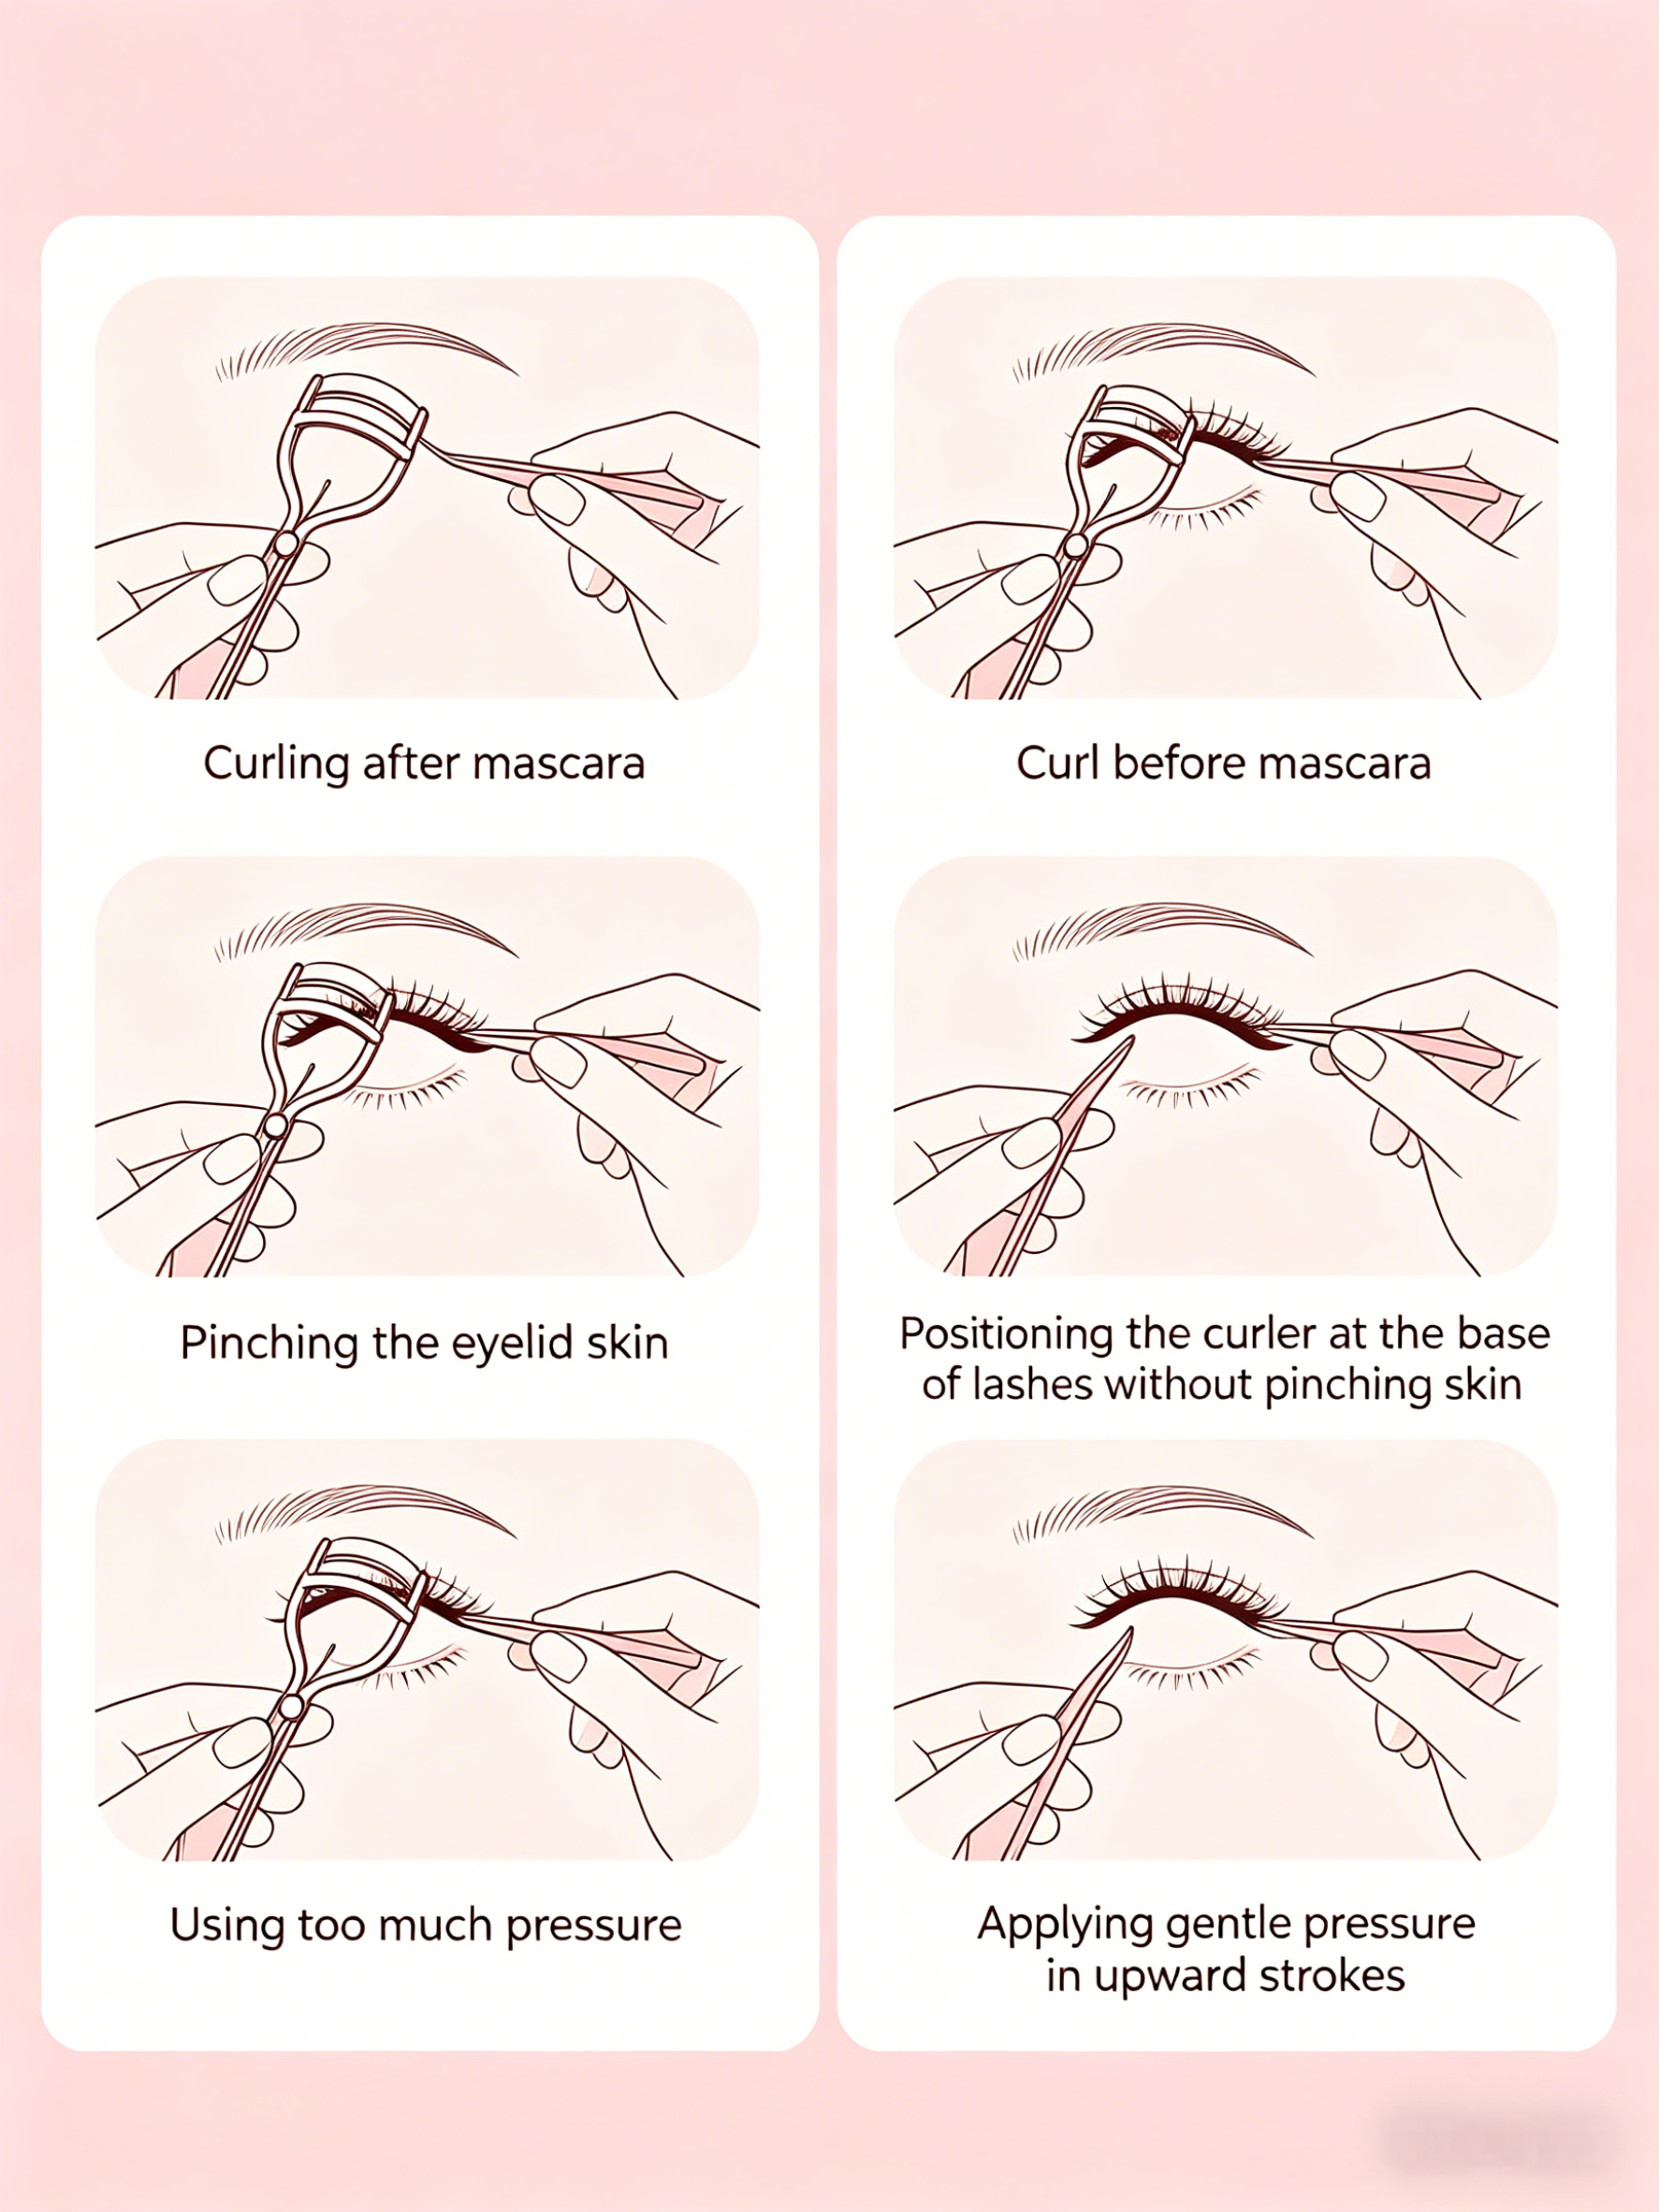
Most bad eyelash curler experiences come from rushing. If the tool is misaligned, even a good curler can pinch. If the pressure is too strong, lashes can bend at a harsh angle instead of forming a natural curve. If the pad is worn down, the metal frame may press too closely against the lashes.
- Curling after mascara: This is one of the biggest causes of sticking and lash breakage. Curl first, then apply mascara.
- Clamping too close to the eyelid: Getting near the lash base is useful, but catching skin is not. Reposition if there is any discomfort.
- Using too much force: A firm squeeze is not the same as a better curl. Use controlled pressure and repeat in sections if needed.
- Ignoring a damaged pad: Replace the pad when it becomes deeply indented, cracked, sticky or uneven.
- Sharing without sanitizing: Eye-area tools should be kept clean, especially in professional or shared-use environments.
- Heating carelessly: If warming a metal curler with a hairdryer, do it only briefly and test it against the hand before placing it near the eye.
Cleaning and Maintenance for Safer Daily Use
Because an eyelash curler touches the eye area, hygiene is not optional. Makeup residue, skin oil and dust can build up on the pad and frame. This buildup may interfere with smooth release and can also make the tool unpleasant to use.
For personal use, wipe the pad and clamp area after each makeup session with a clean tissue or suitable wipe. If product residue is visible, use mild soapy water on the pad area, then dry thoroughly before storage. Avoid storing a damp curler in a closed makeup bag. Moisture can affect both hygiene and tool condition.
Replacement timing depends on frequency of use and pad condition. Rather than relying only on a calendar, inspect the pad regularly. A fresh pad should cushion the lashes evenly. If you see a deep line where the upper bar meets the pad, or if the surface has become sticky, hardened or split, it is time to replace it. For salons, retailers and distributors evaluating tool ranges, pad availability and packaging for replacements are practical details to consider alongside the appearance of the main tool. Olimor Beauty product collections can help buyers review beauty tool categories in a broader merchandising context.
What Buyers Should Consider for Retail or Bulk Sourcing
For a single consumer, comfort and safe use are the top priorities. For a buyer sourcing eyelash curlers for a store, salon kit, online beauty brand or promotional set, consistency becomes equally important. A curler should not only look attractive in product photos; it should perform consistently across production batches and be easy for end users to understand.
When comparing eyelash curlers for sourcing, build a checklist that covers usability, presentation and after-sales practicality:
- Does the frame open and close smoothly without wobbling?
- Is the lash pad aligned evenly across the top pressing bar?
- Does the handle design suit the intended audience, such as beginners, makeup artists or travel users?
- Is the packaging clear about how to use the tool safely?
- Are care instructions included to reduce misuse and complaints?
- Can the tool be packed securely to protect the frame during transport?
- Is the visual finish appropriate for the target price point and sales channel?
These questions help avoid choosing solely by appearance. A buyer may prefer a simple classic design for broad retail appeal, while a beauty kit supplier may prioritize compact packaging or a beginner-friendly instruction insert. If you need to discuss a specific eyelash curler project, you can send an inquiry or contact Olimor with your intended market and use case.
Small Technique Adjustments for Different Lash Types
Straight lashes often need more than one press. Start at the base, then move to the middle of the lashes to create a gradual curve. Long lashes may look unnatural if only the roots are curled, so sectioning is especially helpful. Short lashes require careful placement; avoid chasing a dramatic curl if the curler cannot comfortably reach the base without touching skin.
For sensitive eyes, keep movements slow and avoid using the tool when eyes are watery, irritated or inflamed. Contact lens wearers may prefer to curl before inserting lenses, depending on comfort and personal routine. If a tool repeatedly pinches or misses lashes even with careful positioning, the curve may simply not suit the eye shape.
A Simple Tool That Rewards Good Habits
An eyelash curler works best when it is chosen thoughtfully, used gently and kept clean. Beginners should focus on comfort before drama: align the tool, press lightly, release fully and build confidence over time. For daily makeup users, those few seconds can make lashes look more lifted before mascara. For beauty businesses, the right curler is one that combines reliable construction with clear, safe user guidance.
Whether you are learning the technique for yourself or evaluating tools for a product line, the essentials remain the same: a comfortable curve, a clean pad, controlled pressure and proper maintenance. Master those basics, and an eyelash curler becomes a dependable part of an eye makeup routine rather than a tool to fear.
Tag: